Super Systems 9120 RPS User Manual
Page 6
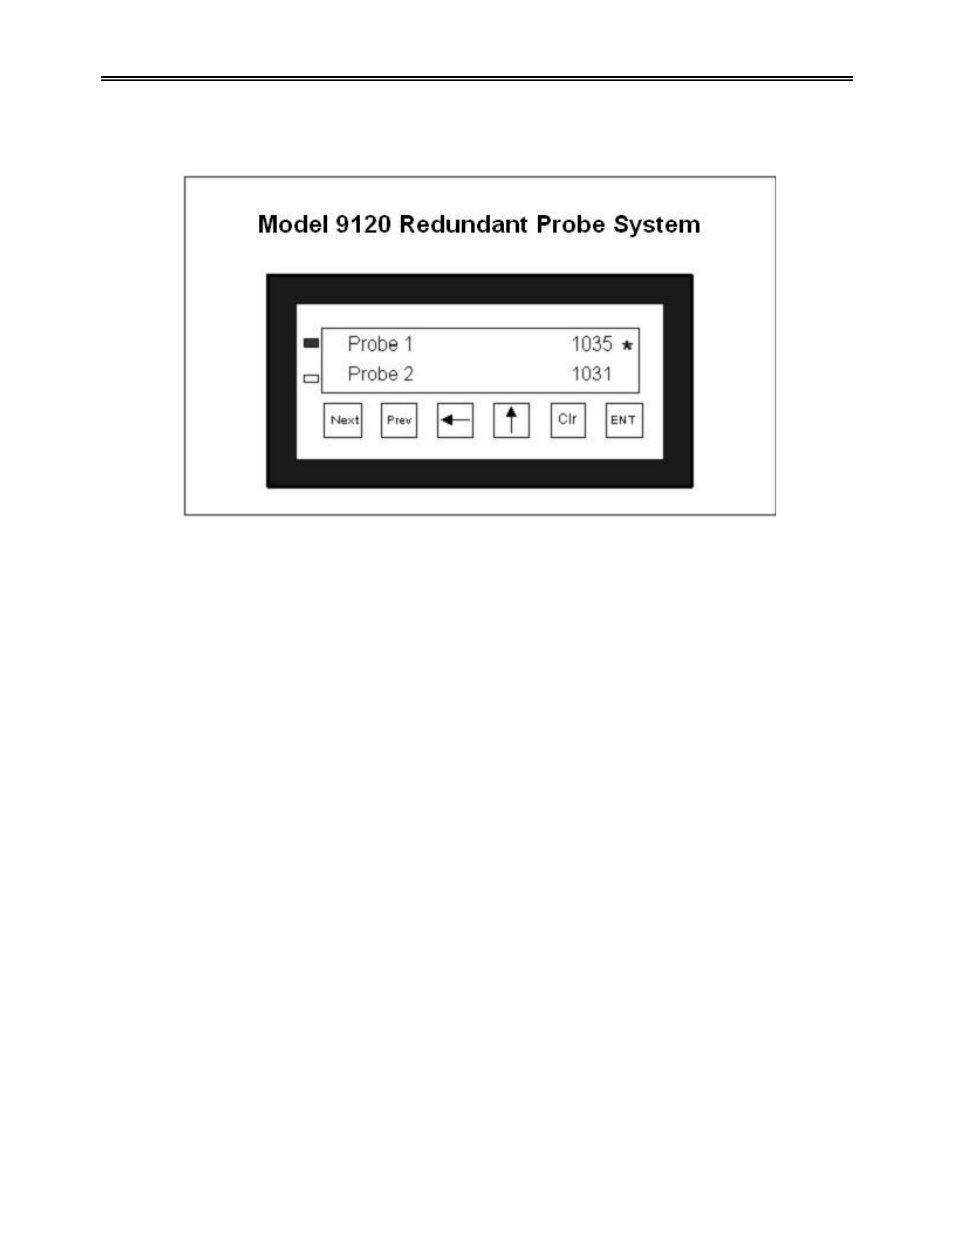
M4560 - Model 9120 Redundant Probe System
M4560 - Model 9120 RPS
Page 6 of 11
Using the operator interface shown below you can configure the Model 9120-RPS per these instructions
Configuration
With the initial display screen showing (as in the picture above), pressing the ENT key takes you to the
second menu item in the Model 9120,
Deviation Band Menu
. Pressing the NEXT key takes you to the third
menu item,
Alarm Delay Menu
. Pressing the NEXT key again takes you to the fourth menu item,
Probe
(Prb) Select Mode
. Pressing the NEXT key again takes you to the fifth menu item,
Manual Probe (Prb)
Select Menu
. Pressing the NEXT key again will display the initial display screen.
From the initial display, pressing the NEXT key instead of the ENT key will display the 800 number for
Super Systems Inc. Pressing the NEXT key again will display the address information for Super Systems
Inc. Pressing the NEXT key again will display the initial display.
Note about configuration – values are entered from left to right on the display. For example, to enter the
number 15, the user would press the up arrow key once so that a 1 is displayed. The user would then
press the left arrow key once so that a 10 is displayed. Next, the user would press the up arrow key five
times so that a 15 is displayed. The number that will be modified will always flash on the display.
Configuration – Deviation Band
The
Deviation Band
menu screen will display the number of millivolts that the deviation band alarm is set
for (default = 10 mV). Pressing the ENT key will enable the user to modify the deviation band value. Once
the ENT key is pressed, the rightmost number will begin flashing. Pressing the up arrow key will reset the
value to a 1. Pressing the up arrow key again will increment this value by one. Enter the new value as
desired. Pressing the ENT key will set the entered value. Pressing the CLR key will reset the value to the
last set value. Pressing the NEXT key will display the
Alarm Delay
menu screen. Pressing the PREV key
will display the initial display.
Example
- The following example will show how to set the deviation band from a value of 50 mV to a
value of 35 mV. Press the ENT key. The 0 in the 50 will begin flashing. Press the up arrow key three
times so that a 3 is displayed. Press the left arrow key once so that a 30 is displayed. Press the up arrow
key five times so that a 35 is displayed. Press the ENT key to set the value. Note about Deviation Band –
the valid range of values for the deviation band is 0 to 50 mV. Any value entered over 50 mV will be set to
the last set value by default.