Wall mounting, Figure 6 – wall mount bracket positions, Figure 7 – wall mounting with ps-50 – Teo NT1-200 User Manual
Page 5
Tone Commander NT1-200, NT1-200/296 Battery Backup / NT1-200 Add-on Battery
Page 5
Wall Mounting
1.
Attach mounting brackets to the Battery Backup and/or Add-on Battery in the wall mounting position
using the supplied mounting bracket screws (see Figure 6).
2.
Fasten a plywood sheet to the wall, ¾” minimum thickness. Do not mount the rack or battery units
directly to drywall material.
3.
Mark and pre-drill the mounting holes for the battery backup and/or add-on battery.
Refer to Figures 7–10 for hole locations and required clearances.
4.
Attach the battery backup and/or add-on battery to the plywood using four suitable fasteners.
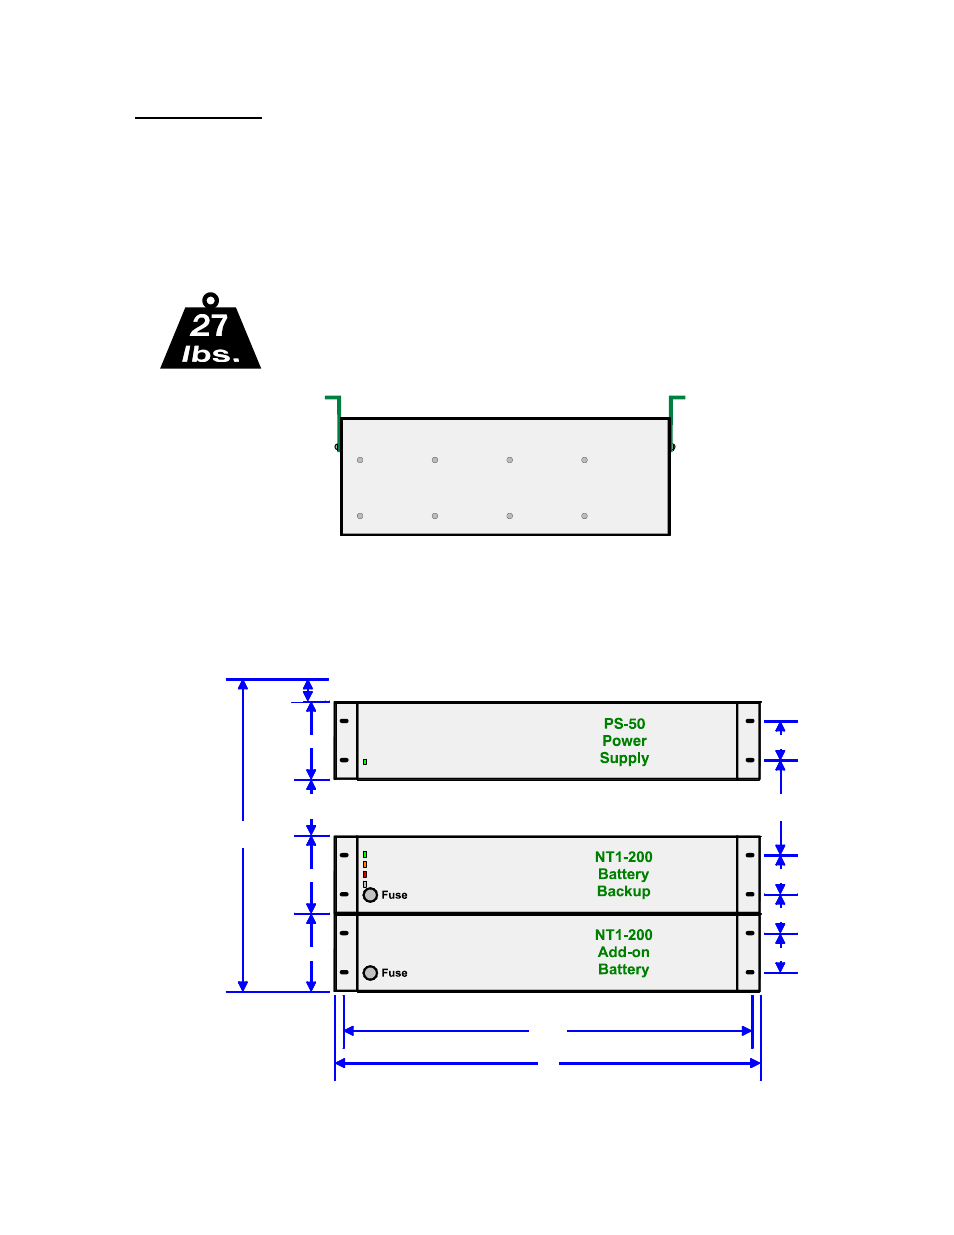
The Battery Backup and Add-on Battery must be fastened securely;
these units weigh 27 lbs. each!
Figure 6 – Wall Mount Bracket Positions
3.5 "
3.5 "
3.5 "
8 " max.
2.5 " min.
1.75 "
19 "
18.25 "
1" min.
clearance
14 " min.
19.5 " max.
1.75 "
1.75 "
1.75 "
4.25 "
min.
Figure 7 – Wall Mounting with PS-50