Triplett CobraCam USB 2 – PN: 8105 User Manual
Page 5
5
screen. (On some OS’s, the AMCAP window may not open, but its icon appears on the
Task Bar. If this happens, click on the icon to open the AMCAP application. If an image from
the camera is not seen, click on the Options tab and select Preview. Then click the Start /
Snapshot button on the CobraCam USB 2 to initialize the image capture. AMCAP may be
opened manually by selecting USB 2.0 PC Camera, then AMCAP from the Program menu.
The video image from the camera should now be displayed in the AMCAP main window.
The tabs at the top of the AMCAP window allow various settings and adjustments to
be altered. The user may change these experimentally and observe their eff ect upon
the images.
(PC & MAC)
Many features of the CobraCam USB 2 are automatic. The camera adjusts itself to produce
the best image obtainable. As with all video cameras, the image becomes more noisy as
the light level is reduced. Since the CobraCam USB 2 is a digital camera, it produces digital
noise (instead of analog noise) that looks like random horizontal lines in the image. These
become less visible as the light level is increased.
The CobraCam USB 2 has relatively slow response time. If the camera is moved quickly, the
image seen on the computer will blur. To obtain the best images, move the camera slowly
and hold it steady.
The best image focus occurs several inches in front of the camera lens. Objects farther away
are slightly out of focus but still easily viewable.
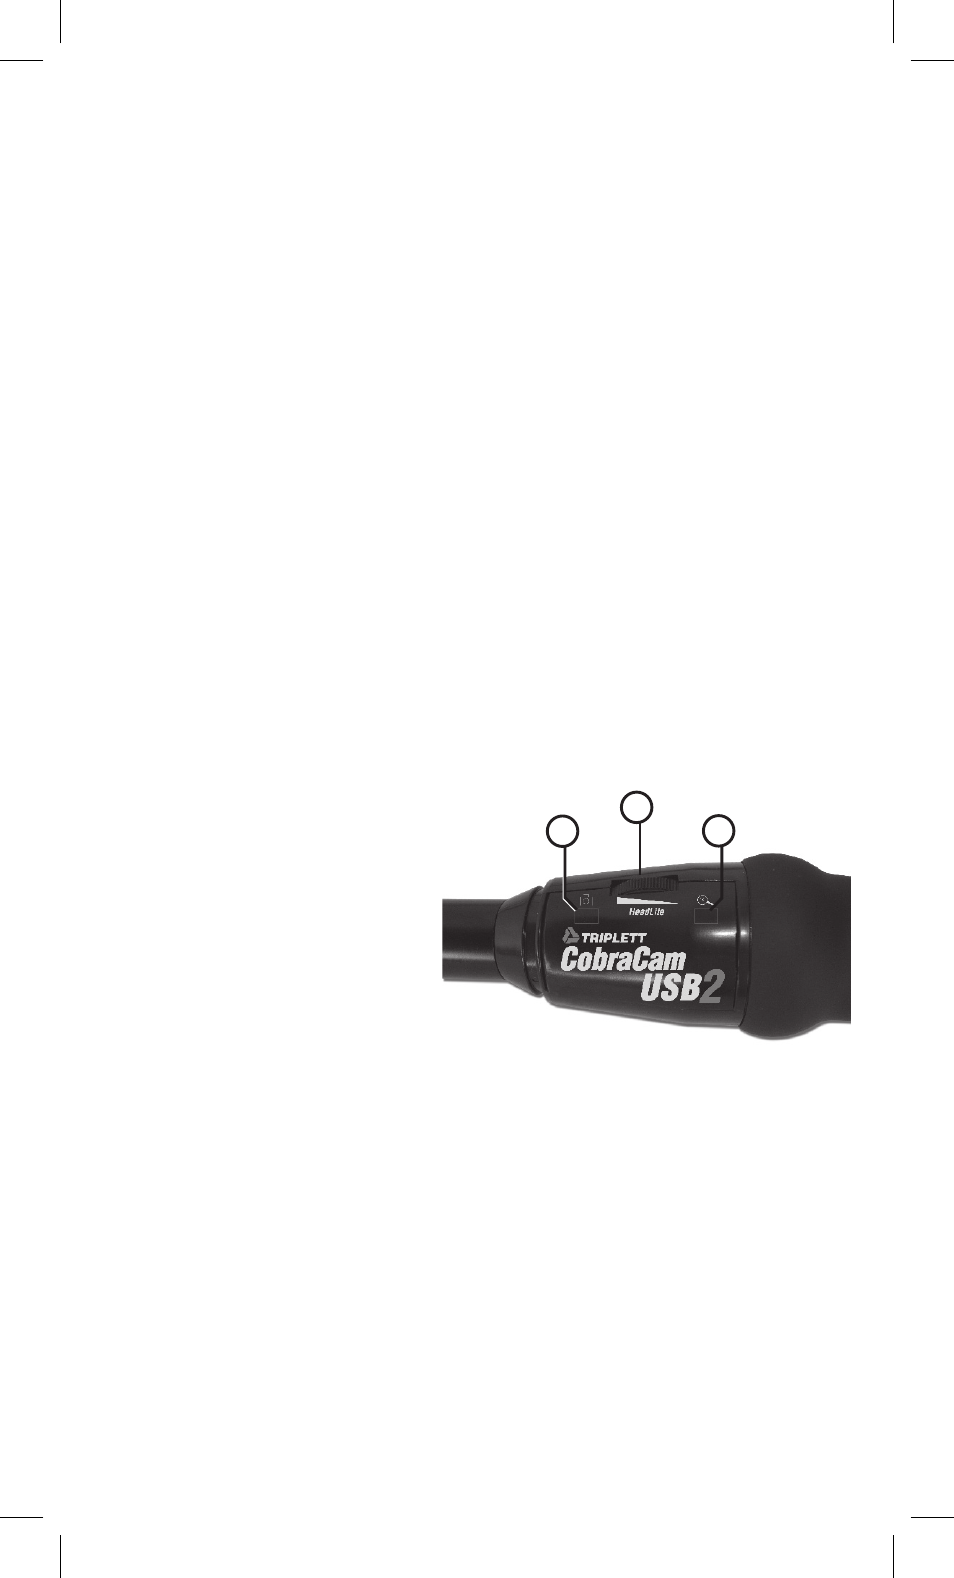
CobraCam USB 2 Controls
1) Headlite Control (MAC & PC)
2) Start / Snapshot Button (PC)
3) Zoom Button (PC)
Using the CobraCam USB 2 Controls
The proper use of the Headlite control (located on the handle of the CobraCam USB 2 ) is
not obvious and requires some experimentation. It has little eff ect when there is adequate
light for the camera, but has a dramatic eff ect when the light level is low or absent. The
Headlites are intended to illuminate objects near the camera lens. They will not light up
objects that are several feet or more away. The Headlite control is adjusted so that the best
view of the desired object is obtained. If the adjustment is too bright, the image will ‘glare’
and obscure visibility. Generally, the lowest brightness that produces a usable image is
best. It will often be found that a better image can be obtained by slightly repositioning
the camera and adjusting the Headlite brightness. (PC & MAC)
1
3
2