TS Performance Bosch Shim Kit User Manual
Page 3
Continued
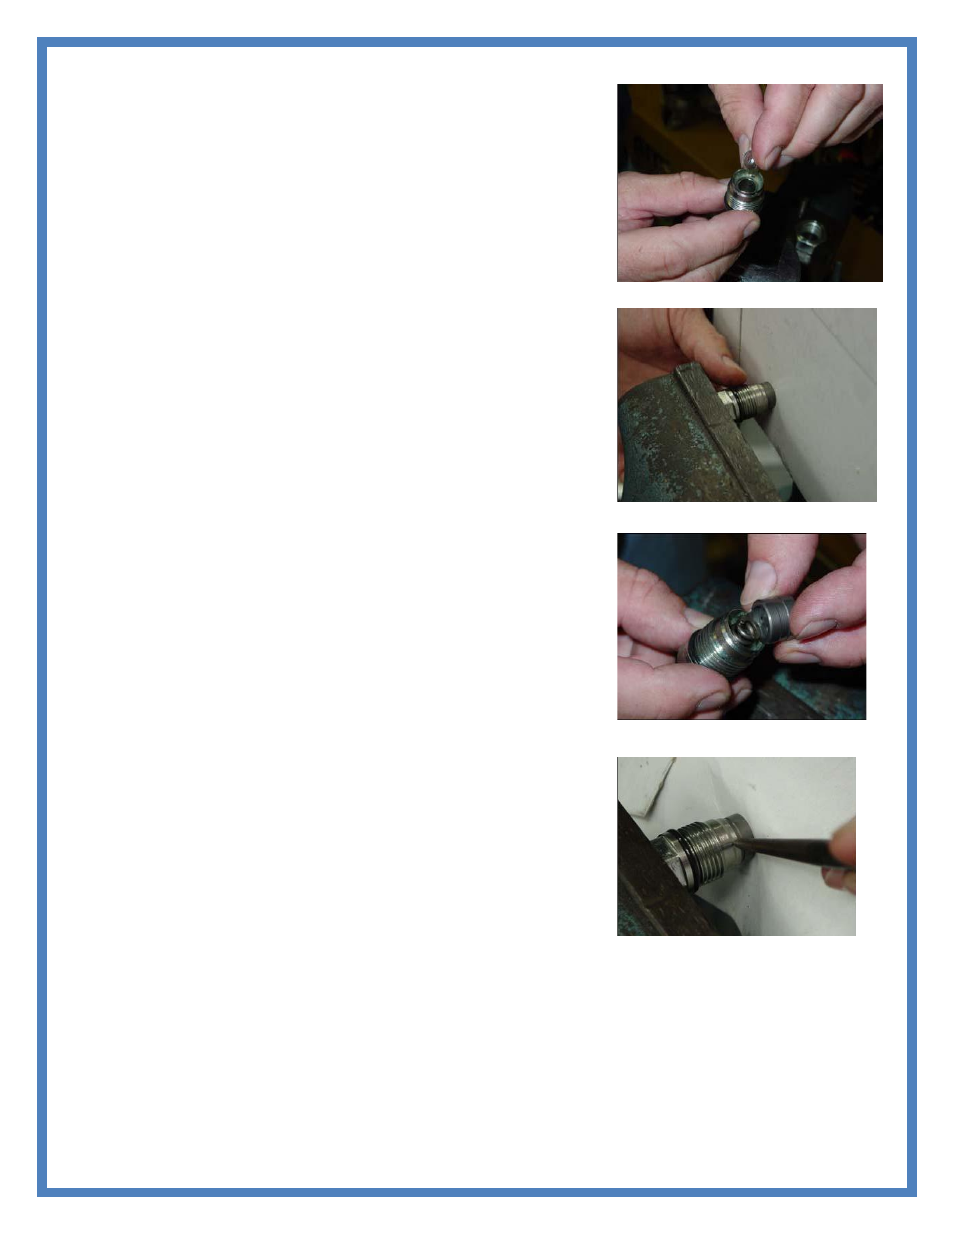
5. Removing the metal spring, then insert the 3 supplied
metal shims into valve. Now re-insert the metal spring
back into the valve.
6. Place valve back in vice, now with a thick piece of
cardboard or piece of wood behind valve cap to prevent
damage to the valve seal surface. Tighten vice so that the
valve cap reenters valve until fully seated. No need to
over-tighten; just tighten until snug.
7. Replace valve spring and then cap. Note that there are
3 holes in a triangle position on the inside of the valve cap
that does not need to be removed from cap and should
face towards spring as it did when it was removed, hole
alignment is not necessary.
8. Take a small punch and small hammer and re-apply
the 3 factory indentations along the lip where the valve
casing covers the valve cap. You may need to loosen the
vice slightly to rotate the valve to access all 3
indentations, but do not let the spring push the cap out
any! Make sure that the cap stays fully seated in valve
while rotating. After doing so loosen the vice and make
sure that the valve cap is held by the indentations.
9. Now place the valve back into the rail and tighten to
150lb. feet. If it is not tight enough fuel may bleed past the valve and cause the
engine to run poorly.
If there are any questions on the product or installation, give us a call at
TS Performance (270) 746-9999