Upsite 10038 Blanking Panel with Temperature Strip – 2U User Manual
Blanking panel install guide, About our product, Hotlok
HotLok
®
Blanking Panels Installation Guide
PART# 10031 | 10033 | 10035 | 10038
HotLok
®
Blanking Panel Install Guide
HotLok® Blanking Panels are packed in 10U cartons inside corrugated cardboard cases. Begin by removing all cartons from the corrugated cardboard case. No
cardboard should enter the computer room. Cardboard and other paper products could contribute to airborne particulate contamination. Airborne contamina-
tion may damage IT equipment by contributing to shorting and reducing cooling efficiencies.
Installation
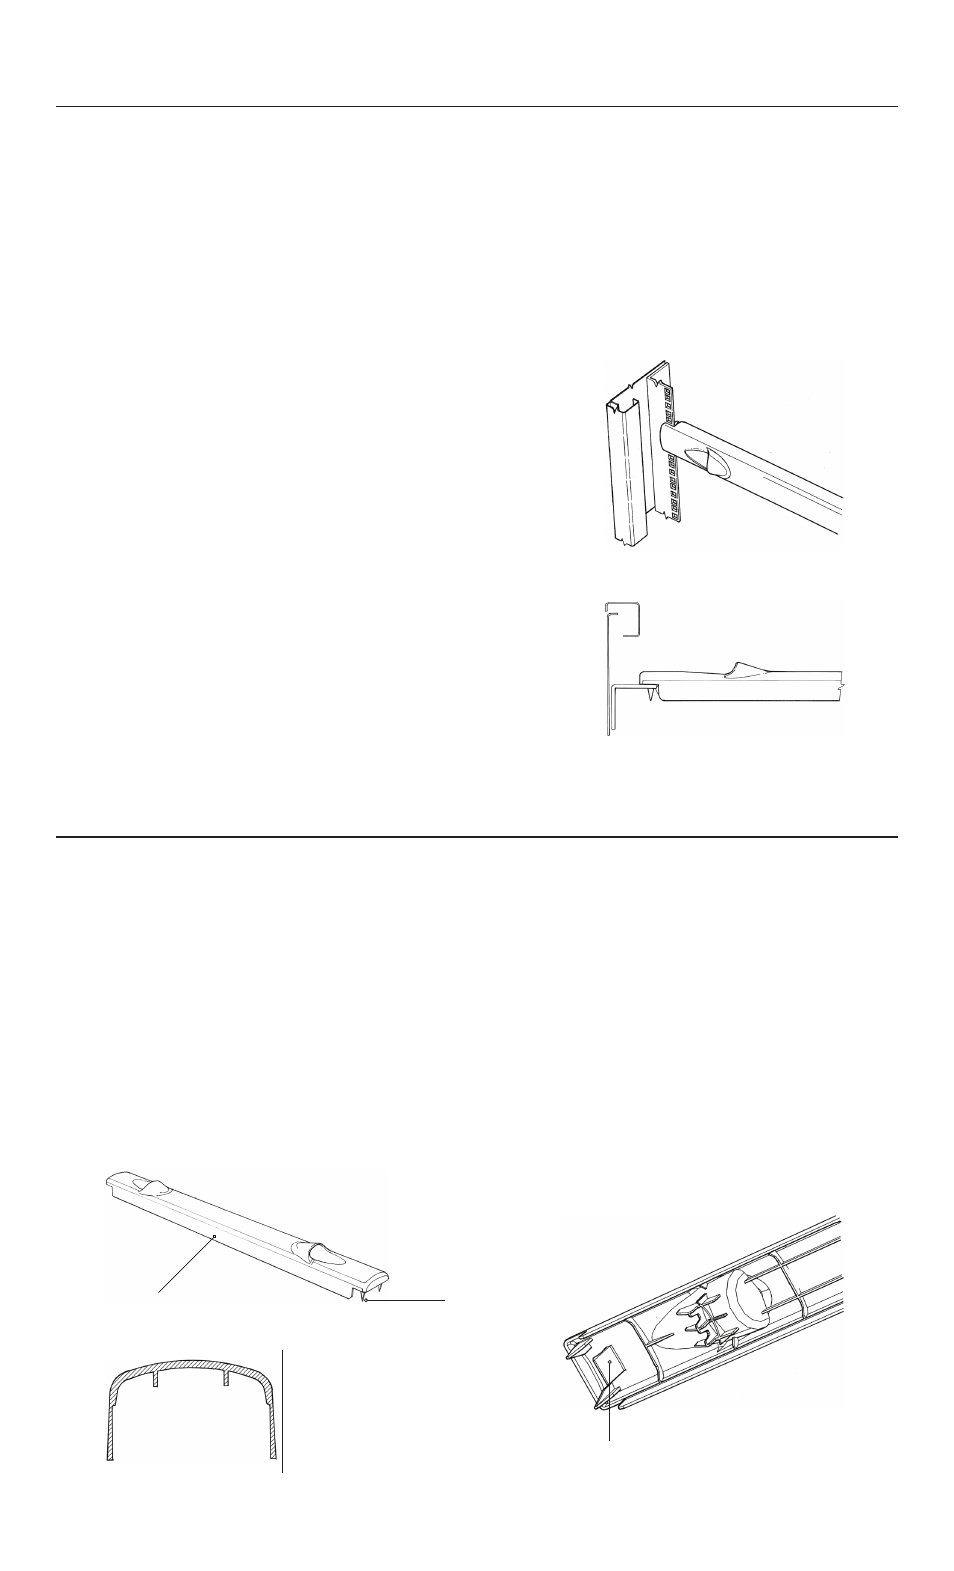
1. Using the finger grips to hold the HotLok Blanking Panel, align the four
pins with the holes in the side rail.
2. Ensure the product is level and pins are even on each side.
3. Push the Blanking Panel into the rack until the clips snap in on both
sides. The clips should be fully inserted and seated with the plastic edge
flush against the side rail. Depending on the size of the rack holes, the
panel may be able to slide up or down. This is not a cause for alarm but a
built in feature to add room for the flared sealing vanes to create a tight
seal. When you place multiple panels they will move and self seal.
4. To maintain the best seal possible, fill all open spaces so that HotLoks
push up against equipment.
5. Please note that the last blanking panel to be installed in a space might
require some additional force to squeeze into pace due to the tight fit
produced by the flared vanes.
6. When uninstalling HotLok Blanking Panels, place one hand on the
panels above or below it and slowly pull out the first unit. The tight fit
can sometimes pull out other panels unintentionally.
Fully seated and installed HotLok
blanking panels
About Our Product
HotLok Blanking Panels are engineered with guide pins and internal clips to secure a tight fit into all 19” EIA rail openings. In the past, we have had different
sized guide pins. We have found that a one size fits all works extremely well on all rack pin sizes.
The guide pins do not hold or have any structural benefit for the panel in the rack; they simply help align it for a level and accurate installation. The clips are what
will click into place to tightly grip the HotLok to the rail.
The sealing vanes or flanges on HotLok Blanking Panels are designed to flare out slightly. As you install multiple HotLok Blanking Panels in a rack, these flared
vanes will press against one another creating a near perfect seal with no gaps between panels. In cabinets with blanking panels that have gaps, up to 19% of IT
air intake is still hot exhaust from the back of the cabinet. The flared design of HotLok results in a near complete elimination of exhaust air.
Guide Pins
Clips
Flared sealing vanes of HotLok
(Straight line shown for comparison)
Vanes