Global bridge board installation, Set bridge map – WattMaster WCC III part 21 User Manual
Page 6
WCC III Technical Guide
20-4
20. GLOBAL BRIDGE BOARD INSTALLATION
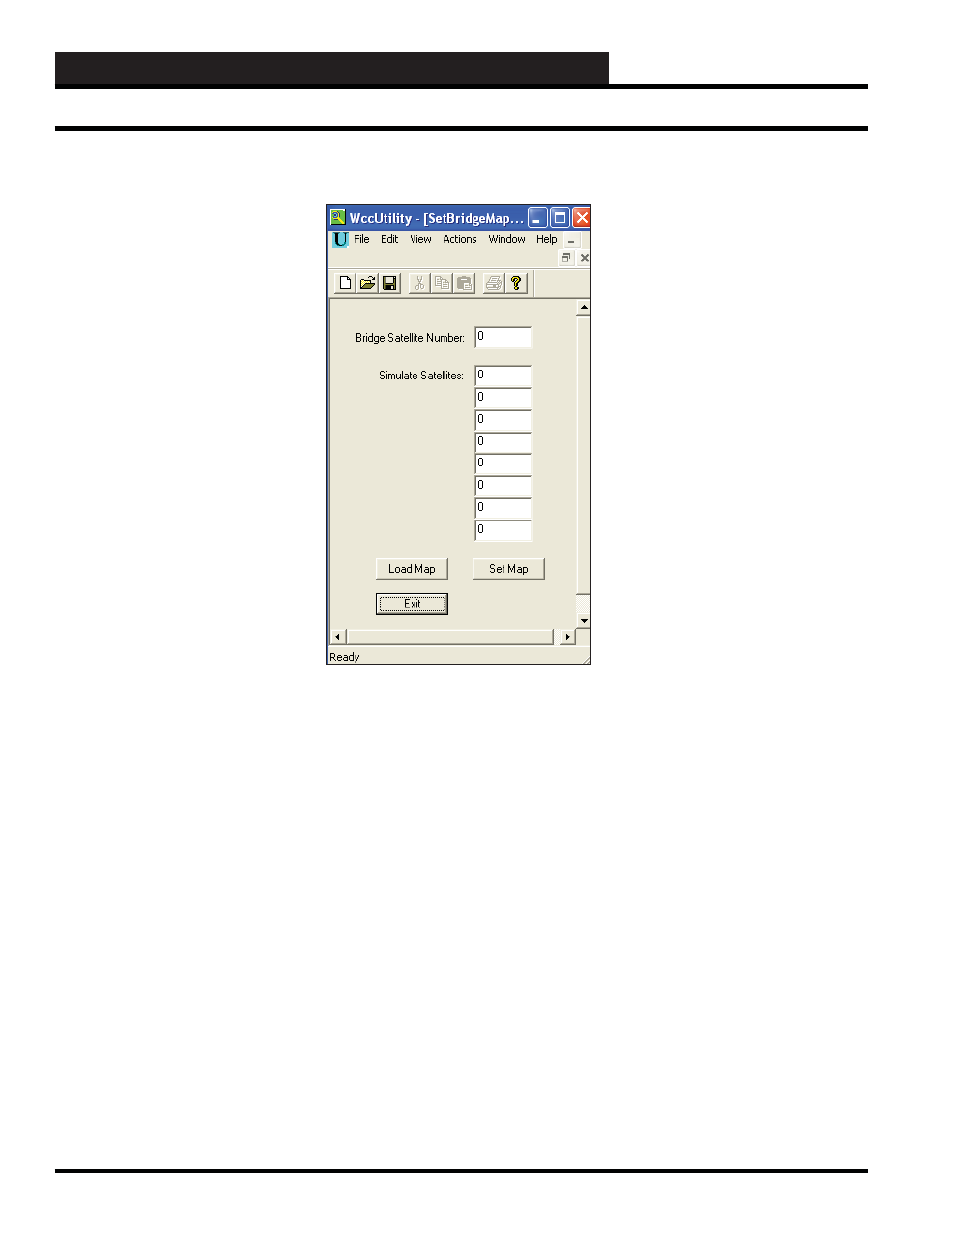
Figure 20-3: The Set Bridge Map Window
SET BRIDGE MAP
From the WccUtility.exe program there are two choices for the
“WCC II to WCC III Global Bridge” board. The second selection
choice is
<Set Bridge Map>
. This is where satellite information
can be sent from the “new” WCC III - MCD to the old WCC II
system.
Bridge Satellite Number:
Enter the address for the “WCC II to
WCC III Global Bridge” board. This value should be higher than
the last satellite number on your system.
<Load Map>
After you type in the address Bridge Satellite (SAT
III) number, press the
<Load Map>
button to see your simulated
satellites (SAT II) that you have selected for simulation.
Simulate Satellites:
Enter the satellite number(s) of which you
would like to simulate. There is a maximum of eight satellites per
“WCC II to WCC III Global Bridge” board. These are the SAT II
simulated addresses.
<Set Map>
After entering (or adding) satellites to the “WCC II
to WCC III Global Bridge” board, you must press the <Set Map>
button to send the map information to the “WCC II to WCC
III Global Bridge” board. After the map information has been
received, the “WCC II to WCC III Global Bridge” board will
capture the current values from the satellites on the WCC III side
and provide them to the old BACKTASK program that is running
on the WCC II system side for use in the simulated SAT II satellite
logical address.
Set Bridge Map