Complete sensor alignment, Configure and verify lanes – Wavetronix SmartSensor HD (101-0415) - Quick-reference Guide (User) User Manual
Page 2
4
Complete sensor alignment
1 Select Lanes from the main menu, then Configuration. Click the magnifying
glass icon at the bottom of the screen and choose Show Alignment.
2 Adjust the sensor according to the arrows and colors shown. Green means the sen-
sor is positioned for optimal performance; yellow and red mean you need to adjust.
3 Once the alignment is right, tighten the sensor mount’s strap screws all the way.
For the tool to function properly, traffic must be flowing freely. Also, if the sensor is
not already aligned close to perpendicular to traffic, this tool will display a question
mark, indicating that the sensor is too far out of alignment for the tool to function properly.
5
Configure and verify lanes
Automatic Configuration
Follow the steps below to automatically configure the SmartSensor HD:
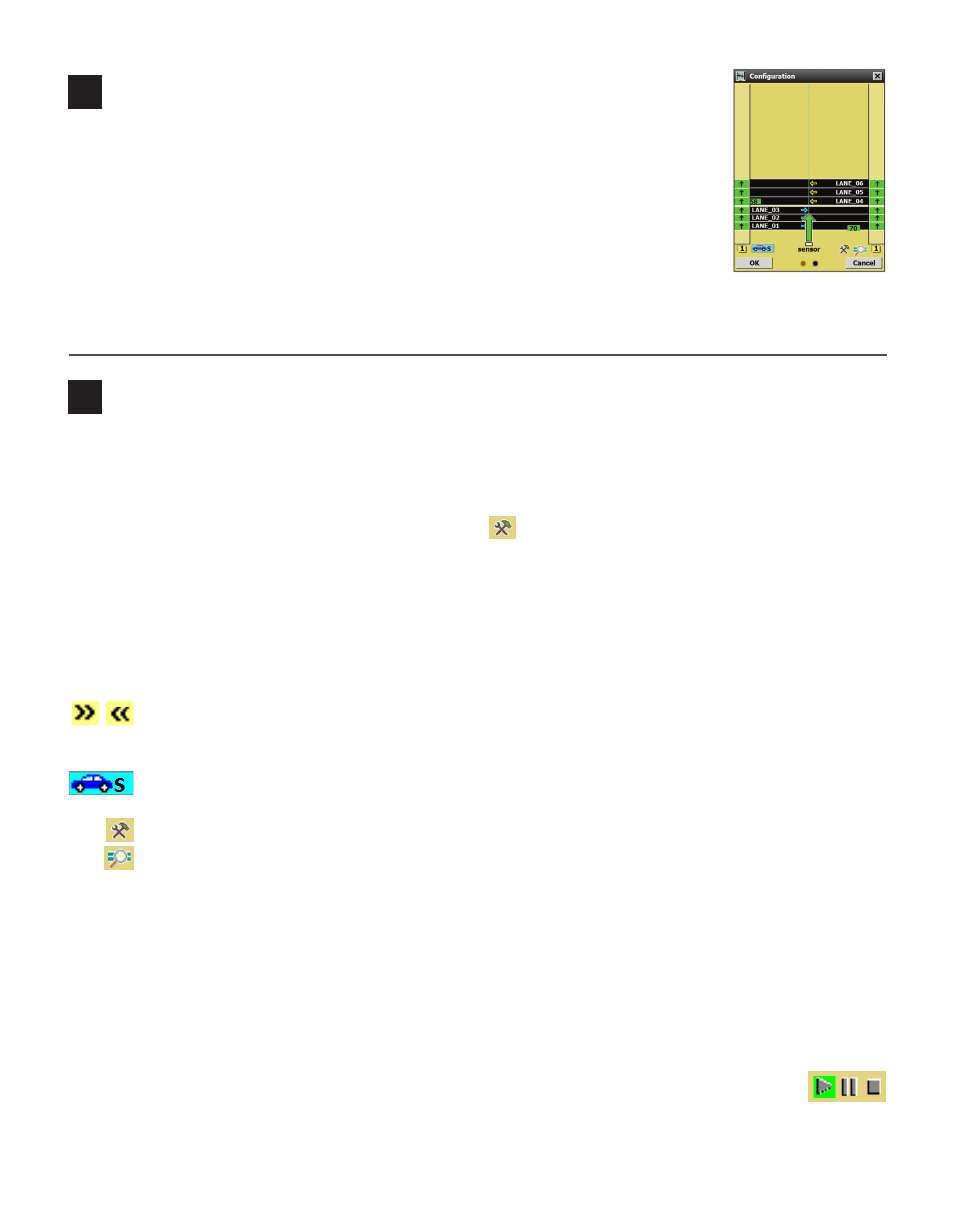
1 Select Lanes from the main menu, then Configuration.
2 In the Configuration window, click the Tools icon and select Clear Edit Area.
3 Click the Tools icon again and then click Restart Auto Cfg. Click OK. When prompted to save the
configuration, choose Yes.
Manual Configuration
The tools on the Configuration window (as mentioned above, select Lanes from the main menu, then Con-
figuration) can help you manually set lanes and adjust lane setup.
˽
Sidebar Display – Set what the sidebars display: automatically configured lanes, lanes saved
on the sensor, distances to each lane, relative occurrence of events or a track for each detected
vehicle.
˽
Vehicle Display – Sets how vehicles are drawn and what is displayed on them. If set to dis-
play by class, the vehicles show a bin number (see Definitions in Part 6).
˽
Tools – Allows you to save and load configurations.
˽
Magnifying Glass – Lets you show or hide automatically configured lanes, lane names, lane
direction and/or a compass.
˽
Shoulder Area – Clicking in the shoulder lets you add or exclude lanes and/or the shoulder.
˽
Lane Window – Clicking on a lane lets you change information about it.
To save the settings you just changed, click the OK button.
Verify Lanes
To verify the lanes were configured properly, go to the Verification screen. Like the Configuration screen,
this screen contains the Sidebar and Vehicle Display tools, plus these additional tools:
˽
Play/Pause/Stop Buttons – Allow you to control the data display and whether passing
vehicles are being included in the counts.
˽
Lane Adjustment – Click in a lane to adjust lane volume, detection, speed, length or extension time.
˽
Logging – The options in the lower right let you log per vehicle data for verification purposes.