Standalone nvr quick installation guide – ACTi GNR-3000 User Manual
Page 2
www.acti.com
2011/07/25
Standalone NVR Quick Installation Guide
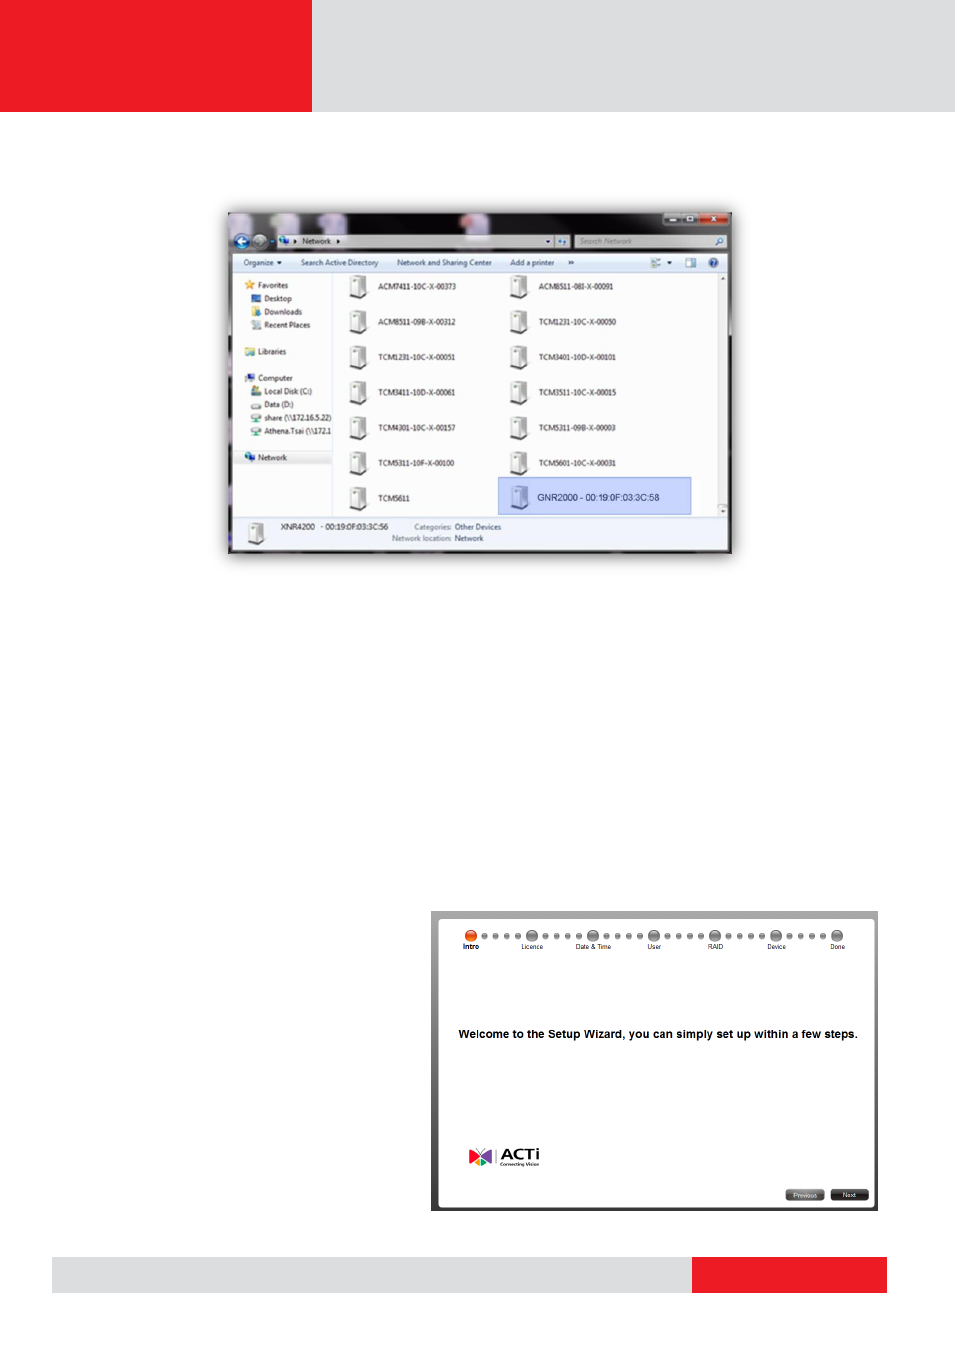
Accessing Standalone NVR by UPnP
Standalone NVR supports UPnP connection. You can find it by
Windows Explorer Network
. Your PC must
be in the same subnet as Standalone NVR. Double-click the icon to log into Standalone NVR.
Accessing Standalone NVR by Internet Explorer
If you know the IP address and port number of the Standalone NVR, you may also type in the IP address and port
number directly into Internet Explorer.
Sample IP will look like this:
http://192.168.0.10:80/
The default Username / Password is:
Admin / 123456
Login
A login screen will welcome you when you connect to Standalone NVR. Enter your Account and Password then
click the
“Login” button to Login.
On the first login, you will be prompted to install ActiveX components. You
must accept to use Standalone NVR.
You may also click the
“Download ActiveX installation package” link at
the lower left of login screen to download install file.
Setup Wizard
After logging in, Setup Wizard will guide you
through the initial setup process. Clicking the
“Next” button located to the lower right will skip
the current step. All the settings in the setup
wizard are available in the Setup tab from
Standalone NVR web interface so that you may
come back to it later. You can see the
Standalone NVR startup screen after
completing Setup.