Airaid 200-126-1 User Manual
Fig#1 fig#2 fig#3 fig#4, Installation instructions
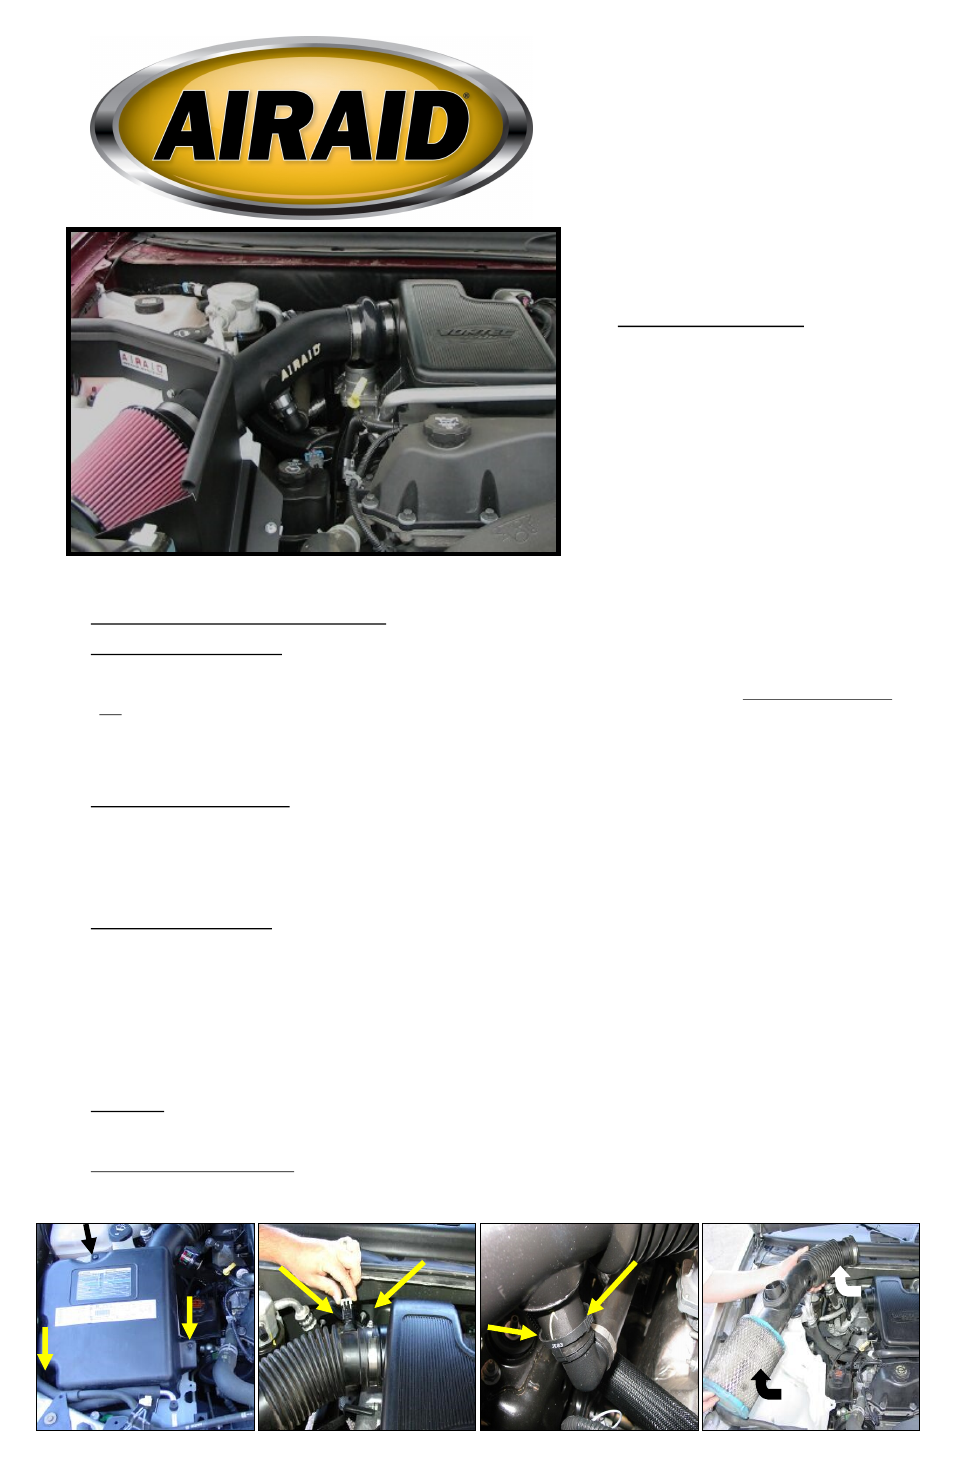
Installation Instructions
For Part Numbers:
200-126-1
700-450 Airaid Oiled Media Filter
201-126-1
701-450 SynthaMax Dry Media Filter - Red
202-126-1
702-450 SynthaMax Dry Media Filter - Black
203-126-1
703-450 SynthaMax Dry Media Filter - Blue
2004-05 Buick Rainer
2002-05 Chevrolet Trailblazer
2002-05 GMC Envoy
2003-05 Isuzu Ascender
2002-04 Oldsmobile Bravada
4.2L I6
Component Identification
1.
Airaid Premium Filter
1
2.
Air Dam Assembly
1
3.
Plastic Intake Tube
1
4.
Weather Strip 21½”
1
5.
Urethane Hump Hose
1
6.
Grommet Plug (In Tube)
1
7.
M6-1x25 Hex Bolt
3
8.
¼-20 x 5/8” Hex Bolt
2
9.
3/16” Flat Washer
3
10.
3/16” Lock Washer
2
11.
#60 Hose Clamp
2
12.
Grommet
1
13.
Hose Fitting Adapter
1
14.
Rubber Grommet
1
Full color instructions can be viewed on our web site at Airaid.com. Use the Product Search function to find your part number, and click View Details.
I
DISCONNECT NEGATIVE (-) BATTERY CABLE
II
Remove Factory Intake Assembly
A) Using a Phillips head scr ewdriver , loosen the three scr ews holding the factor y air box lid in place and r emove. See Fig#1 (Note: Bottom air box
section will remain in place.)
B) Using a flat blade screwdriver, carefully r emove the air temper atur e sensor fr om the factor y intake tube. See Fig#2 (Note: Retain parts for later
use)
C) 2004 Short Wheel Base Only. Gr asp and firmly squeeze the air injection connector as shown and remove. Fig#3
D) Loosen the hose clamp on the engine side of the factory intake tube using a flat head screwdr iver .
E) Remove the factor y intake tube and stock air filter while leaving the lower air box section in place. See Fig#4 (Hint: lower air box section is also
the windshield washer fluid reservoir)
III
Assemble the Airaid Intake System
A) Inser t the supplied r ubber gr ommet along with the r etained factor y air temper ature sensor into the small hole located on the r ear of the curve
on the Airaid tube. See Fig#5
B) 2004 Short Wheel Base Only. Inser t the large r ubber gr ommet and hose connector adapter into the hole located on the under side section of the
Airaid intake tube. See Fig#6 & 7 Use the plug grommet for all other vehicles without air injection.
C) Assemble the Air aid intake tube and air dam with the supplied ¼” bolts and washer s Refer to Fig#8
D) Slide the Airaid urethane hump hose and supplied hose clamps over the cur ved end of the Air aid intake tube. Refer to Fig#7
IV
Install the Airaid Intake System
A) Place the complete Airaid intake assembly into the engine compartment and align. Refer to Fig#9
B) Position the Air aid cool air dam assembly on top of the windshield washer fluid r eser voir using the har dwar e provided. See Fig#9 (Note: leave
hardware loose for later adjustment)
C) Mount the Air aid Premium air filter onto the end of the tube and tighten the hose clamp. Refer to Fig#9
D) Slide the Airaid urethane hump hose and hose clamps over the factor y air box located on the top of the engine. Make sur e ther e is an adequate
amount of urethane hose covering both the Airaid intake tube and air box. See Fig#9
E) 2004 Short Wheel Base Only. Reconnect the air injection connector Fig#10 and the air temperature sensor connector . Fig#11
F) Check alignment of complete air dam assembly and tighten r emaining hose clamps and fasteners.
G) Install weather strip on air dam. Refer to Fig#9 (Hint: Start from one corner of the air dam and press the weather strip firmly onto the panel while
working your way out to each end of the air dam. This will insure that the weather strip is installed correctly and allow for ease of installation)
VI
Finishing Up
A) Make sur e that the intake path is clear of all debr is!
B) Check alignment of the Air aid intake tube and tighten all clamps, brackets, nuts & bolts.
C) Inspect your over all wor k and check for clear ance between air dam assembly and the hood.
D) Re-connect the negative battery cable.
Fig#1
Fig#2
Fig#3
Fig#4