Airaid 250-230 User Manual
Installation instructions, Component identification
Installation Instructions
For Part Numbers:
250-230
720-475 Airaid Oiled Media Filter
251-230
721-475 SynthaMax Dry Media Filter - Red
252-230
722-475 SynthaMax Dry Media Filter - Black
253-230
723-475 SynthaMax Dry Media Filter - Blue
2008-13 Chevrolet Corvette C6
2010-13 Chevrolet Corvette Grand Sport
LS3 6.2L V8
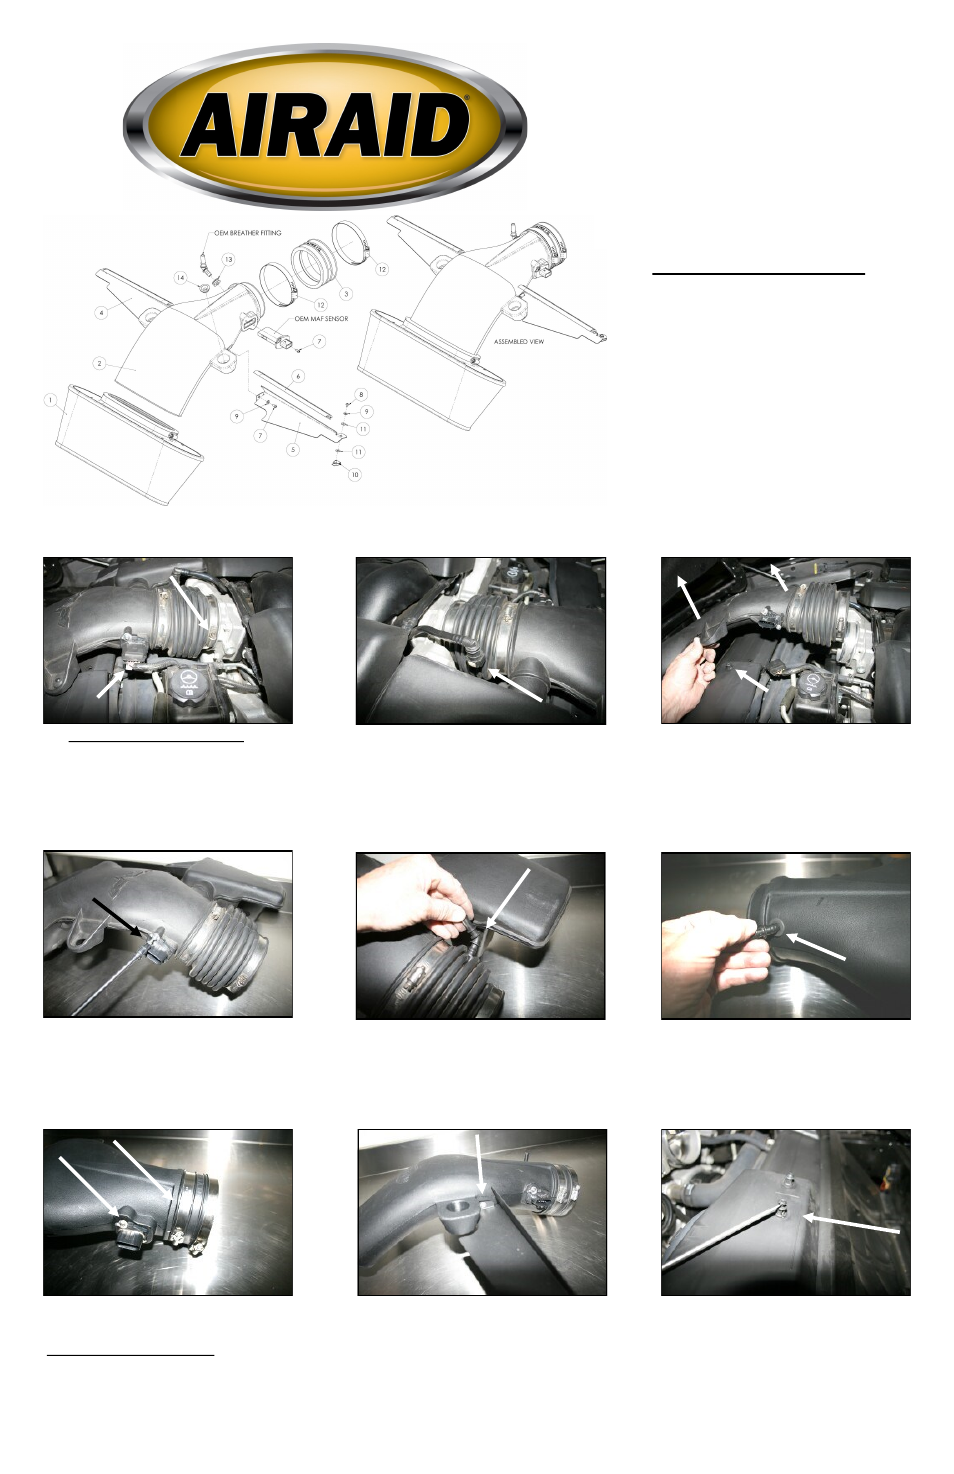
Component Identification
1. Airaid Premium Filter
1
2. Airaid Intake Tube
1
3. Urethane Coupler
1
4. Passenger Side Air Dam
1
5. Driver Side Air Dam
1
6. Weather Strip 9 1/2”
2
7.
8-32 x 3/8” Button Head Screw
4
8.
M4 Pan Head Screw
2
9.
#8 Flat Washer
4
10.
M4 Clip Nut
2
11.
Small Rubber Washer
4
12.
#64 Hose Clamp
2
13.
Grommet
1
14.
Grommet
2
1. Disconnect negative battery cable.
Remove the grey security clip on the bottom of
the Mass Air Flow sensor wiring connector. Next
squeeze the tab on the bottom of the connector,
and disconnect the wiring harness from the sen-
sor. Now loosen the hose clamp holding the tube
to the throttle body.
2. Squeeze the tabs on the sides of the crankcase
breather connector, and disconnect the breather
hose from the factory intake tube breather fitting.
3. Lift up on the factory intake tube assembly to
disengage the grommets from the three grommet
posts and throttle body. Remove the assembly
from the vehicle.
4. Using a #20 Torx Bit, remove the two factory
screws that hold the MAF sensor into the factory
intake tube. Remove the MAF sensor for reinstal-
lation in step #7.
5. Remove the factory breather fitting from the
factory intake tube and save it for reinstallation in
step #6.
6. Install the provided grommet (#13) into the
hole in the Airaid Intake Tube (#2). Next install
the factory plastic breather fitting removed in step
#5 into the grommet.
7. Reinstall the Mass Air Flow sensor removed in
step #4, into the Airaid Intake Tube using two 8-
32x3/8” button head bolts (#7).
Do Not Use The Factory Screws!
Next, install the urethane coupler (#3) onto the
Airaid Intake Tube using two #64 hose clamps
(#12) as shown. Tighten only the clamp closest to
the MAF sensor.
8. Attach the two air dams (#5 driver side & #4
passenger side) onto the Airaid Intake Tube using
one 8-32x1/4” button head bolt (#8) and #8 flat
washer (#9) on each side. Leave the bolts slightly
loose for now to allow for adjustment.
9. Using a flat blade screwdriver, pry up the cen-
ter pin in the grommet post closest to the right
fender on the radiator shroud, and remove both
pieces of the grommet post from the vehicle.
Clip
Grommet Post
Driver Side Shown
Full color instructions can be viewed on our web site at Airaid.com. Use the Product Search function to find your part number, and click View Details.