Airaid 400-162 User Manual
Installation instructions, Component identification
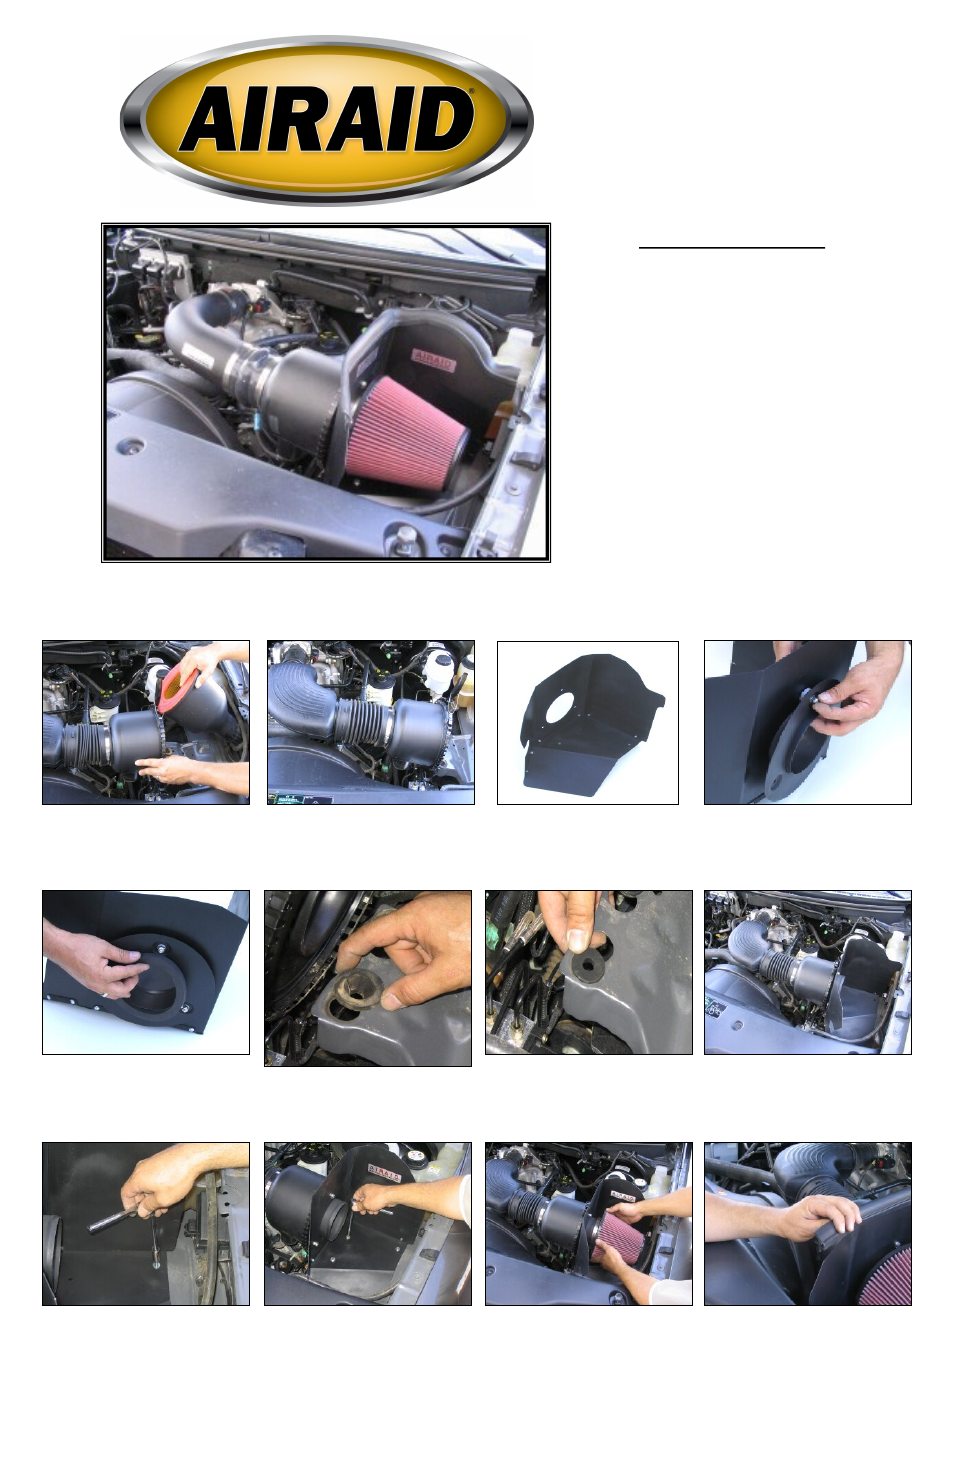
Installation Instructions
For Part Numbers:
400-162
700-445 Airaid Oiled Media Filter
401-162
701-445 SynthaMax Dry Media Filter - Red
402-162
702-445 SynthaMax Dry Media Filter - Black
403-162
703-445 SynthaMax Dry Media Filter - Blue
2004-06 Ford F-150 4.6L 3 Valve
(Does NOT fit 2 Valve or Heritage body)
Component Identification
1
.
Airaid Premium Filter
1
2.
MAF Panel Black
1
3.
Bottom Panel Black
1
4.
Filter Adapter
1
5.
Weather Strip 24 ¾”
1
6.
Modular Intake Tube
1
7.
Silicone Reducer
1
8.
Urethane Hump Hose
1
9.
5/8”x 20” Rubber Hose
1
10.
Bushing
3
11.
Gasket 4.5”
1
12.
¼ - 20 x 7/8” Bolt
5
13.
¼ - 20 Nut
5
14.
¼” Flat Washer
12
15.
6-32 x 5/16” Screw
7
16.
#6 Flat Washer
7
17.
6-32 Keps Nut
7
18.
M6 - 1 x 25 Hex Bolt
1
19.
Rubber Grommet
2
20.
Long Bracket
1
21.
#19 Speed Clamp
2
22.
#80 Hose Clamp
2
23.
#56 Hose Clamp
1
24.
#48 Hose Clamp
1
25.
Black Hose Mount 1
Full color instructions can be viewed on our web site at Airaid.com. Use the Product Search function to find your part number, and click View Details.
2. Remove air filter and air box from
vehicle.
1. Disconnect negative battery cable.
Unclip factory filter housing from intake
assembly.
3. Assemble the Airaid Cool Air Dam
assembly using the supplied #6
screws, washers and nuts as
shown above.
4. Assemble the Airaid Filter Adapter
plate using the supplied ¼ inch
bolts, washers, spacers and nuts
provided as shown above.
5. Install the supplied gasket on the
Airaid filter adapter as shown.
6. Remove the two factory grommets
from the body and discard.
7. Install the supplied rubber grommets
in place of the factory grommets previ-
ously removed.
8. Install the Airaid Cool Air Dam as-
sembly on vehicle using the factory
intake tube clamp.
9. Mount the Airaid Cool Air Dam as-
sembly to the vehicle using the
supplied metric bolt and washer
and the factory bolt hole as shown
above.
10. Finish mounting the Airaid Cool Air
Dam assembly to body using the
supplied ¼” nuts, bolts, washers
and long bracket as shown. Note:
The long bracket must be mounted
under the factory mounting plate
and grommets.
11. Mount the Airaid air filter on to the
filter adapter using the supplied
hose clamp.
12. Install the supplied weather strip on
the top edge of the Airaid Cool Air
Dam. Note: The weather strip is
pre cut to the proper length. Start
from one end and work your way
around to the other end to insure
even placement.