Airaid 400-241 User Manual
Component identification, Installation instructions
Installation Instructions
For Part Number 400-241
This Is Not A Complete Kit
This Is A Retro Fit Kit To Be Used Only With Airaid
Part Numbers:
400-109
400-118
401-109
401-118
402-109
402-118
403-109
403-118
1997-2004 Ford F-150/Expedition
4.6L, 5.4L V8
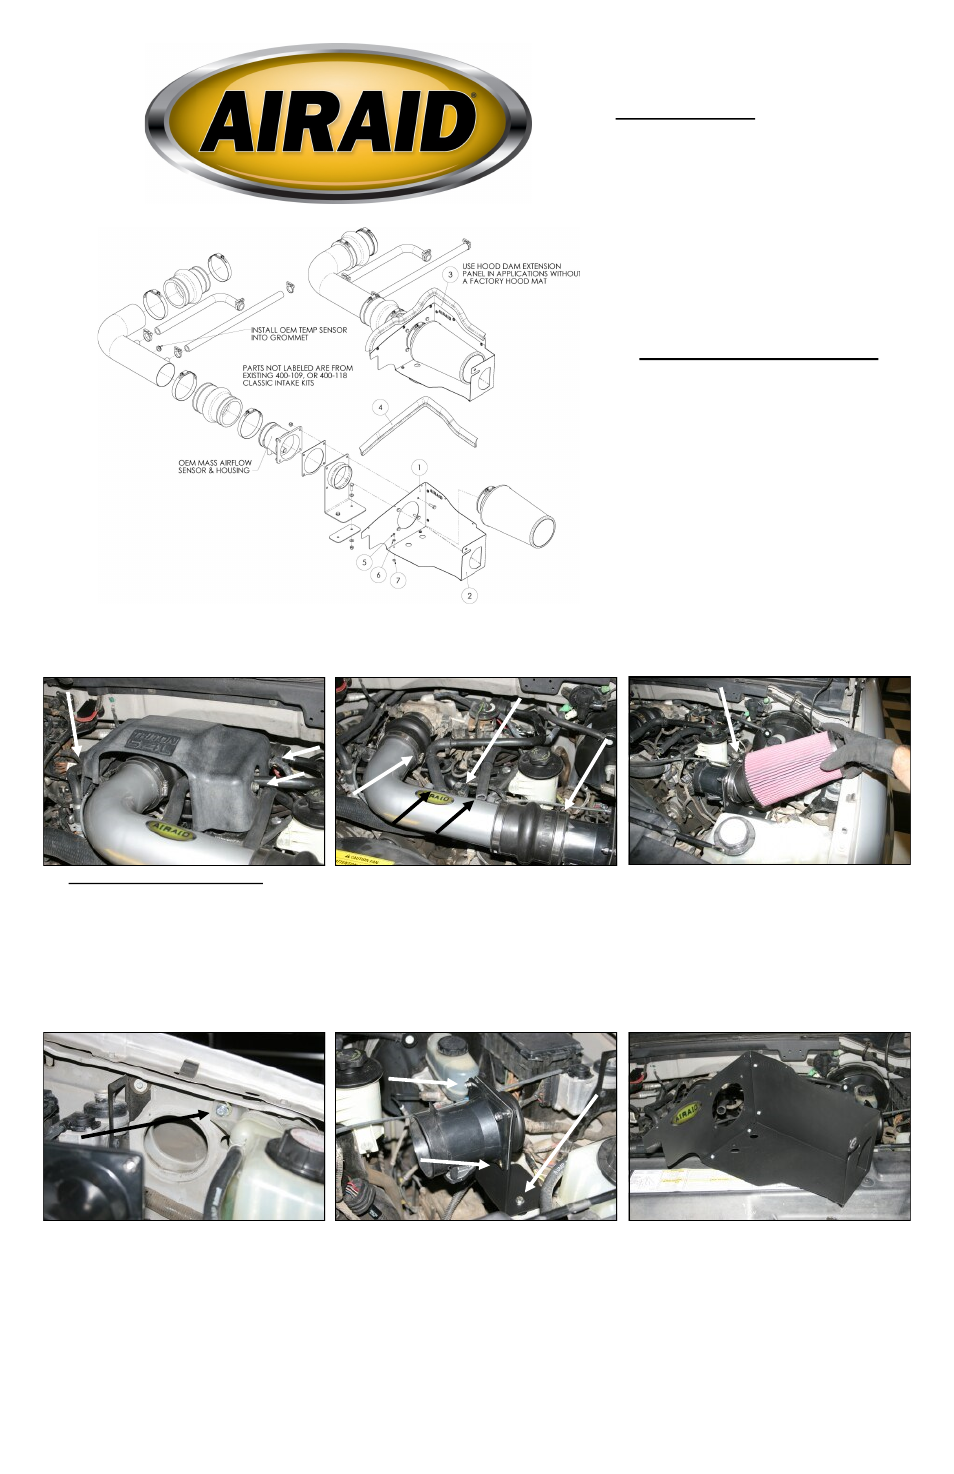
Component Identification
1. MAF Panel
1
2. Bottom Panel
1
3. Panel Extension
1
4. Weather Strip 23”
1
5.
6-32 x 5/16” Phillips Screw
9
6.
#6 Flat Washer
9
7.
6-32 Keps Nut
9
1. Disconnect the negative battery cable.
Remove the three bolts that secure the beauty cover over
the throttlebody. Remove the beauty cover and set these
parts aside for reinstallation in step #10..
3. Loosen the hose clamp and remove the air filter from
the vehicle.
4. Using a 10mm socket, remove and save the 6mm bolt
that secures the radiator overflow tank to the driver’s
side inner fender.
5. Remove the four bolts that secure the MAF sensor
housing to the MAF bracket. Remove the MAF sensor
housing and gasket and set them aside. These parts will
be reused in step #7. Next remove the MAF bracket
from the vehicle. The bracket and mounting hardware
will be reused in step #9.
6. Assemble the two panels (#1) & (#2) as shown using
four 6-32x3/8” Phillips head screws (#5), #6 flat wash-
ers (#6), and Kep nuts (#7).
A.
2.A). Disconnect the temper atur e sensor wir ing har -
ness from intake air temperature sensor.
B). Disconnect the two r ubber hoses fr om the air in-
take tube.
C). Loosen the hose clamp that secur es the hump
hose to the Mass Air Flow sensor (MAF) housing.
D). Loosen the hose clamp that secur es the air intake
tube to the reducing hump hose.
Remove the air intake tube from the vehicle.
B.
C.
D.
Full color instructions can be viewed on our web site at Airaid.com. Use the Product Search function to find your part number, and click View Details.