Airaid 450-330 User Manual
Page 2
Airaid Filter Co. 2688 E Rose Garden Ln. Phoenix AZ 85050 (800) 498-6951
Thank you for purchasing the Airaid Intake System. Contact Airaid @ (800) 498-6951 8:00 AM - 5:00 PM MST weekdays for questions
regarding fit or instructions that are not clear to you. Your Airaid Intake System was carefully inspected and packaged. Check that no parts are
missing, or were damaged during shipping. If any parts are missing, contact Airaid. The air filter element is protected from direct exposure to wa-
ter and debris; care should be taken not to drive through deep water. WATER INGESTION IS THE DRIVERS RESPONSIBILITY! The air filter
is reusable and should be cleaned periodically.
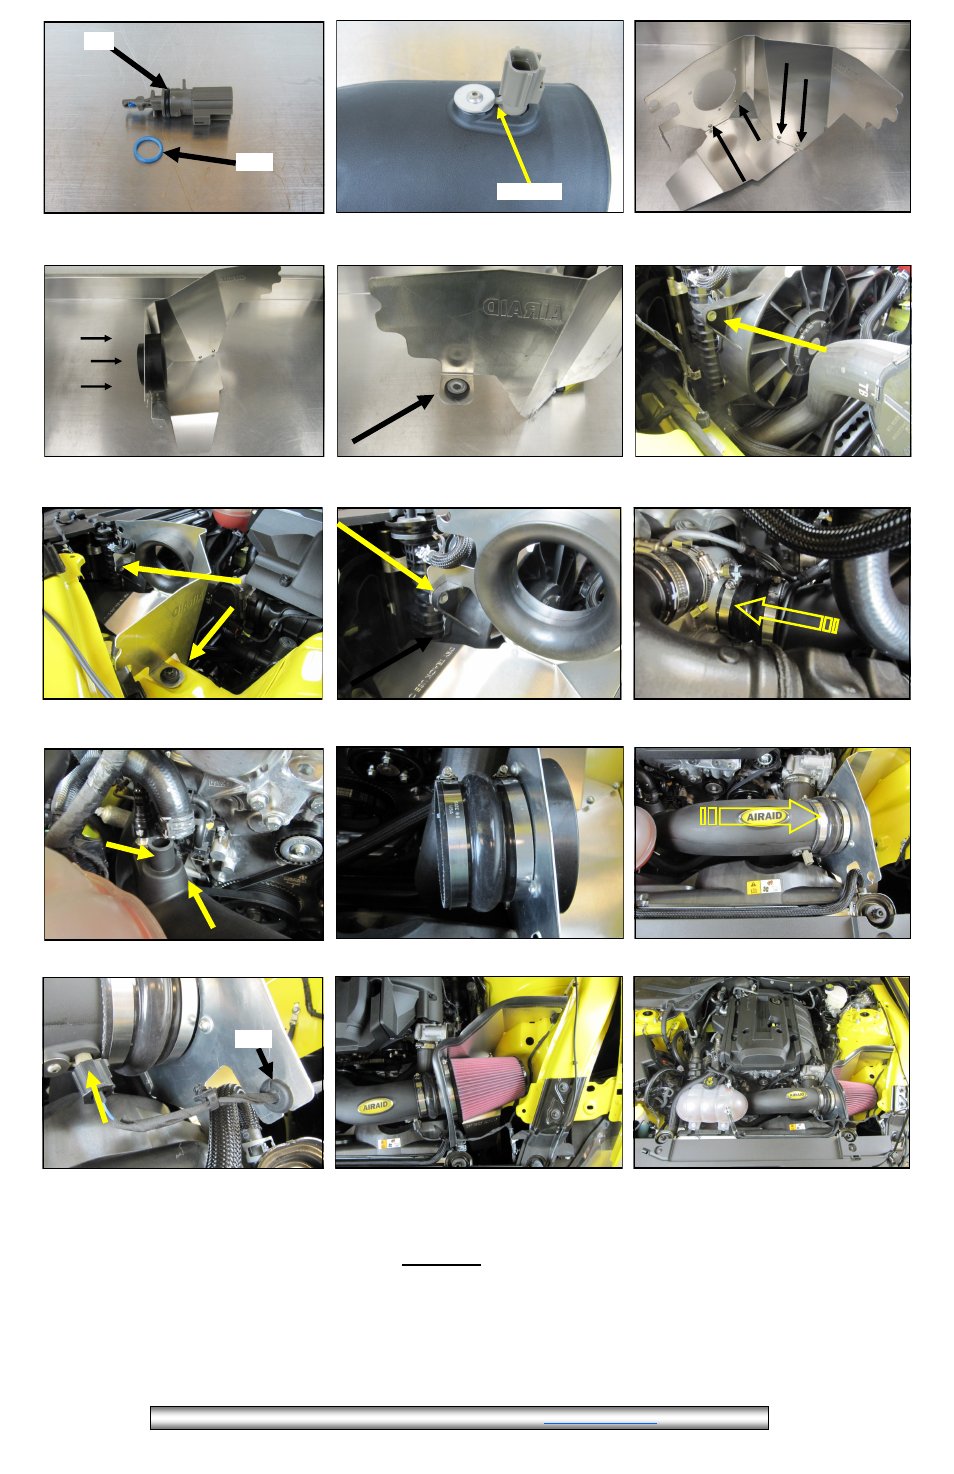
7. Remove the protective film from the Panels and cre-
ate the assembly as shown using four 1/4 -20 Button
Head Screws and Lock washers.
For your Oiled media filter we suggest using
the AIRAID Filter Tune-Up Kit!
REV01.13.15
11. Insert the air temperature sensor into the Airaid intake
tube as shown and secure it using the #8 Screw and
Washer.
10. Replace the OEM O ring on the sensor with the sup-
plied Airaid O ring.
New
OLD
Lock Tab
9. Transfer the OEM air box grommet and anti-crush
sleeve into the Panel assembly as shown.
8. Install the Filter Adapter onto the Panel Assembly as
shown, using the three 1/4-20 Button Head Screws and
Flat Washers.
13. Lower the Airaid Intake tube down into position
and slide the reducer onto the turbo inlet.
17. Reconnect the PCV and bypass line to the Airaid
Intake Tube.
10. Remove the drivers side fan shroud bolt and set it
aside.
12. When properly installed, the Panel tab resides behind
the fan shroud as shown.
11. Install the Panel assembly into the engine compart-
ment as shown and secure using the OEM hardware
removed in steps
3 and 10.
7. Slide the Airaid Intake Tube into the Hump Hose and
tighten all four Hose Clamps.
11. Slide the Hump Hose with two, #68 Clamps onto the
Filter Adapter .
7. Double check your work. Make sure all clamps, hos-
es, bolts, and screws are tight. Double check the hood
clearance. Reconnect the negative battery cable.
11. Install the Airaid Premium Filter onto the Filter
Adapter. Install the weatherstrip on top of the Panel as-
sembly as shown with the contour rolling away from the
filter.
10. Split one edge of the remaining Grommet with a
sharp knife and run the AT harness through it. Install
the Grommet and harness into the Panel as shown and
reconnect the sensor.
Cut