Airaid 510-153 User Manual
Installation instructions, Component identification, One spacer under each screw
Installation Instructions
For Part Numbers:
510-153
700-451 Airaid Oiled Media Filter
511-153
701-451 SynthaMax Dry Media Filter - Red
512-153
702-451 SynthaMax Dry Media Filter - Black
513-153
703-451 SynthaMax Dry Media Filter - Blue
1999-00 Toyota Tacoma
3.4L V6
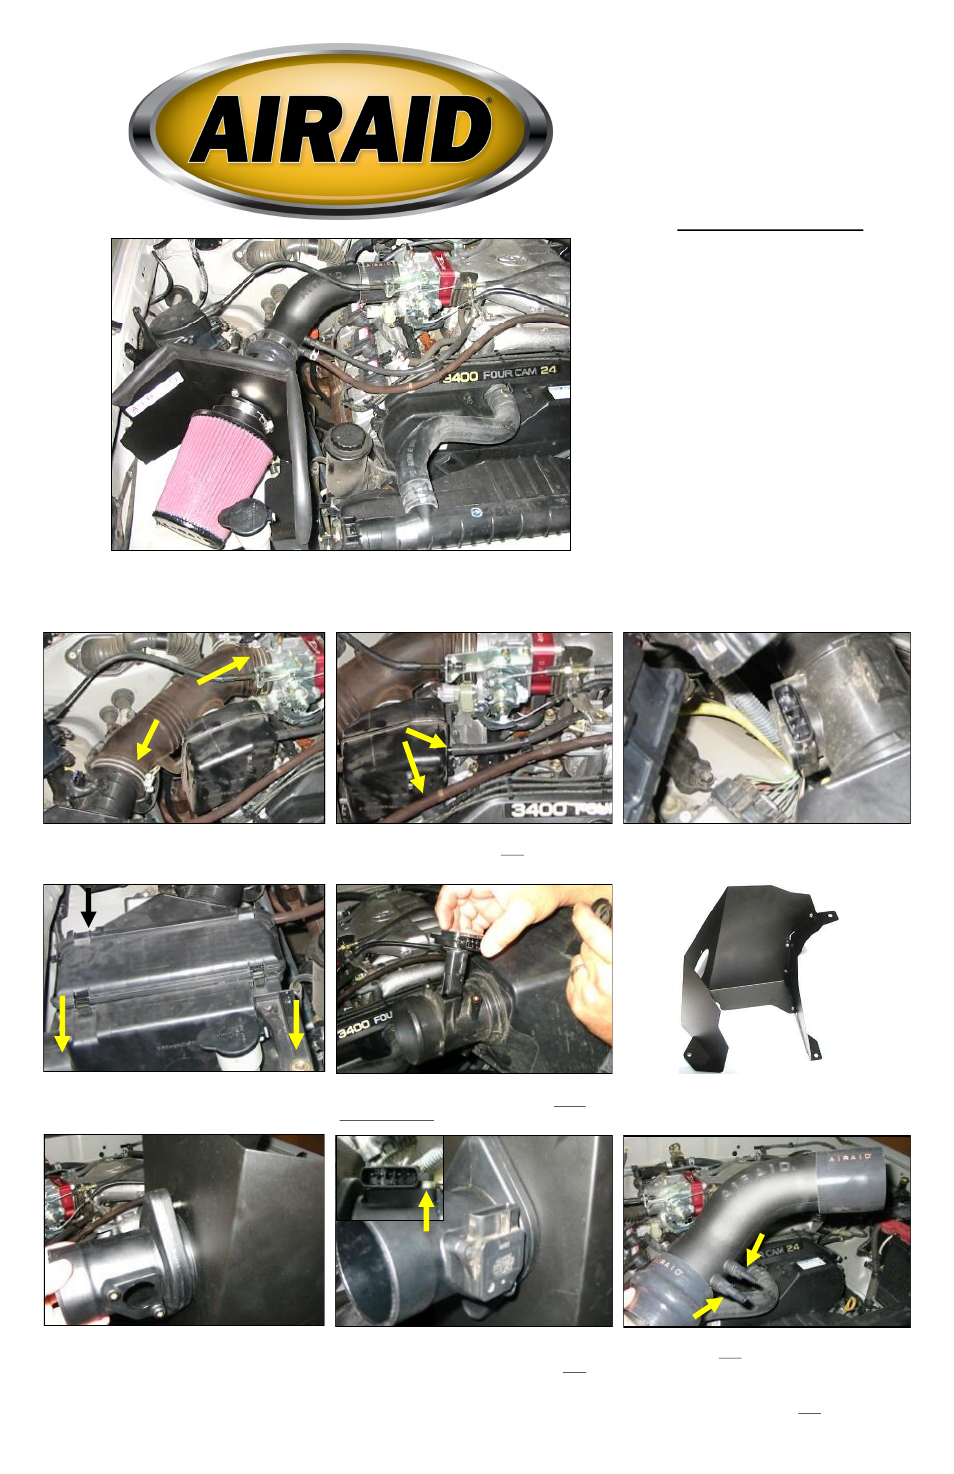
2. Remove factory vacuum lines / hose from the facto-
ry air box and intake tube. (Note: Retain the 3/8”
vacuum hose)
3. Disconnect the electrical connector from the Mass Air
Sensor.
4. With a 12mm socket, remove the three bolts securing
the factory air box assembly & remove the factory
air box assembly from vehicle.
5. Loosen the two screws on the Mass Air Sensor and
remove the sensor from the factory air box. Retain
sensor for later use.
6. Assemble the Airaid Cool Air Dam using four small
screws, washers, and nuts provided.
8. Using the two 8-32 Allen head screws and two plas-
tic spacers provided, mount the factory Mass Air
Sensor to the Airaid filter adapter tube. (Note: the
plastic spacers are placed between the Mass Air
Sensor and the Filter Adapter Tube with the
screws sliding through the spacers).
7. Using two supplied ¼-20 bolts and washers, mount
the Airaid filter adapter to the Airaid Cool Air
Dam.
9. Install two supplied ¼” NPT barbed fittings in Airaid
intake tube. (Note: Install 3/8” fitting in the for-
ward hole and the ¼” fitting in the back hole) Slide
hump hose and two #52 hose clamps on large end of
intake tube and slide coupler with two #48 hose
clamps on small end of tube. (Note: leave all hose
clamps loose for final assembly)
Component Identification
1.
Airaid Premium Filter
1
2.
MAF Air Dam Panel
1
3.
Front Air Dam Panel
1
4.
Black Plastic Tube Adapter
1
5.
Airaid Intake Tube
1
6.
Urethane Coupler
1
7.
Urethane Hump Hose
1
8.
Weather Strip 20”
1
9.
¼-20 x 5/8” Hex Bolt
2
10.
¼” Flat Washer
2
11.
8-32 x ½” SS Button Screw
2
12.
6-32 x 5/16” Screw
4
13.
#6 Flat Washer
4
14.
6-32 Keps Nut
4
15.
8mm x 1.25 Hex Bolt
3
16.
5/16” Flat Washer
3
17.
¼”NPT x 3/8” Barb Fitting
1
18.
¼” NPT x ¼” Barb Fitting
1
19.
½” x 5/8” Connector
1
20.
#52 Hose Clamp
2
21.
#48 Hose Clamp
2
22.
½” x 4” Breather Hose
1
23.
¼” x 16” Vacuum Hose
1
24.
#16 Black Speed Clamp
2
25.
3/8” Nylon Spacer/Washer
2
1.Disconnect The Negative Battery Terminal!
Loosen the two hose clamps on the factory intake tube.
Full color instructions can be viewed on our web site at Airaid.com. Use the Product Search function to find your part number, and click View Details.
One
spacer
under
each
screw.