Airaid 510-201 User Manual
Installation instructions, Component identification
Installation Instructions
For Part Numbers:
510-201
700-458 Airaid Oiled Media Filter
511-201
701-458 SynthaMax Dry Media Filter - Red
512-201
702-458 SynthaMax Dry Media Filter - Black
513-201
703-458 SynthaMax Dry Media Filter - Blue
2007-09 Toyota FJ Cruiser 4.0L V6
C.A.R.B. E.O. Includes 2007
Vehicles Only… All Others Pending
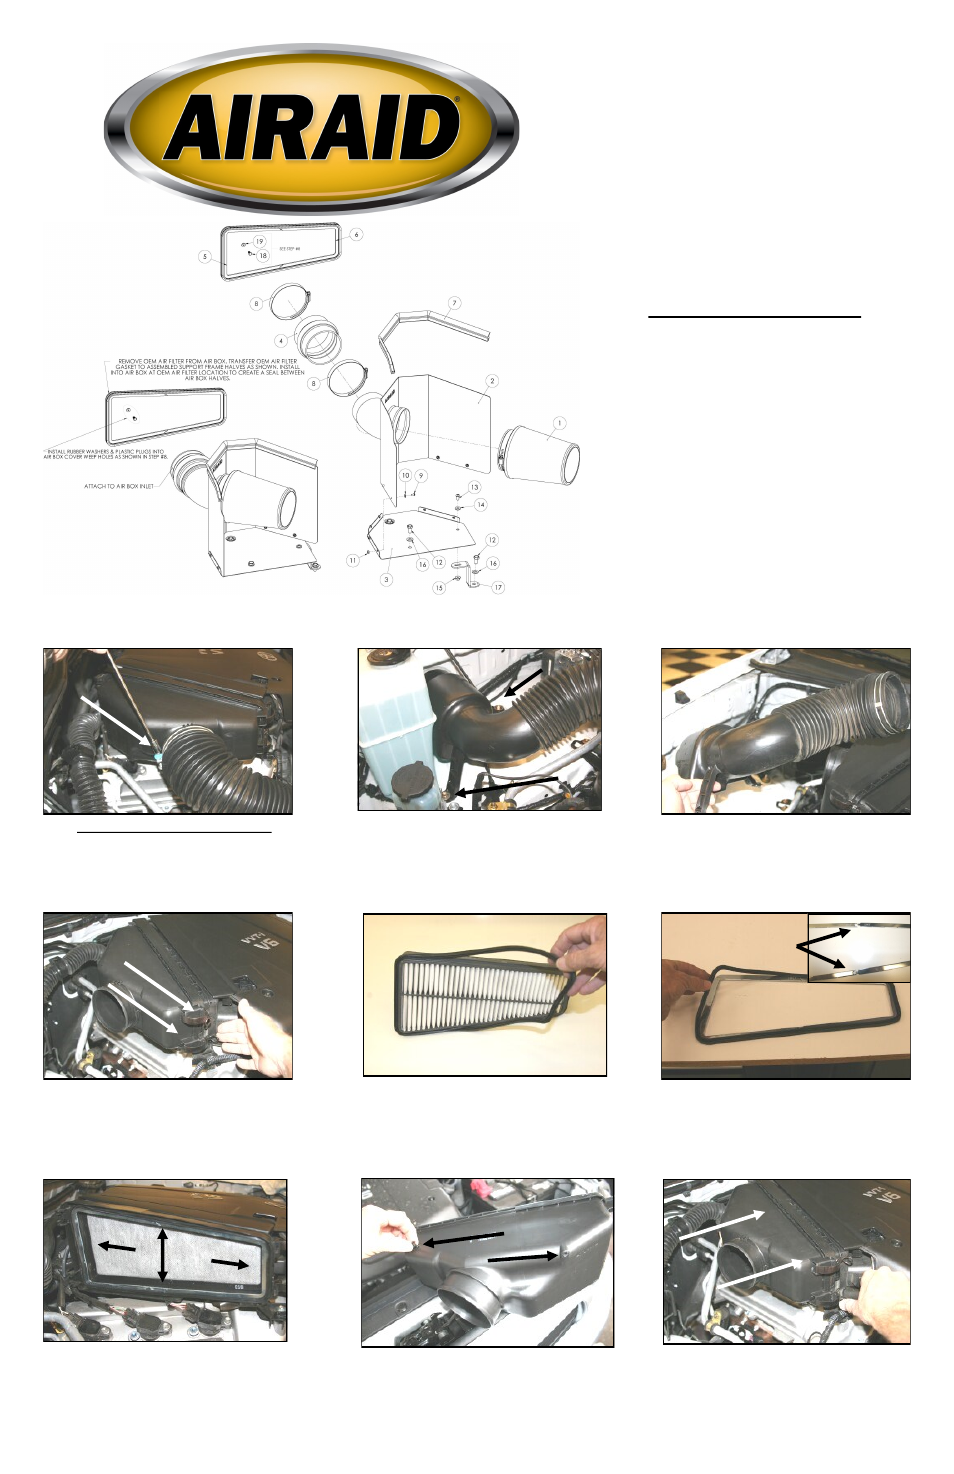
Component Identification
1.
Airaid Premium Filter
1
2.
MAF Panel
1
3.
Bottom Panel
1
4.
Silicone Hump Hose
1
5.
Left Gskt Support Frame
1
6.
Right Gskt Support Frame
1
7.
Weather Strip 21”
1
8.
#64 Hose Clamp
2
9.
6-32x5/16” Screw
6
10.
#6 Flat Washer
6
11.
6-32 Keps Nut
6
12.
M8x1.25x16mm Hex Bolt
3
13.
1/4-20x1/2” Button Head Bolt
1
14.
1/4” Flat Washer
1
15.
1/4” Serrated Nut
1
16.
5/16” Flat Washer
3
17.
Bracket
1
18.
3/16” Plastic Plug
2
19.
Small Rubber Washer
2
1. Disconnect the negative battery cable.
Loosen the hose clamp on the factory intake
tube where it connects to the airbox.
2. With a 12mm socket, remove two bolts that
hold the intake tube to the fender.
3. Remove the complete intake tube from the
vehicle.
4. Unlatch the two clips that hold the cover on
the factory airbox and remove the cover and the
factory air cleaner.
5. Remove the rubber gasket from around the
factory air cleaner.
6. Lay the left and right gasket support frames
(#5) & (#6) on a workbench (see inset) and re-
install the factory rubber gasket around the out-
side as shown.
7. Re-install the gasket assembly back into the
factory airbox as shown. Do not tamper with the
factory hydrocarbon filter, as this will void the
vehicle manufacturer’s warranty, and street le-
gal status in the state of California.
9. Re-install the factory airbox cover, and re-latch
both clips.
Lock 2 pieces together!
8. Install the two rubber washers (#19) onto the
two plastic plugs (#18) that are provided in the
hardware kit, and insert them into the two weep
holes in the factory air cleaner cover removed in
step #4, as shown
Full color instructions can be viewed on our web site at Airaid.com. Use the Product Search function to find your part number, and click View Details.