Airaid 520-188 User Manual
Component identification, Installation instructions
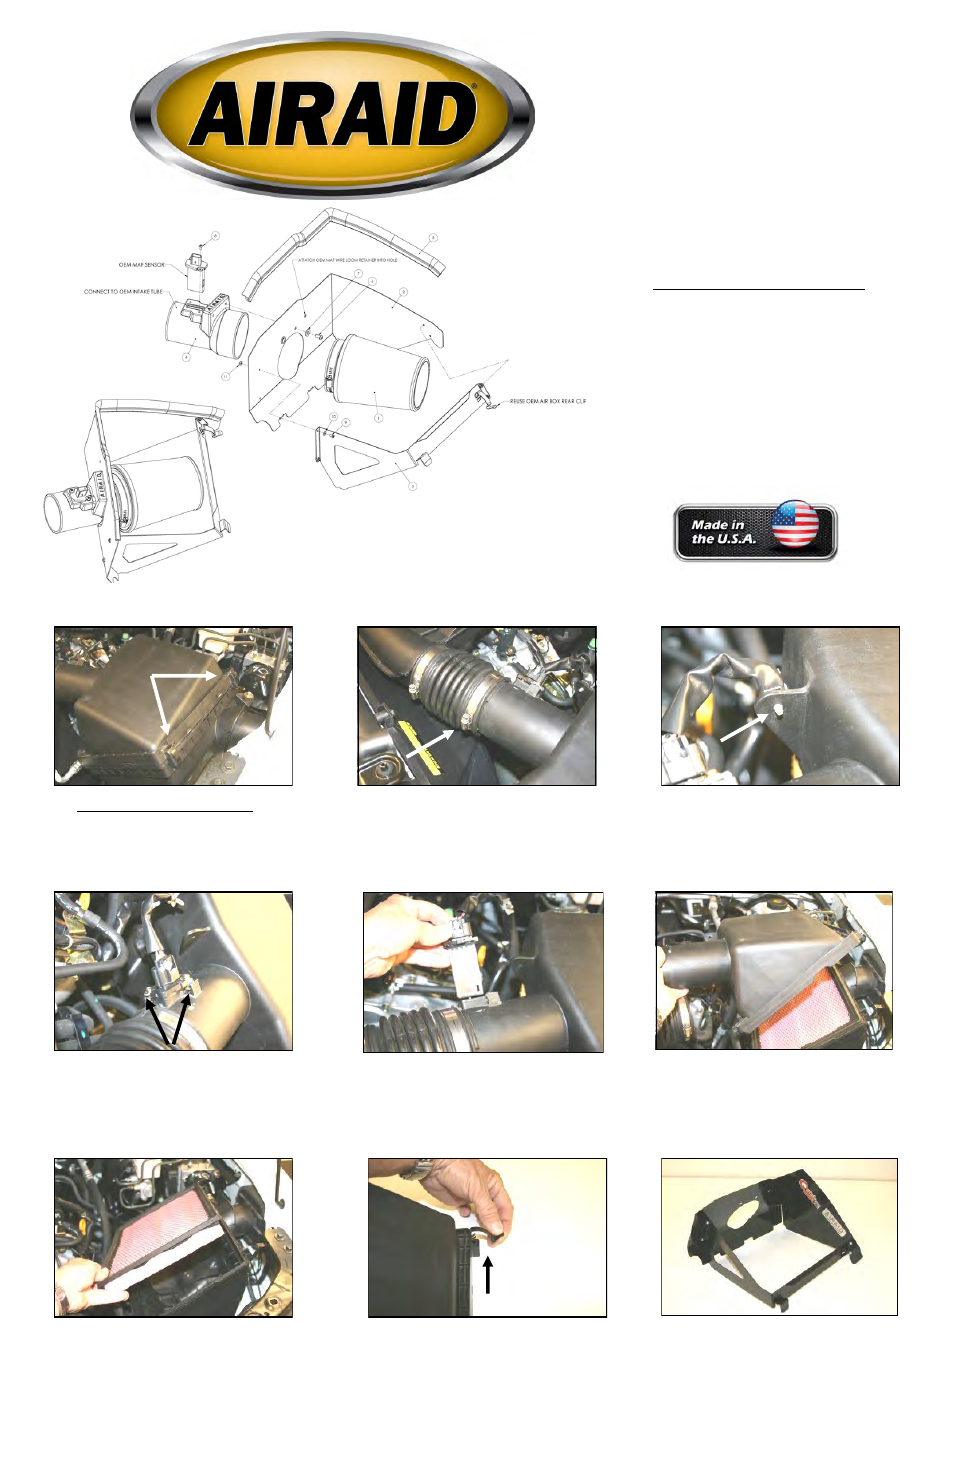
Component Identification
1.
Airaid Premium Filter
1
2.
MAF Panel
1
3.
Front Panel
1
4.
MAF Adapter
1
5.
Weather Strip 25”
1
6.
1/4”-20 Button Head Bolt
2
7.
1/4” Flat Washer
2
8.
8-32x3/8” Button Head Bolt
2
9.
6-32x5/16” Screw
4
10.
#6 Flat Washer
4
11.
6-32 Keps Nut
4
1. Disconnect negative battery cable.
Unhook two latches on the factory airbox.
2. Loosen the hose clamp on factory airbox
neck.
3. Using pliers, carefully squeeze the two tabs
together, and remove the wire loom retainer
from the factory airbox lid.
4. Remove the two screws that hold the Mass
Air Flow sensor.
5. Without disconnecting the MAF sensor, re-
move it from the factory airbox lid, and set it
aside. It is important to note the direction of the
MAF sensor when removed, as to assure correct
reinstallation later in the install process. The
MAF sensor must be installed in the correct
direction for proper air flow calibration.
6. Remove the factory airbox lid.
7. Remove the factory air filter.
8. Very carefully remove the rear clip from the
factory airbox.
9. Assemble the Quick Fit Panels (#2&3) as
shown, using the four supplied screws (#9),
washers (#10), and nuts (#11).
A.
Full color instructions can be viewed on our web site at Airaid.com. Use the Product Search function to find your part number, and click View Details.
Installation Instructions
For Part Numbers:
520-188
700-458 Airaid Oiled Media Filter
521-188
701-458 Airaid SynthaMax Dry Media Filter - Red
522-188
702-458 Airaid SynthaMax Dry Media Filter - Black
523-188
703-458 Airaid SynthaMax Dry Media Filter - Blue
2005-15 Nissan Frontier/ Xterra
2005-12 Nissan Pathfinder
2009-12 Suzuki Equator
4.0L V6