Airaid 883-290 User Manual
Installation instructions, Component identification
Installation Instructions
For Part Number:
883-290 Intake Kit
2013-1
5 Maverick 1000
1000cc
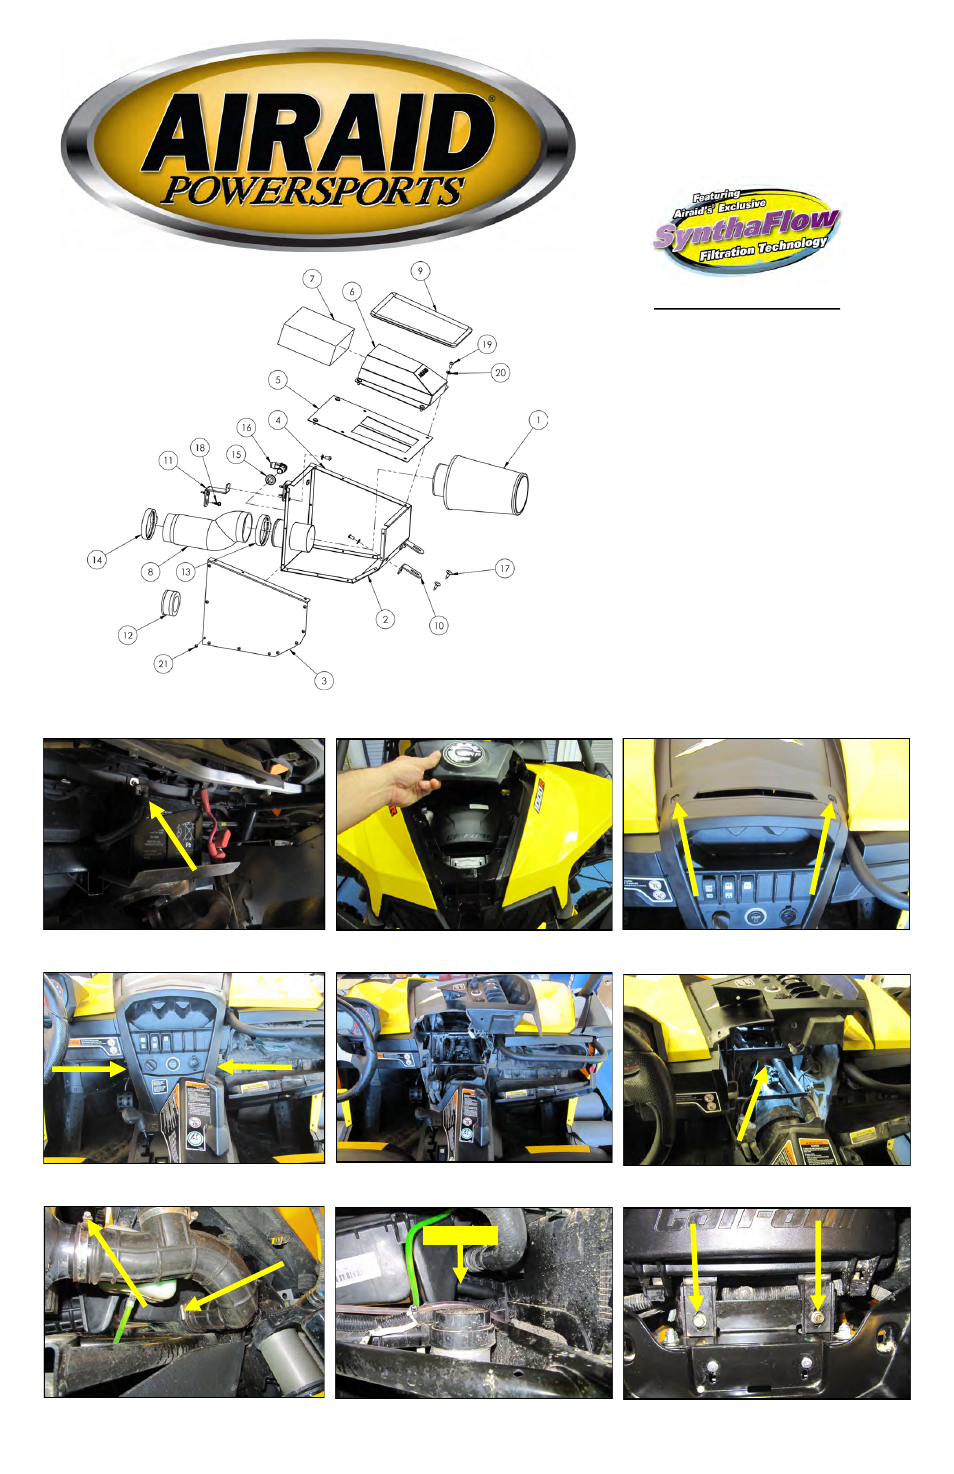
2. Remove the center section of the hood to gain access
to the airbox assembly.
3. Remove the two Torx screws from the top of the center
console.
4. Open the glove box and remove the two plastic rivets
on each side the center console.
5. Pull the console out and lay it on top of the hood.
6. Loosen throttlebody clamp .
8. Inside the driver side inner fender area, Disconnect
the PCV breather from the airbox.
7. Inside the passenger side inner fender area, loosen the
air inlet tube clamps and remove the tube.
9. Remove the two front airbox nuts and bolts in the core
support bracket.
1. Disconnect The Negative Battery Terminal. It is lo-
cated above the exhaust, in the rear of the vehicle.
PCV Breather
Component Identification
1.
Airaid Premium Filter
1
2.
Bottom Panel
1
3.
Left Panel
1
4.
Right Panel
1
5.
Top Panel
1
6.
Hood Scoop
1
7.
Foam Pre-Filter 1
8.
Silicone Coupler
1
9.
Rubber Edge Trim 33"
1
10.
Front Bracket
2
11.
Rear Bracket
2
12.
Firewall Cap
1
13.
#48 Hose Clamp 1
14.
#44 Hose Clamp 1
15.
5/8" Grommet 1
16.
5/8" Elbow
1
17.
Plastic Rivet
2
18.
Self Drilling Screw
4
19.
¼-20 x 1/2” Button Head Screw 10
20.
1/4” Flat Washer 10
21.
8-32 Thread Cutting Screw 20
22.
Bubble Sticker
1
NOTE: Please read these install instructions in their entirety
before beginning the installation process. A successful instal-
lation will require the use of an assistant in two separate steps.
Airaid recommends the use of Medium Strength Thread
Locker on all threaded fasteners.
Full color instructions can be viewed on our web site at Airaid.com. Use the Product Search function to find your part number, and click View Details.
Page 1