Allstar Performance ALL10266 User Manual
Heated tire siper, Operating instructions
Allstar Performance 8300 Lane Dr., Watervliet, MI 49098
Phone: (269) 463-8000 Fax: (800) 772-2618 www.allstarperformance.com
Form 1041
Rev. 020808
Heated Tire Siper
OPERATING INSTRUCTIONS
1. Use the blade rail on siper and pliers to snap individual sipe blades away from strip.
2. Place blades in between spacers. Adjust lever and blade clamping screw, according to the number of
blades you want to hold. The more blades that are to be held, the more the clamping screw will need to be
loosened. The lever can be adjusted by disengaging it from the screw head (push it in) and rotating it to the
desired position. Up to 13 blades can be held in the siper.
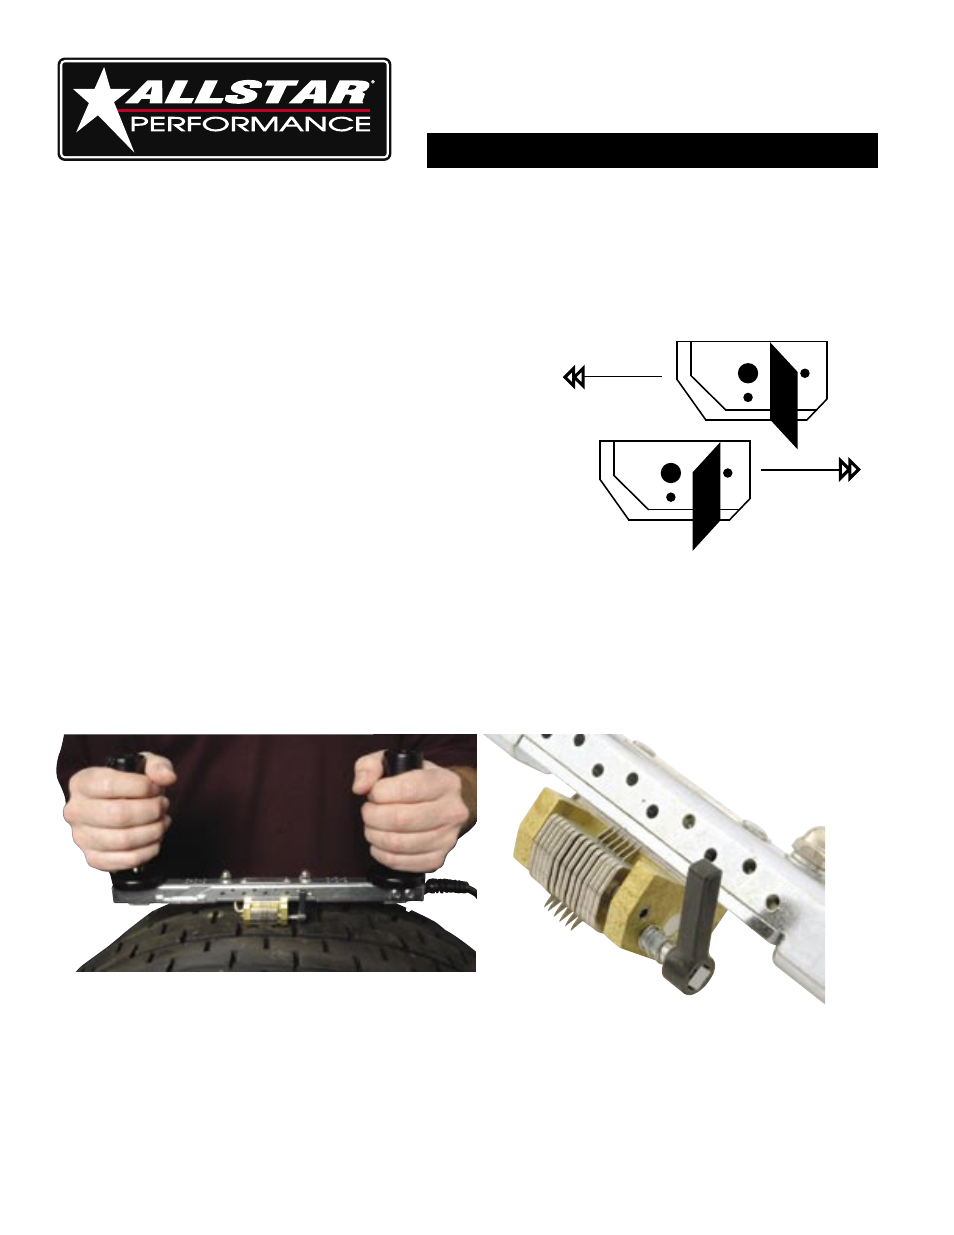
3. Set the cutting edge of the blades in the cutting direction.
Pulling in this direction enables the tool to easily
slide over existing grooves in the tire. This is best
for cutting multiple sipes or speed siping.
Pulling in this direction enables the operator to view
the blades as it cuts through the rubber. This is best for
precision grooving or siping with one or more blades.
4. Move blades up or down in head assembly to desired depth of cut. A flat surface can be used to set mul-
tiple blades to the same depth. Lock blades in place by turning lever.
5. Plug siper in to only a 110V electrical outlet. Allow 10-15 minutes to heat up.
6. For safety, always set the siper in the proper resting position with the center mark "V" on the head facing
down. DO NOT set heated tool near any flammable materials.
7. Avoid touching metallic parts of the heated siper.
Related Components:
ALL99108 Replacement Blades
ALL99104 Replacement Tension Lever Kit