Allstar Performance ALL11016 User Manual
Instructions 37 degree flare tool
Allstar Performance 8300 Lane Dr., Watervliet, MI 49098
Phone: (269) 463-8000 Fax: (800) 772-2618 www.allstarperformance.com
Form 1126
Page 1 of 1
Rev. 032513
INSTRUCTIONS
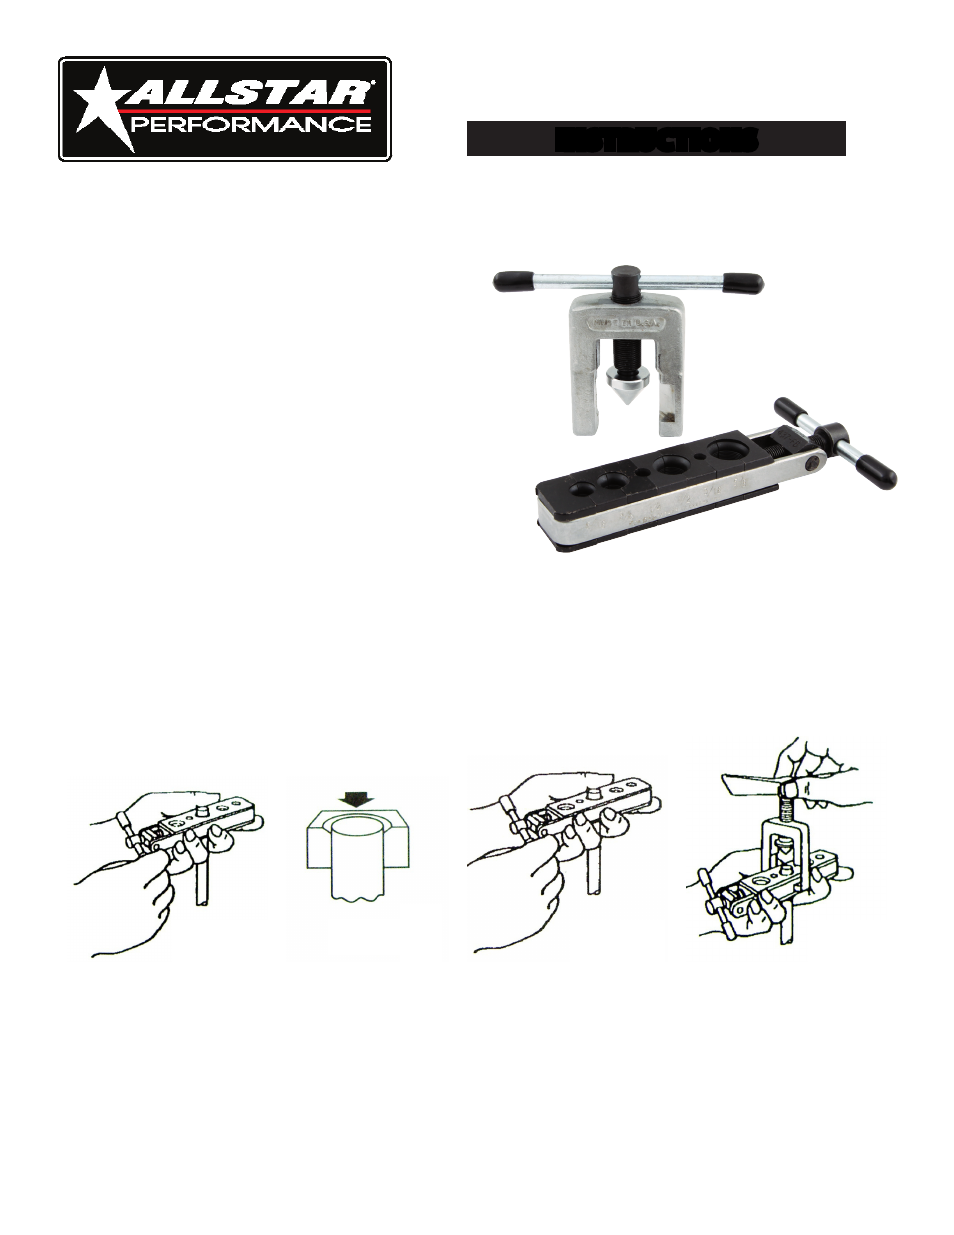
37 Degree Flare Tool
CONTENTS:
1 - Flaring Bar
1 - Yoke with anvil
Instructions
This tool is designed to flare soft copper, aluminum and brass
tubing. Not intended for flaring of steel or stainless steel tubing.
1. End of tubing must be cut square.(Use ALL11010 or ALL11011
Tubing Cutter)
2. Deburr inside of tubing (Use ALL11036).
3. Slip the flare nut onto tubing.
4. Oil threads and cone with a light lubricant such as WD-40 before
each use especially when flaring aluminum.
5. Loosen die clamp screw to allow separation of the sliding flaring
segments. See (Figure1).
6. Tool is self-gauging. The proper size flare is achived when
tubing is clamped flush with the top of the die block.
See (Figure2). Insert tubing between the segments of the die
block which correspond to the size of tubing being flared.
7. Firmly tighten the die clamp screw against the end segment. See (Figure3).
8. Position the yoke over the top of the die holder and twist clockwise to lock in position. The yoke should be positioned directly
over the top of the tube. See (Figure4).
9. Turn the yoke screw clockwise until contact is made between the anvil and tube. Continue turning the yoke screw down just
until slight resistance occurs. This indicates an accurate flare has been achieved. IMPORTANT: To maintain strength of the flare,
do not force the anvil beyond this point.
Figure1
Figure2
Figure3
Figure4