Allstar Performance ALL11350 User Manual
Allstar Performance Spare parts
Allstar Performance 8300 Lane Dr., Watervliet, MI 49098
Phone: (269) 463-8000 Fax: (800) 772-2618 www.allstarperformance.com
Form 1142
Page 1 of 2
Rev. 011315
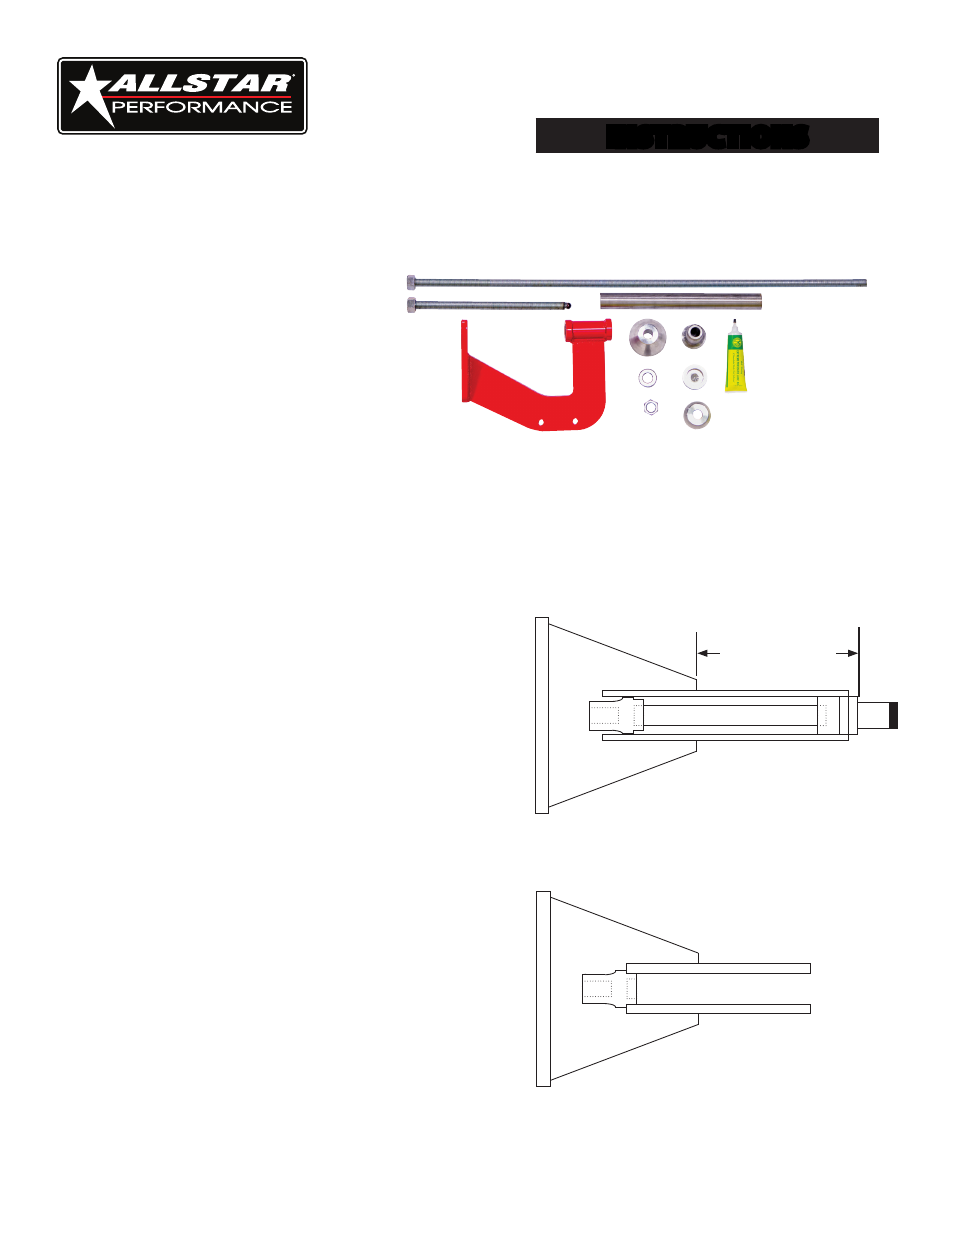
INSTRUCTIONS
Quick Change Tube
Install/Removal Tool
Kit Includes:
1-Fixture Assembly
1-Outer Removal Slug for Aluminum/Steel Tubes
1-Inner Push Tube Slug for Steel Tubes
1-Push Tube (1-3/4" x .120" for steel axle tube removal only)
1-Threaded Removal Mandrel (Short)
1-Threaded Installation Mandrel (Long)
1-Mandrel Nut
1-Bell Support Cone
1-End Cap for W5 and 5x5 2.0/2.5" Pins
1-Installation Mandrel Bearing
1-Tube High Pressure Grease
Removing Steel Axle Tubes:
1.
Remove inner axle seal if applicable.
2.
A length of steel tubing (push tube) is included in this kit and it will require cutting to length
depending on length of axle tube being removed. To determine the length of push tube measure
from the outer edge of the bell to the snout bearing shoulder and add 1" to this measurement
(See Figure #1). It is important to make this cut square. Tech Tip: Use a standard hose clamp tightened
around tube as a guide if needed.
3.
Place inner removal slug over end of push tube and
place inside tube. Inner slug should make contact
with end of welded-in snout inside axle tube.
4.
Place outer removal slug over push tube and inside
axle tube.
5.
Place assembly in fixture using care to keep slugs and
push tube together.
6.
Proceed to Removal Continued (at top of page 2).
Removing Aluminum Axle Tubes:
1.
Remove inner axle seal if applicable.
2.
Place outer removal slug inside bell making contact
with inner edge of tube (See Figure #2).
3.
Place assembly in fixture using care to keep slug
inside tube.
Dimension +1" =
Push Tube Length
Figure #1
Figure #2