Allstar Performance ALL76201 User Manual
Allstar Performance Spare parts
Allstar Performance 8300 Lane Dr., Watervliet, MI 49098
Phone: (269) 463-8000 Fax: (800) 772-2618 www.allstarperformance.com
Form 1035
Rev. 122607
Remote Starter Solenoid Kit For GM Starters
Installation Instructions
1.
Disconnect both battery cables from the battery.
2.
Find a suitable area to mount the solenoid (firewall, inner fender panel, or the frame). Drill two holes and mount the
solenoid using suitable fastners. Note: If mounting the solenoid to surfaces other than metal, a ground wire must be
connected to the solenoid mounting screw. The solenoid must be grounded!
3.
Mark all wires at the starter solenoid and disconnect them.
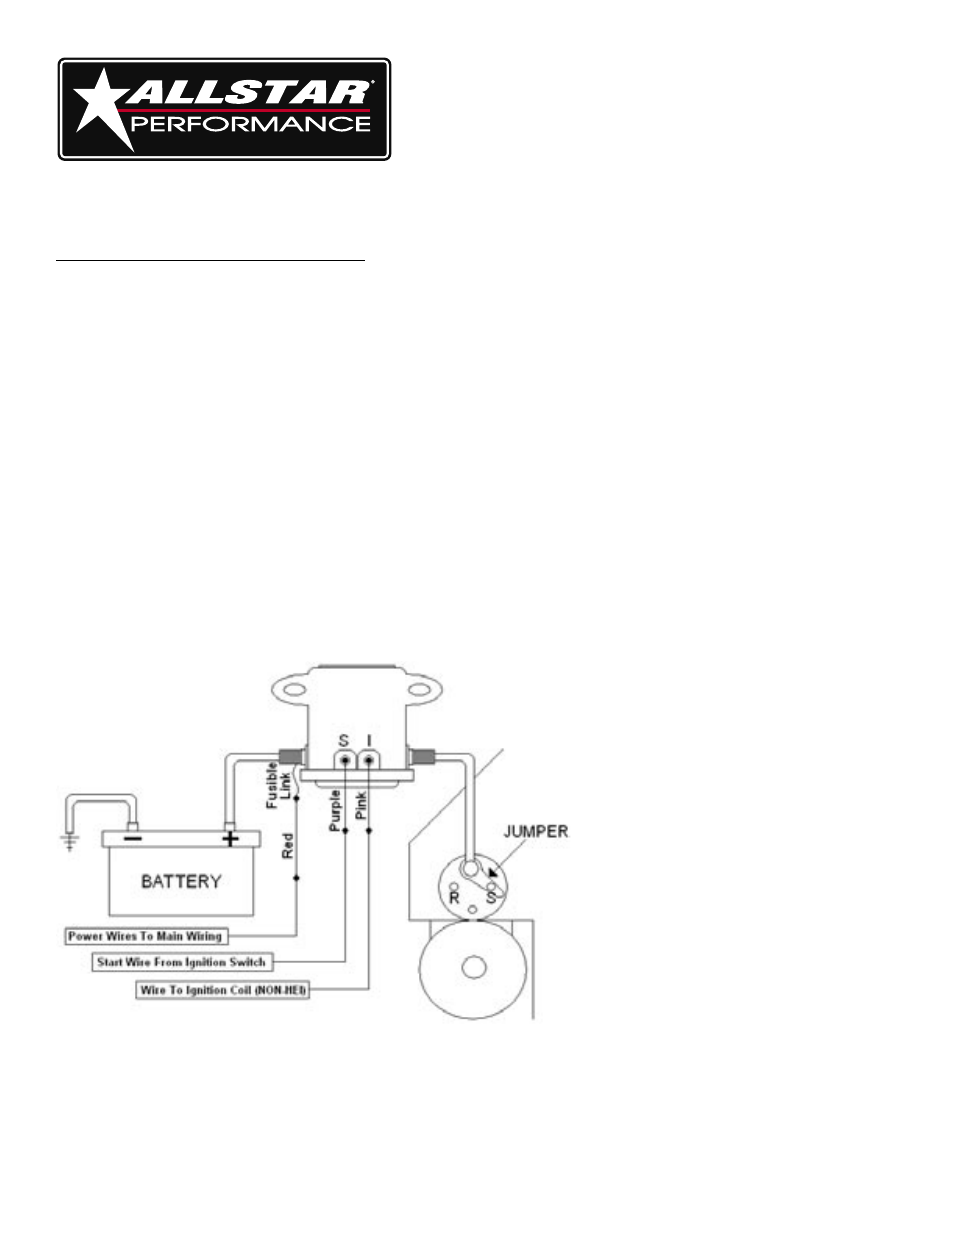
4.
Install the jumper on the starter solenoid, it will go on the battery and the "S" terminal.
5.
Route original battery cable from the battery to one of the large terminals on the new solenoid. Route a second battery
cable from the other large terminal on the new solenoid to the battery terminal of the solenoid on the starter. Note: When
routing battery cables make sure they are not near exhaust or any sharp edges.
6.
Locate the wires that originally went to the battery terminal of the starter solenoid. Lenghten the wire by adding the red
wire supplied in the kit to them and connect to the large terminal of the new solenoid that has the battery cable from the
battery connected to it. Caution: Any fusible links that were cut off must be reinstalled on the same wire before you re
connect it.
7.
Take the wire that went to the "S" terminal of the starter solenoid and lengthen it using the supplied purple wire. Route
this wire to the new solenoid and connect it to the "S" terminal.
8.
If the vehicle has a wire on the "R" terminal of the solenoid at the starter, then lengthen it using the pink wire supplied
and connect it to the "I" terminal of the new solenoid.
9.
Reconnect the battery cables and test the solenoid for proper operation.