Steel-set man-07.pdf, Connecting the filter pump to your pool, Ladder assembly (if applicable) – Aqua Leisure Steel-Set Pool User Manual
Page 7
P.7
H. Attach one Leg Cap [D] to the
bottom of each vertical leg.
I.
Review the assembly. Grab along
the top of the frame and give the
pool a shake to make sure all pins
are locked in place. Gently pull the
bottom of each leg in an outward
direction to make sure they are in
an upright, vertical position.
J.
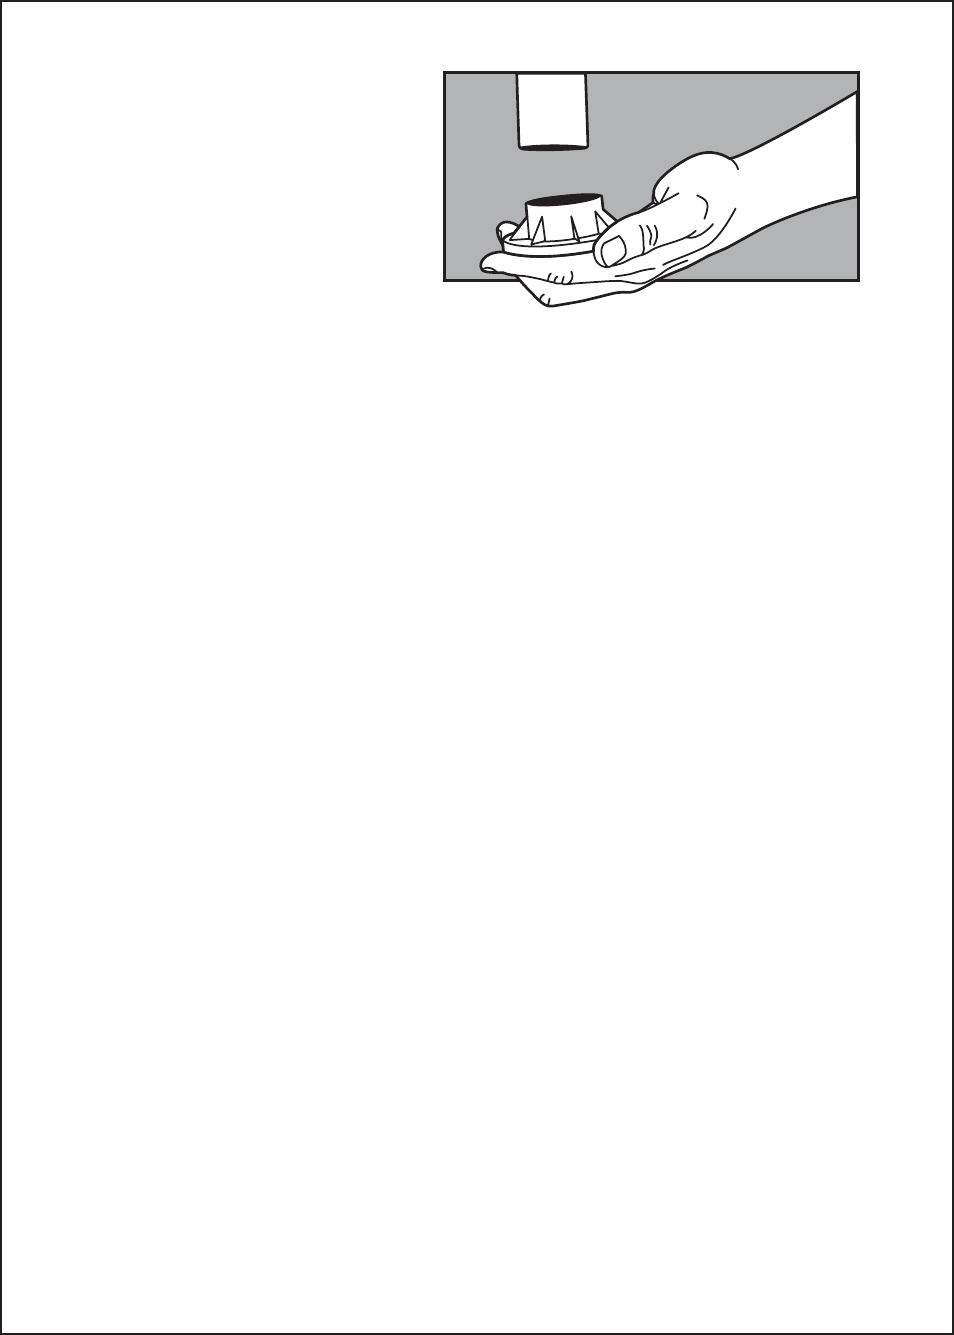
Close and secure the three openings in the pool (the drain valve and the two fixtures for
attaching filter pump hoses). First, make sure that the outer drain plug is inserted into the
drain valve and that the outer drain cap is screwed on tightly. Then locate the attached
caps inside the pool, and firmly press them into the wall until they snap closed over their
openings. Note: make sure to keep the “bullet” shaped plastic drain adapter (located in
the patch kit) in a safe location in order to drain your pool at the end of the swim season.
K.
Begin filling the pool with about 1 inch of water. Smooth out any wrinkles or creases in
the floor by physically entering the pool. Carefully push out along the pool floor edge
with your foot by going around the pool. Use care not to push too hard or hit any of the
vertical legs with your foot.
L.
Once you have removed all wrinkles in the floor, continue filling the pool with water
until the level reaches near the top of the pool. Inspect the pool frequently to verify it is
filling
evenly.
IMPORTANT: If you notice water collecting unevenly or excessive
sloping to one side, STOP FILLING THE POOL IMMEDIATELY. This indicates
that the ground is not level enough, or that the wrinkles in the floor have not been
properly smoothed out. If this occurs, completely drain the pool (See section 7 in this
manual) and then carefully CARRY it to a more suitable site.
*IMPORTANT NOTE: Do not be alarmed if the outer walls of your pool appear to be wet, as some
“sweating” (appearance of condesation droplets on the pool) may initially occur after set-up is complete,
especially in cooler climates. This process is completely normal for this type of pool and does not
indicate any leakage. When sweating does occur it generally stops within 72 hours of filling the pool.
4. CONNECTING THE FILTER PUMP TO YOUR POOL
At this time, please refer to the detailed instruction manual enclosed in the filter pump box. If
your pool system comes with pump model number SA-3768, please also refer to the strainer
& plunger valve installation instructions.
5. LADDER ASSEMBLY (IF APPLICABLE)
If your Steel-Set™ pool system includes a ladder, please refer to the detailed assembly
instructions enclosed in the ladder box.
Note: For your convenience and enjoyment all Steel-Set™ pool systems measuring 12’
or larger include a durable, easy-to-assemble ladder. For Steel-Set™ systems that do not
include a ladder as standard equipment, our 2-step ladder, Model #SA-3796 may be
purchased as a separate accessory from many retailers.