Back flush kit, Triton check valve 14 – Atlantic Water Gardens Pro Series PS4600 User Manual
Page 14
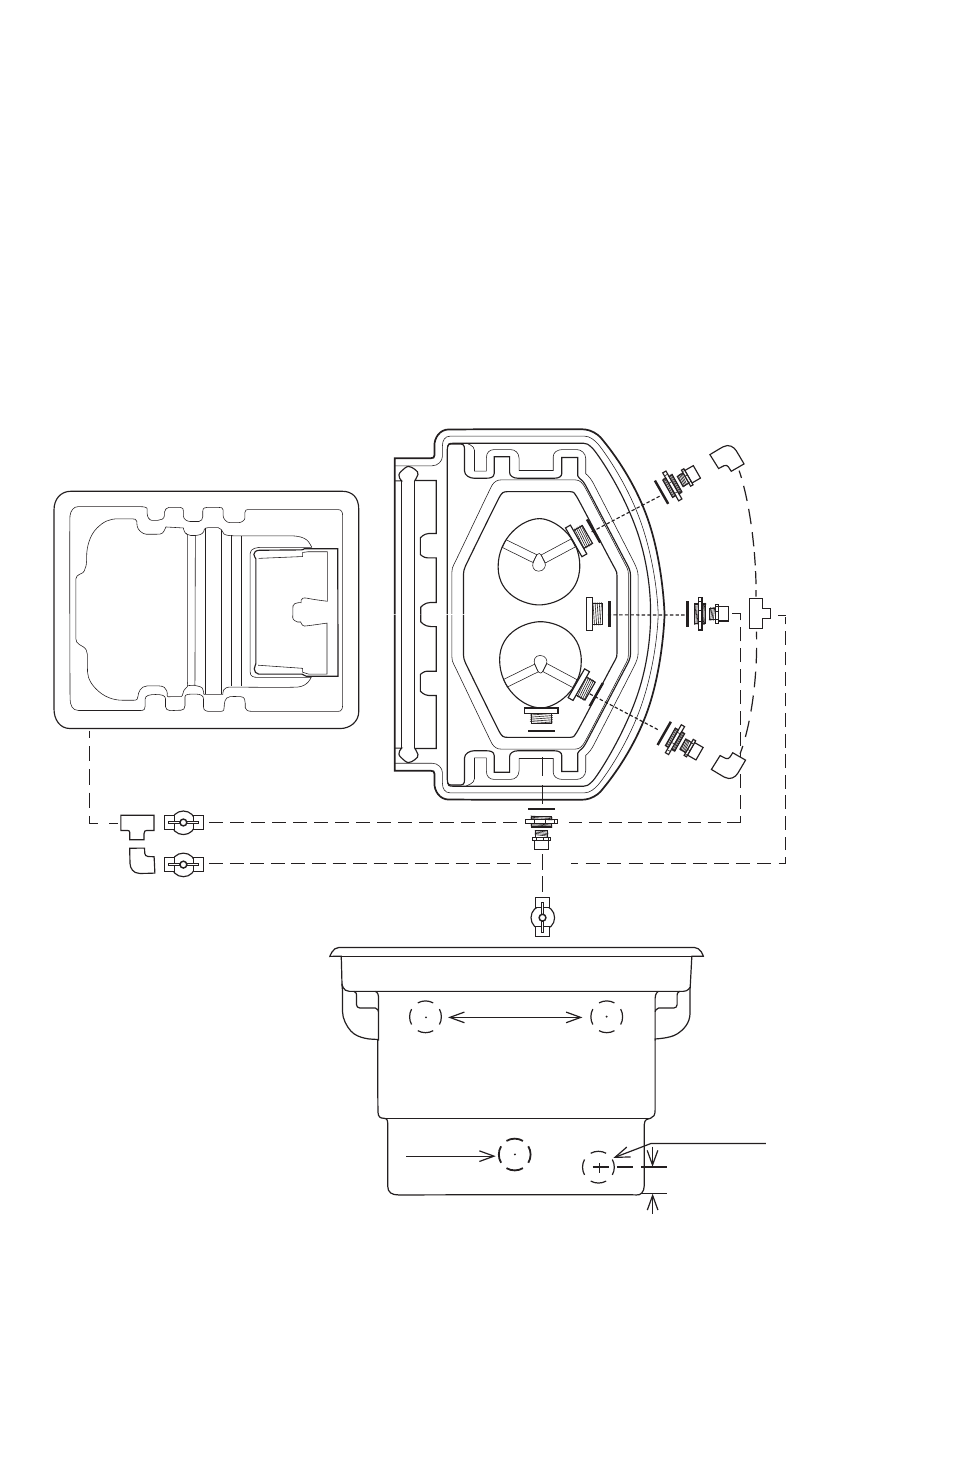
BACK FLUSH KIT
If you are installing the BFK1000 in a new construction project it is a good idea to
drill the holes and install the 2” bulkheads and male thread adaptors before you set the
FilterFalls. Drill-points have been provided below the rock ledge on two of the back filter
panels for the back-flush feed inlets. Drill the holes using a 3” hole saw and install the
bulkheads. Follow the bulkhead installation instructions on page 7.
Find the best location for the bottom drain outlet. Drill-points are not provided for the
bottom drain bulkhead location. The bottom drain can be installed in any of the open
panels on the bottom of the FilterFalls. The center point of hole should be drilled 21/2” up
from the bottom of the FilterFalls and centered from side to side on one of the panels.
Drilling the hole 21/2” up will position the bulkhead as low as possible.
Install the bottom drain bulkhead and follow the plumbing diagram below to complete
the installation. Note: Three stage matala filter kits are available for all Pro Series
FilterFalls. Matala filters will greatly increase the effectiveness of the back-flush kit.
PUMP
DISCHARGE
FILTERFALL FEED
BACK FLUSH FEED
DRAIN
BACK FLUSH FEED
3” HOLES
3” HOLE
3” HOLE
MAIN FEED
BOTTOM
DRAIN
2
1
/
2
”
Figure 19.
Locate the model number of the Atlantic Skimmer/Pump Vault and TidalWave pump used
for this installation on the chart on the next page. Follow the corresponding column down
and row across until they intersect. The number or letter at the intersection point is the
‘perfect cut’ reference mark for this installation. If the corresponding reference mark is a
letter, then the 1½" threaded end of the discharge pipe will be used. If the corresponding
reference mark is a number, then the 2" threaded end of the discharge pipe will be used.
TRITON CHECK VALVE
14