Product specifications, Maintenance installation – Atlantic Water Gardens RHCRU User Manual
Page 2
Maintenance
Installation
DISCLAIMER This product specification is not a complete guide to product usage. Further information is available from Rain Harvesting Pty Ltd and from the Installation and
Operating Instructions . This specification sheet must be read in conjunction with the Installation and Operating Instructions and all applicable statutory requirement. Product
specifications may change without notice. © Rain Harvesting Pty Ltd
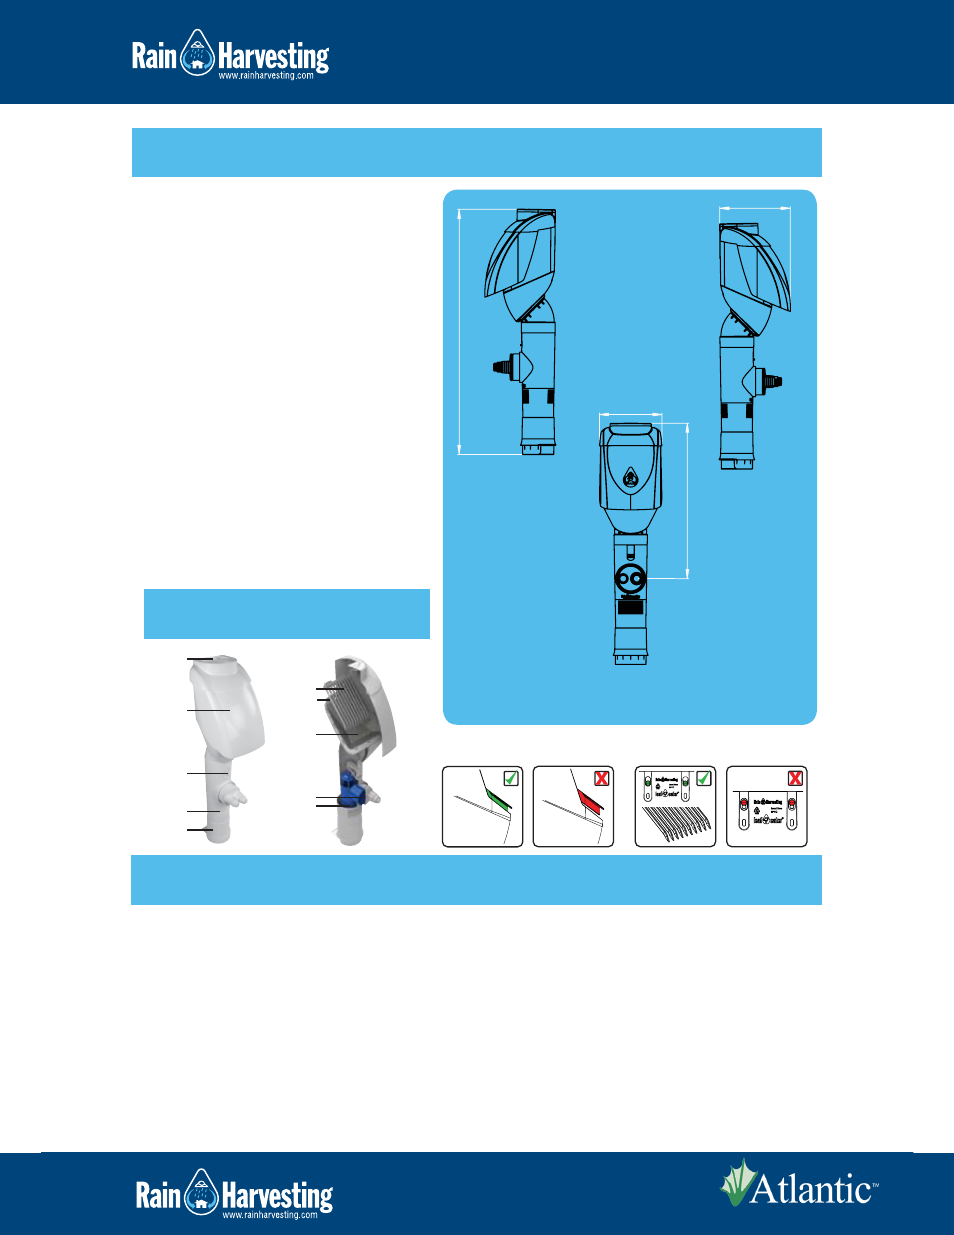
ALL DIMENSIONS IN INCHES UNLESS OTHERWISE STATED.
1. Remove 29.3" of downspout from where the
Clean Rain
TM
is to be situated. Ensure all edges
are clean and smooth.
2. Remove the cap and use snips to remove a
section to fit the downspout.
3. Remove the cover by flexing outwards at the
top.
4. Fit the correct downspout adaptor to the
bottom of the Clean Rain
TM
.
5. Slide the cap up the top section of downspout
and hold temporarily in place.
6. Install the Clean Rain
TM
by positioning it securely
on the bottom section of downspout.
7. Screw the top of the Clean Rain
TM
in position
through the screw slots provided. Ensure
appropriate screws and anchors (if required)
are used.
8. Check the placement of the Vibrating Screen. It
must sit behind and below the front face (refer
figure 1).
9. Insert the Leaf Slide into slot holes (refer figure
2).
10. Re-install the front cover.
11. Slide the cap back down the downspout until it
sits securely on top of the Clean Rain
TM
unit.
The Clean Rain
TM
is mostly self-cleaning, however it may require occasional maintenance in order to keep it
functioning optimally.
RAIN HEAD – The leaf slide and vibrating screen can both be removed when the cap and cover are off by lifting up
and out. If cleaning is required simply hose or brush off any debris. Replace as per figure 1 and 2.
OUTLET – The outlet has an internal mosquito barrier that prevents any mosquitoes from entering the tank. To clean
simply remove the outlet by holding the unit in one hand and with a firm pull remove the outlet adaptor. The
mosquito barrier sits within the outlet and can be removed by hand.
FIRST FLUSH – The Smart Sense
TM
valve may require the occasional clean to remove any build-up of sediment. To
clean remove the Clean Rain
TM
from the wall and take the bottom adaptor off the unit. To maintain optimum
performance the washers based at the bottom of the Smart Sense
TM
valve should be replaced approximately every
12 to 24 months.
a. Cap
b. Cover
d. Breather
e. Adaptor
c. On/Off
Switch
f. Leaf Slide
h. Vibrating
Screen
i. Outlet
j. Valve
(Smart Sense
TM
)
g. Screw Slots
On/Off
The Clean Rain
®
can be turned off so that no water is diverted. To do
this simply flick the switch on the front of the Clean Rain
®
and in the
next rainfall event all water will be diverted to stormwater.
Figure 2.
Figure 1.
9.01
RIGHT SIDE VIEW
8.11
20.20
FRONT VIEW
31.34
LEFT SIDE VIEW
TOLL FREE (866) 506 3047
www.rainharvesting.com
Product Specifications
www.atlanticwatergardens.com