Installing/removing an interface card, Installing an interface card, Connecting the power cord – H3C Technologies H3C S5560 Series Switches User Manual
Page 42: Connecting an ac power cord to the switch
33
Installing/removing an interface card
The S5560-30C-EI, S5560-30F-EI, S5560-54C-EI, S5560-30C-PWR-EI, and S5560-54C-PWR-EI each
have one expansion interface slot. For the interface cards available for the switches, see "
FRUs and compatibility matrixes
."
This section uses the LSWM2QP2P and LSWM2XGT8PM interface cards as an example to describe the
procedures of installing and removing an interface card.
Installing an interface card
1.
Wear an ESD wrist strap and make sure it makes good skin contact and is correctly grounded.
2.
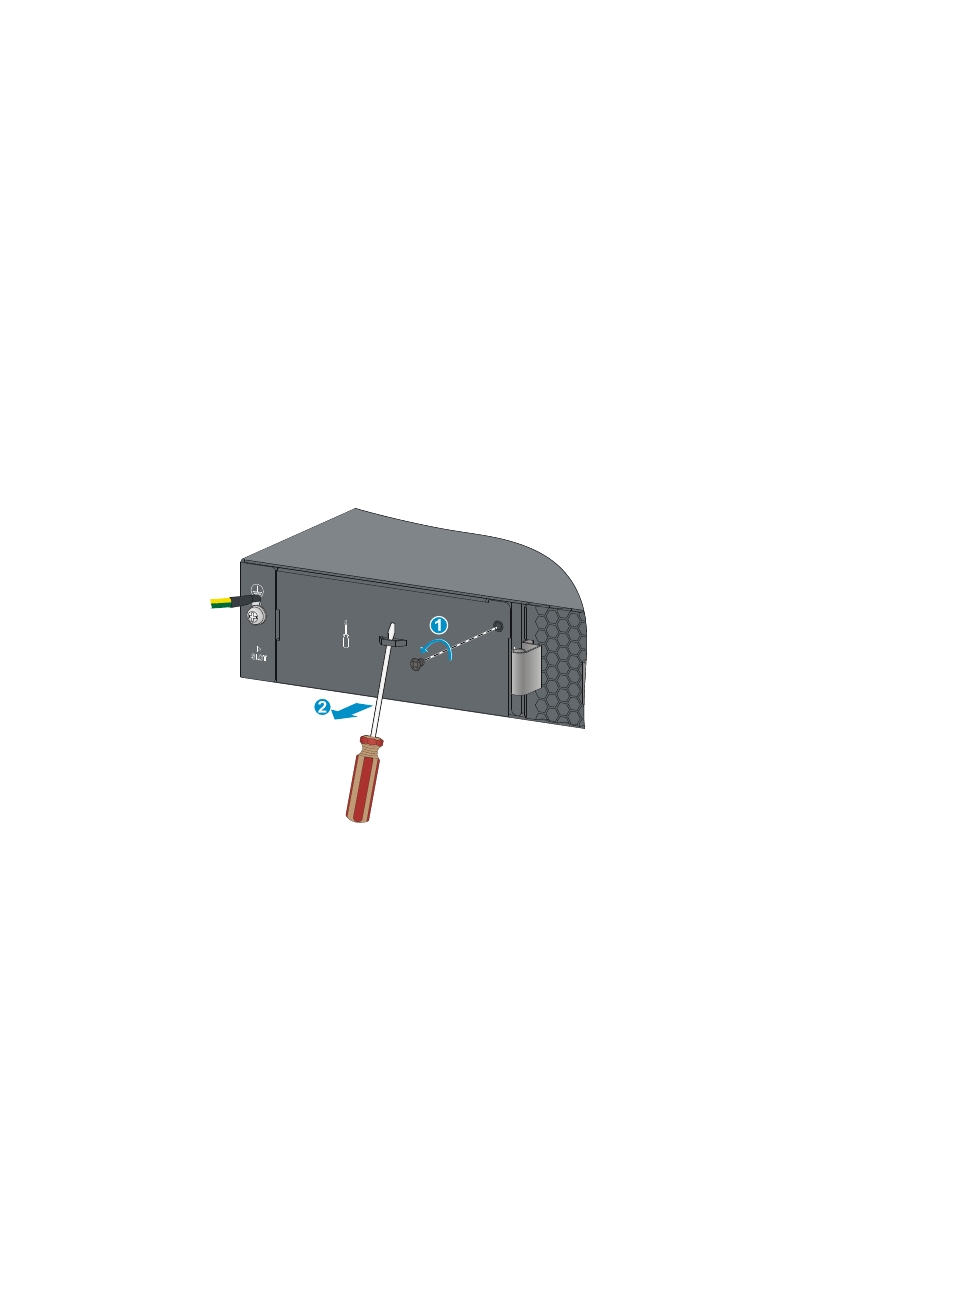
Remove the mounting screws on the filler panel over the interface card slot with a Phillips
screwdriver and remove the filler panel.
Keep the filler panel for future use.
Figure 43 Removing the filler panel over an interface card slot
3.
Unpack the interface card.
4.
(Optional.) If the interface card has an ejector lever, rotate out the ejector lever.
Skip this step if the interface card does not have an ejector lever.
5.
Gently push the interface card in along the guide rails until the interface card has good contact
with the switch chassis
6.
(Optional.) If the interface card has an ejector lever, rotate in the ejector lever.
Skip this step if the interface card does not have an ejector lever.
7.
Tighten the captive screws with a Phillips screwdriver to secure the interface card in the slot.