Grass Valley KayakDD-1 Quick Start User Manual
Kayakdd- 1, Quick start guide, Unpacking
KayakDD- 1
™
Quick Start Guide
UNPACKING
Before you begin, unpack and identify the following items:
Control Panel
Software CD and
License Keys
AC Power
Cable
48V DC
Power Cable
Crossover
LAN Cable
Mainframe
Key Caps
Remover Tool
Manuals and
Release Notes
USB
Flash Memory
50pin
Tally Connector
Fig. 1: Delivered parts
Note that most options are software license keys that are already loaded in the
system. Refer to the Release Notes for the latest information about your system’s
capabilities.
CONNECT FRAME AND CONTROL PANEL
D
Crossover LAN cable.
D
48 Volt DC Power cable.
Refer to the Planning and Installation manual how to connect a KayakDD
switcher with a networked PC.
Power Cable
LAN Cable
Fig. 2: Cabling between Frame and Control Panel
CONNECT INPUTS AND OUTPUTS
All Serial Digital (SDI) 4:3 or 16:9 inputs and outputs.
D
Connect inputs in any order (they can be mapped later, see User Manual).
D
Connect preview and program outputs to monitors.
D
Connect AUX outputs as needed.
D
Connect analog genlock reference (optional) Terminate as needed.
Reference
AUX
Outputs
Inputs
Fig. 3: Rear of the frame
CONNECT AC POWER CORD AND SWITCH ON
D
Power Supply is wide--range and frequency auto--sensing.
D
Wait approx. 60 seconds until all blue lights on the frame front side of the
frame are on and the control panel display is on.
Blue Lights must be on
Fig. 4: Front of the frame
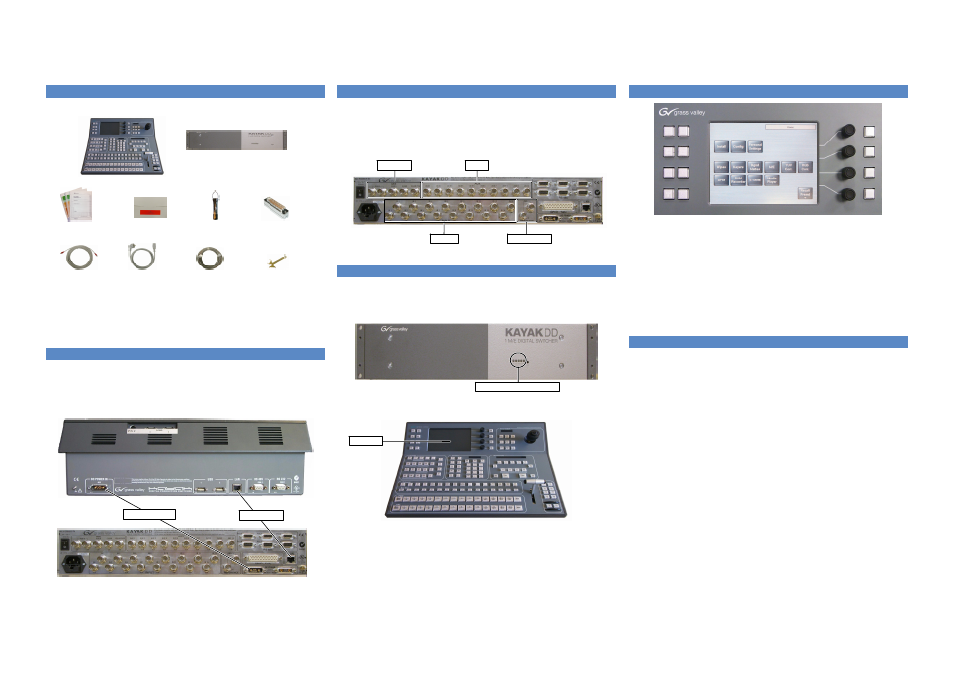
Display
Fig. 5: KayakDD--1 Control Panel
CONTROL PANEL
Home
Live
Mode
Menu
Lock
Last
Menu
User
1
User
4
User
3
User
2
Fig. 6: Panel Display with Home Menu
HOME
Jumps to the HOME MENU.
MENU LOCK Activate to disable auto menu follow.
LIVE MODE
Makes the WIPE MENU and KEYER MENU buttons quicker
to use for On--Air applications by displaying fewer selections.
LAST MENU
Jumps back to the last selected menu.
USER 1...4
User definable preferred menus. Select a menu, hold down the
USER X button for two seconds. A short flash of the button
confirms that the menu is learned. To recall the menu, just press
the USER X button again.
SOURCES, DESTINATION AND SHIFT
SOURCE SELECTION. On any Source Selection Row, pressing a Source
Selector button will change that row output to the newly selected source. Any
Source Selection row that contributes to the On--Air picture will change button
color to RED (or increase brightness -- depending on Personality setting).
D
By pressing and holding the SHIFT BUTTON you get access to the shifted
(2nd) sources on the source selector row.
D
When a shifted source is selected the SHIFT BUTTON on that row stays
illuminated.
D
If the source is a PGM or PST source and is transitioned the SHIFT
BUTTON follows the flip--flop.
D
To select a non--shifted source press only the source selector button
required. This cancels the shift function for that row.
SHIFT BUTTON on DESTINATION SELECTORS. In the Delegate Row of the
switcher, the top row is a destination row.
D
To access AUX Busses higher than AUX 5 you must press the SHIFT
BUTTON at the end of the Delegate Row.
D
Selecting a Shifted Destination will keep the SHIFT BUTTON illuminated
until a non--shifted destination is selected.
Customized source legends can be created using the template on the software
CD Rom ( Path: \Kayak\KayakManuals ).
The template can be printed on transparent foil in A4 or letter size.
Please refer to the Planning & Installation Manual how to remove button caps with
the supplied tool, insert the legend and re--seat the cap.