ShoreLand'r TA0131 User Manual
Accessory
Midwest Industries, Inc.
Ida Grove, IA 51445
800.859.3028
www.shorelandr.com
0003801
Page 1
05/03/07
ACCESSORY
TA0131
Tongue Harness Retro Kit for 95/150 Aluminum Trailers
The new wire harness for the SL95AL and SL150AL trailers is designed so there is a positive ground system (white wire) that is connected
directly to the actuator eliminating any grounding through the frame to operate the actuator. The lights for the trailer still rely on the trailer
frame for its grounding.
ASSEMBLY INSTRUCTIONS
Remove the following from the trailer:
• Remove the boat from the trailer.
• Mark the winch post where it is located on
the tongue. It will be mounted in the same
position once the retro kit has been com-
pletely assembled. Remove the winch
post assembly.
• Remove the two battery boxes from the
side frame of the trailer.
• Remove the lids from the battery boxes,
disconnect the wires from the batteries.
• Remove the mounting screw that secures
the breakaway switch to the tongue.
Installation of the Wire Harness
• Locate the main wire harness coming
out the front of the tongue. It has the ¾”
black shield. Push it into the front of the
tongue so there won’t be any pressure
on the wire harness as it is pulled back-
wards into the tongue.
• Pull the wire harness out the hole in the
top of the tongue located directly behind
where the two side frames meet each
other above the tongue.
• Pull on the wire harness until approxi-
mately 8” of the black shield extends out
the hole.
• Cut the blue, black and white wires ap-
proximately 2” behind the black shield.
• Unplug the two wires from the break-
away switch and mark with tape to iden-
tify for future connections.
• Unplug the violet and blue wire from the
tongue harness. Cut the wire leads from
the BrakeRite actuator at the butt-splic-
es. Remove these wires from the trailer
tongue and frame, then discard. Cut the
white ground wire also. Remove the
ground ring that secured with one of the
mounting bolts. The BrakeRite actuator
will be connected with the new wire har-
ness being installed.
• Locate the red, yellow and green wires
that have the male bullet plugs on them.
These wires power the lights on the trail-
er. Disconnect the plugs, secure wires
so that they will not slip back into the
hole in the top of the tongue. They will
be reconnected later.
• Disconnect the brown front side marker
lights by unplugging the connection.
• Disconnect the white ground wire from
the tongue by removing the screw in the
white grounding ring.
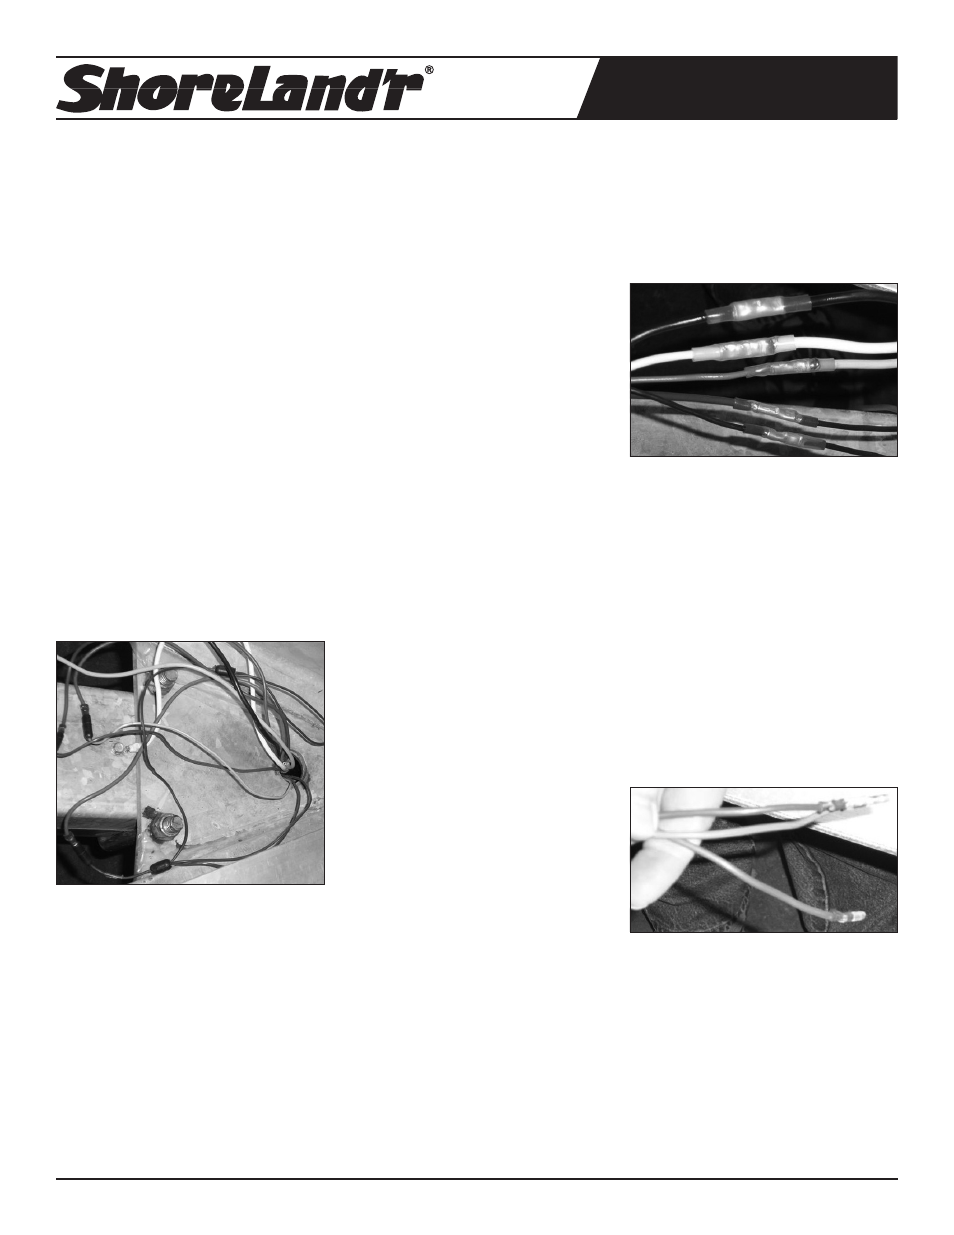
Making the Wire Connections at the Top
of the Tongue
• Locate a 6” section of the ¾” heat shrink
tube. Slide it over the end of the black
shield until the heat shrink tube is totally
on the black shielding.
• Strip the ends of the blue, black, and
white wires approximately 3/8”.
• Locate the new section of wire harness
with the plastic loom. It has a tee located
closer to one end than the other. Inside
the plastic loom are three colored wires,
blue, black and white.
• Mate the blue to blue, black to black,
and white to white wires with those just
stripped on the existing section of wire
harness. Connect together by crimping
the butt connectors already attached to
the wires of the new wire harness sec-
tion.
• Locate the two black wires from the
breakaway switch that were marked
with tape. Cut the plugs off the ends of
the wires and strip the ends 3/8”. Con-
nect one of the wires to the violet wire
of the new wire harness and the other to
the black wire of the new wire harness.
• Heat the shrink connections with a heat
gun or other means making sure the
wires are not overheated causing the
coating to melt.
• Once all of the above connections have
been sealed, slide the ¾” shrink tube over
all of the connections so they are located
in the center of the ¾” shrink tube. The
three trailer light leads should extend out
past the end of the shrink tube.
• One end of the shrink tube should be lo-
cated on the black cable shield while the
other end is on the plastic loom of the
new harness. Heat the shrink tube with a
heat gun or alternate source of heat. Do
not overheat.