Lanzar OPTICAP60 User Manual
Page 2
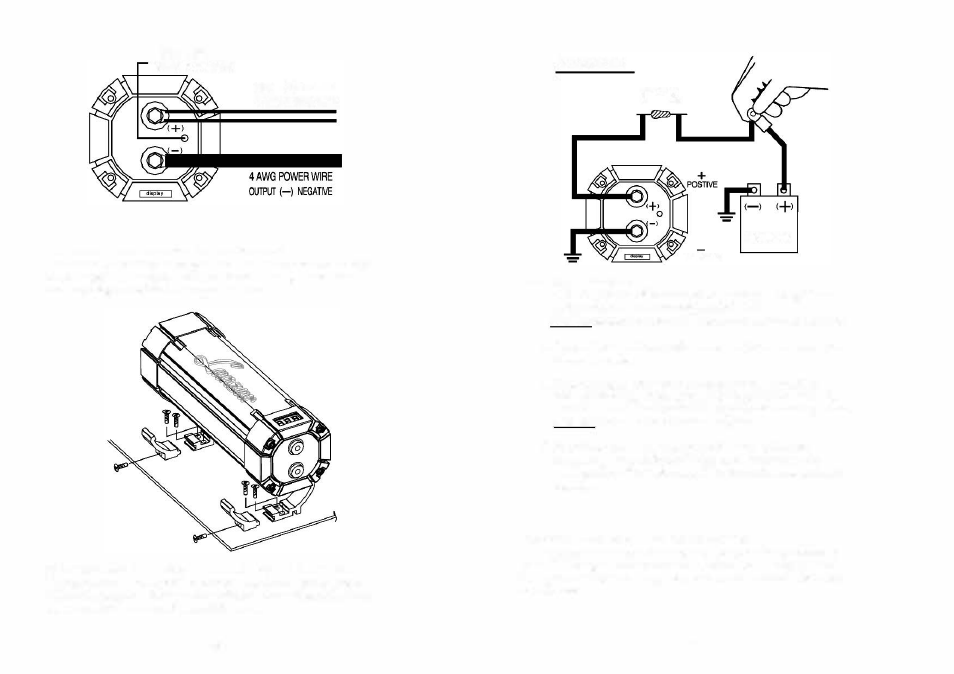
VRl/VClTAGE
TOI..EllANQ: ADJ.JSTh£NT
INPUT
( +)
POSmvE
4 AWG POWER �RE
INSTALLATION AND MDUNTING:
You must first attach the mounting tabs to the capacitor before mounting it.
Use the supplied hardware shown
in
the picture to the right. Notice the
small mounting screw hole in the capacitor chassis.
CHARGING THE CAPACITDR AND WIRING:
The capacitor must
be
charged before connecting the Power and Ground
cables to the capacitor. Failure to charge the capacitor will result in a large
spark generated from the rapid inflow of c
urren
t.
- 2 -
CHARGING
To Charge the capacitor:
BULBI
RESISTOR
BATIERY
NEGATIVE
I.
Make Capacitor positive terminal connections with amplifier and
tighten the bolt. Do not over-tighten the bolts!
Caution: Stripped
tenninalii are not covered under the capacitor's warranty.
2.
Connect the ground cable with battery, amplifier, then refer to the
attached drawing.
3.
Place the supplied charging bulb
/
resistor between positive
tenninal of the capacitor and the battery's positive tenninal. Do
this for
2
-
3
minutes or until the charging bulb
/
resistor goes out.
Caution:
The charging bulb
I resistor will
get hot!
4.
Immediately take out the charging bulb
/
resistor from the
connecting wire after the charging process. And connect the
positive cable of the battery directly to the positive tenninal on the
capacitor.
DISCHARGING THE CAPACITOR:
When you want to take out the capacitor after you finish the installation
process from original
car
audio system. You must do discharge process
when you want to move the capacitor. It will be safe to release the power
of the capacitor.
-
3
-