Preparing the product for use / operation, Loading the magazine, Operation – Parkside PDT 40 C2 User Manual
Page 25
25
GB
Preparing the product for use / Operation
Connect the device to a suitable compressed
air source.
1. To do so, press the compressed air hose quick-
release coupling (not included in the scope of
delivery) on the ¼" threaded nipple
4
of the
compressed air tacker.
Locking is automatic.
2. Connect the other end of the compressed air
hose to the (filter) pressure reducer on the com-
pressor.
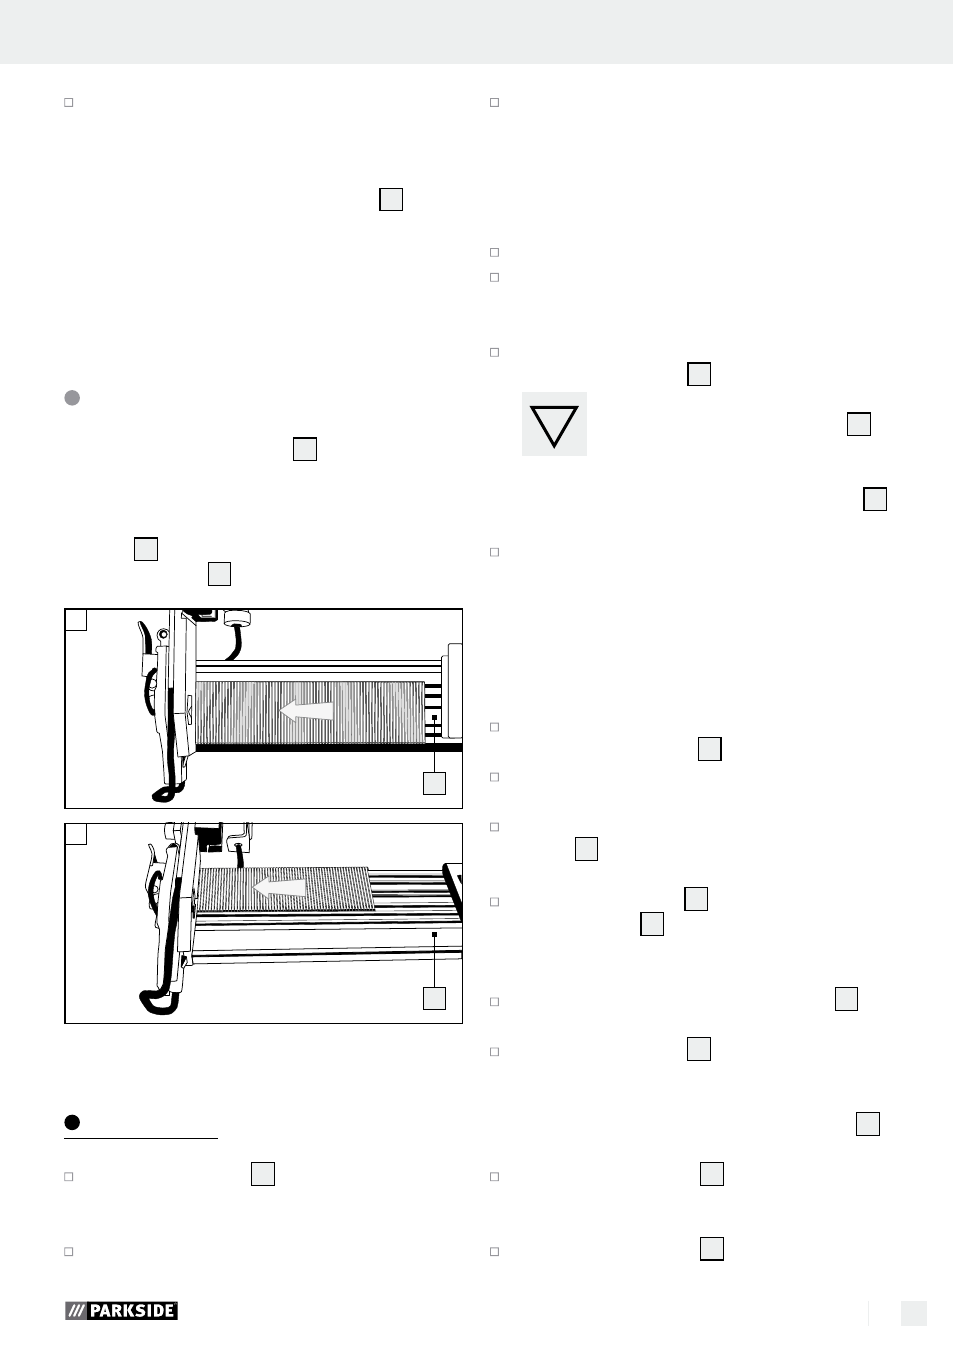
Loading the magazine
1. Press the magazine lever
5
and pull the mag-
azine cover back to its stop position.
2. Insert the corresponding fastener (nails, see
Fig. 01 or staples, see Fig. 02) into the maga-
zine
6
. The tacks must be put on the rail of
the magazine
6
.
02
6
01
6
3. Slide the magazine cover forwards until it locks.
Operation
Load the magazine
6
of the compressed air
tacker as described in the chapter “Loading the
magazine“.
Use the pressure reducer to set the correct
operating pressure.
Ensure that the permissible operating pressure
of 8 bar at the device is never exceeded.
Operating pressure that is too high does not
provide any performance increase, but only in-
creases compressed air consumption and ac-
celerates wear on the device.
Switch on the compressor.
Allow the compressor to run once long enough
until maximum tank pressure is reached and the
device is switched off.
Place the compressed air tacker on the workpiece
and press the trigger
2
.
NOTE: The compressed air tacker
is equipped with a trigger lock
9
.
The fastener will only leave the device
when the mouth of the compressed air tacker is
pressed against the workpiece and the trigger
2
is actuated.
Check that the fastener has been driven in cor-
responding to the work requirements.
– If the fastener is protruding, increase the air
pressure in 0.5 bar increments.
– If the fastener is too deep, decrease the air
pressure in 0.5 bar increments.
As an alternative, you can accelerate the work
by keeping the trigger
2
depressed.
Set the compressed air tacker against the work-
piece.
Press the device against the workpiece until the
mouth
10
touches it. The fastener will leave the
device.
As long as the trigger
2
is kept depressed, each
time the mouth
10
touches the workpiece one
fastener will leave the device.
Another alternative is to keep the mouth
10
pressed against the workpiece.
Each time the trigger
2
is actuated, a fastener
will leave the device.
NOTE: Fine adjustment with the knurled screw
8
is possible.
Turn the knurled screw
8
downwards in order
to drive the fastener more deeply into the work-
piece.
Turn the knurled screw
8
upwards in order to
drive the fastener less deeply into the workpiece.
Safety of the fastener driving tool / Preparing the product for use