Curtis DPF151 User Manual
Curtis Digital Photo Frame
DPF151
1.5” Keychain Photo Frame
Instruction Manual
A. Introduction
Thank you for your purchase. This digital photo frame is designed to
transfer and store images from a PC and then display the images.
B. Warning
1. Do not expose this device to water or moisture. Care should be taken
so that objects are not placed on, nor liquids spilled on or inside the
device.
2. The device should be kept away from sources of high heat such as
radiators or stoves.
3. The device should be connected to a power supply only of the type
described in the operation instructions or as marked on the unit.
4. Do not remove cover. Refer servicing to qualified personnel.
C. Charging the battery
The internal battery of the device may be charged using the USB cable
when connected to a powered USB port (such as USB input on your
computer) or hub. At full charge, the device can provide up to 5 hours of
run time. This device will be fully charged after 2 hours. Do not leave the
device connected to the powered USB for longer than 12 consecutive
hours, otherwise damage and overheating of the device may occur.
D. Transferring Images
1. Connect the smaller end of the supplied USB cable to the unit, while
the other end to a free USB port on your computer, the unit will
automatically turn on, and on the computer a window will pop up. If no
window, press “ ” on the unit to assure that the “USB connection” is
switched to “Yes”. The “Preview” section allows you to browse for
photos, while the “Pics in DPF” section displays the pictures saved in
the unit. A dialog box of no pictures saved will pop up. There’s an icon
indicating failure/success of connection.
2. Tick right key of mouse on blank area to switch languages. Press
“Setting” to set front color and background color.
3. Select a picture, move the rectangle to crop for your favorite area. Click
“+/-“ to zoom out/in the picture till max/LCD size. Click “Rotate L/R” to
rotate preview picture counterclockwise/clockwise 90 degrees. Press
“Clear” to erase the rectangle with “Clear” becoming “Rect”, and the
picture will automatically turn to LCD size. Press “Rect” to recall the
rectangle. Click “Add” to add the selected picture into “Pics in DPF”
section.
4. You may delete/save selected/all pictures in “Pics in DPF” section.
5. Click “Down” to sync the unit for downloading pictures. Press “Exit” to
finish transferring images.
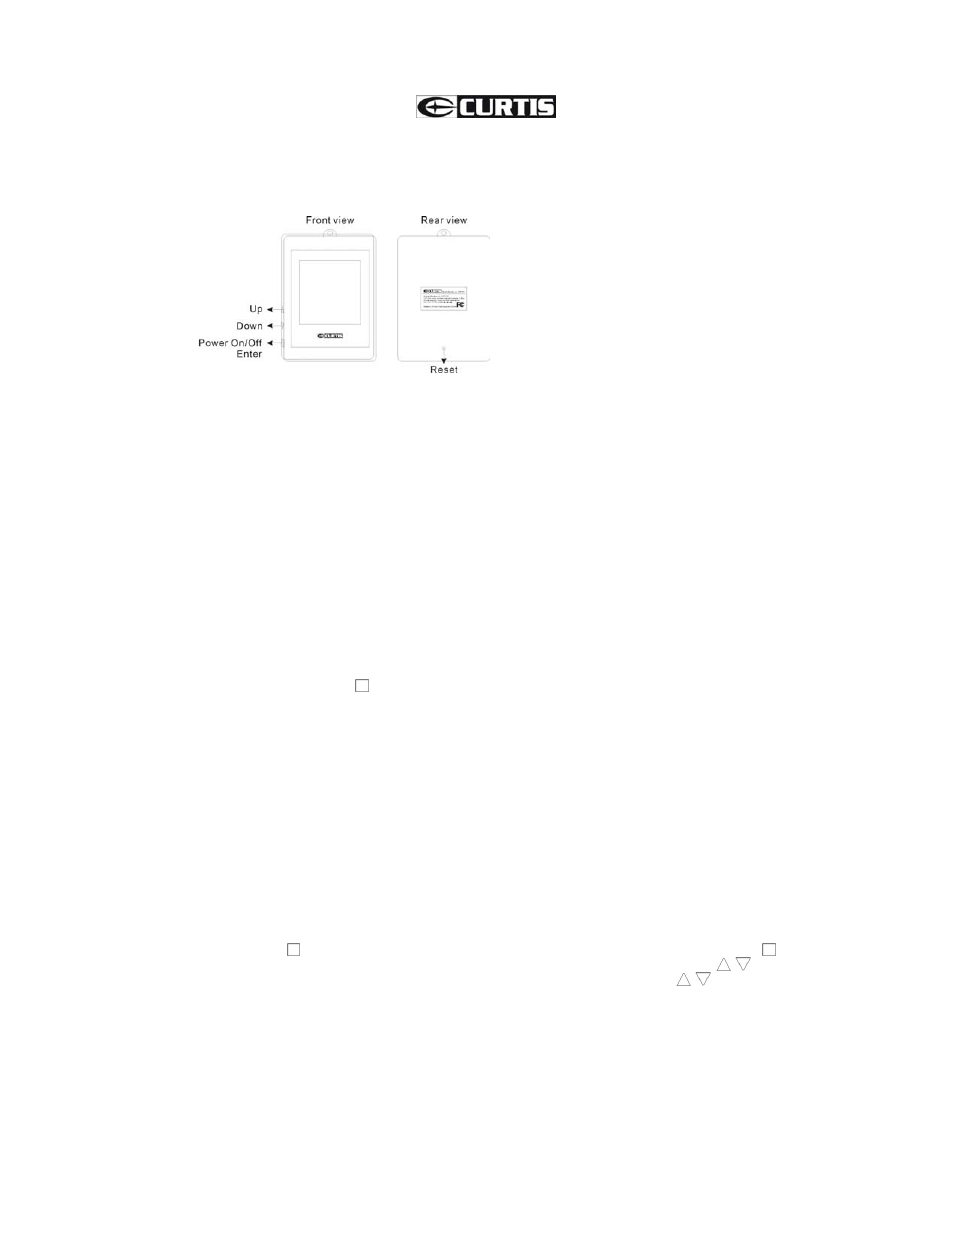
E. Using the unit
1. Press “ ” for above 3 seconds to turn on/off the unit, while press “ ”
once to enter submenu or select till back to main menu. Press “ / ” for
above 3 seconds to display time in picture, while press “ / ” once to
skip forward/backward selection.
2. Enter “USB Connect” to switch between charging and download.
3. Enter “Slide Show” to select display time (00~15 minutes) of every
picture. 00 means displaying still image.
4. Enter “Auto On/Off” to select if the unit automatically shut off in 00~30
minutes when no key is pressed for 3 minutes. 00 means turning off the
unit manually.
5. Enter “LCD Contrast” to switch the contrast at 01~06 level.
6. Enter “Backlight” to switch the backlight at 01~21 level.