Curtis SP303 User Manual
Page 3
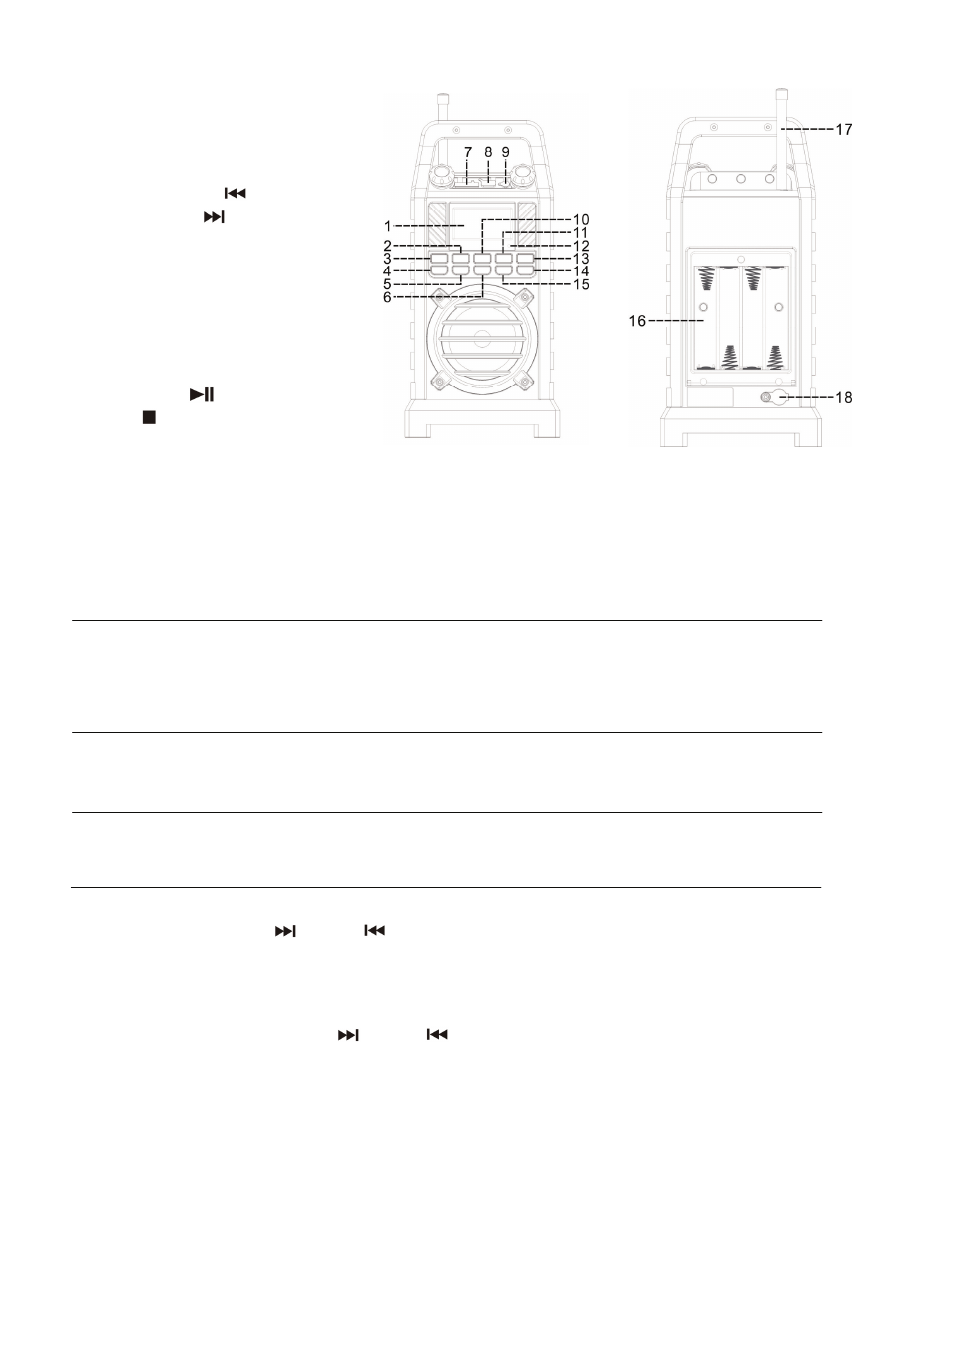
LOCATION OF CONTROLS
1) LCD
display
2) Function
button
3) On
/
Off button
4) Repeat/random play button
5) Tune/Skip
down
button
6) Tune/Skip
up button
7) SD card slot
8) USB
socket
9) 3.5mm
Aux-in
jack
10) Pre up/+10/Pro button
11) Volume down
12) Bluetooth LED indicator
13) Volume up button
14) Play/pause
button
15) Stop
button
16) Battery compartment
17) FM wire antenna
18) DC in jack
Caution:
Usage of controls or adjustments or performance of procedures other than those specified herein may result in
hazardous radiation exposure.
This unit should not be adjusted or repaired by anyone except qualified service personnel.
Precautions for use
Installation
•
Unpack all parts and remove protective material.
• Do not connect the unit to the mains before checking the main voltage and before all other connections have been
made.
•
Do not cover any vents and make sure that there is a space of several centimeters around the unit for ventilation.
AC connection
1. Connect the DC plug (19) to the DC jack (18) of the main unit, then, connect the AC/DC adaptor (20) to the AC outlet.
2. Turn on the unit by On/Off (3), if the LCD display (1) is on with backlighting, it means the power supply is normal.
Now your system is ready to play the music.
DC connection
For DC operation, please insert 8 pcs size C (UM-2) battery to the battery compartment (16) as the indication in battery
compartment and remove the DC plug (19) from the DC jack (18).
Listening to radio
Manual tuning
1. Turn on unit by On/Off button (3) & then press the Function button (2) to select “ FM ” mode.
2.
Press the
Tune / Skip up “
or down
” (6/5) button to change the received frequency in order to reach your
desired FM channel
3. Adjust volume up/down button (11/13) to the desired volume level.
Auto tuning
1. Press Function button (2) to select “ Tuner ” mode.
2. Press and hold the Tuning / Skip up “
or down
” button (6/5), the unit will start searching until reach receive a
FM channel, repeat this step until the desired radio station is being reached.
3. Adjust volume up/down button (11/13) to the desired volume level.
Hints for best reception:-
The receiver has a build-in FM rod antenna (17) on top of the unit. Extend it as long as possible to get best reception.
Preset stations
You can store up to total of 20 FM radio stations in the memory.
1. Set to FM mode by “Function” (2).
2. Turn to the desired FM station according the above “Listening Radio” instruction.
3. Press and hold “ Pre-up/+10/Pro ” button (10) few second to active program state. Display will flash with “ P 01 “.
EN-1