Curtis STT102USB User Manual
Page 4
4
Charging the Battery
This Turntable has a built-in rechargeable lithium
–ion battery which can provide up to 3 hours of
continuous use. To charge the battery, please connect the turntable to your computer by using the
USB cable. The battery will charge automatically. During the period of charging, the indicator reminds
green. When charging is complete, the green indicator LED will turn off.
Listening to a Record
1. Lift the buckle on the front of the turntable and open the lid.
2. Turn the power & volume control knob clockwise. The red LED will light to show that the turntable is
turned on. The green LED will light if the internal battery is charging. Once charging is complete, the
green LED will turn off.
3. Place a record on the turntable and select the player speed (33/45/78) according to the desired
record speed. NOTE: when playing a 45 rpm record, use the included 45 rpm adapter.
4. Open the tone arm clip to release the tone arm. Push the lift lever backward to raise the tone arm
and gently move the tone arm to the desired position over the record.
The turntable will begin to spin when the arm is moved toward the record. Push the lift lever forward
lower the tone arm slowly onto the desired position on the record to begin playing the record. Please
note: The record will begin to spin only when the tone arm is moved over the record if the Auto Stop is
turned on.
5. If the Auto Stop Control is turned ON, the record will stop automatically when finished. If Auto Stop
Control is turned OFF, record will NOT stop automatically when finished.
6. For best performance and product maintenance, unplug the turntable when not in use.
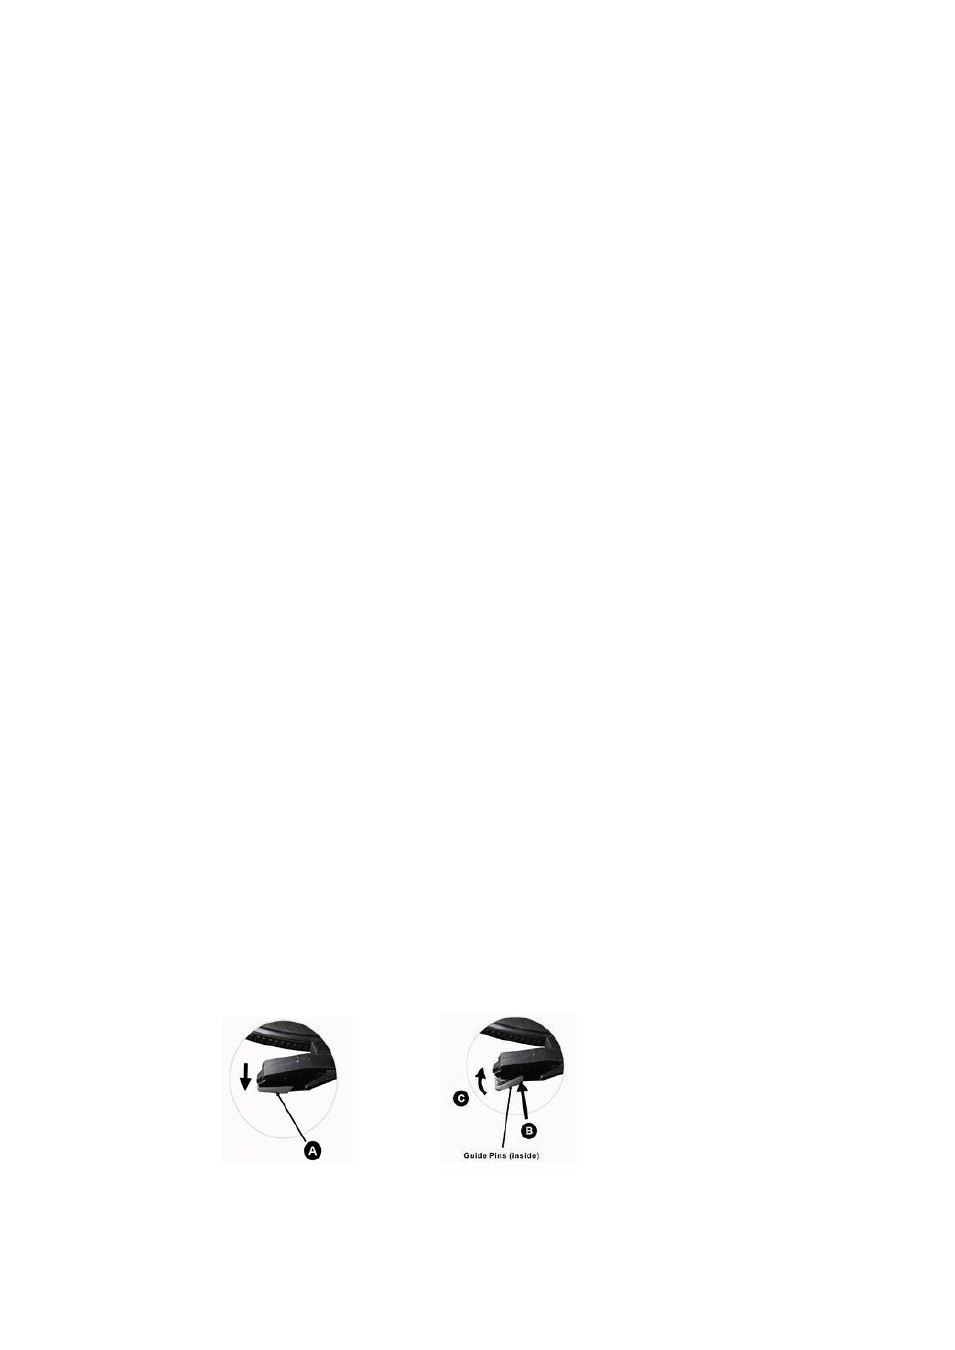
TURNTABLE STYLUS (needle) REPLACEMENT
To replace the turntable stylus (needle), please refer to the instructions below:
-Removing the stylus from the cartridge
1. Place a screwdriver at the tip of the stylus and push downward as shown in
direction “A”.
2. Remove the stylus by pulling the stylus forward and pushing downward.
-Installing the stylus (needle)
1. Hold the tip of the stylus and insert the stylus by pressing as shown in
direction “B”.
2. Push the stylus upward as in direction «C» until the stylus locks into the tip position.