Wiring, Getting ready – Casio XJ-SK600 User Manual
Page 8
E-7
Getting Ready
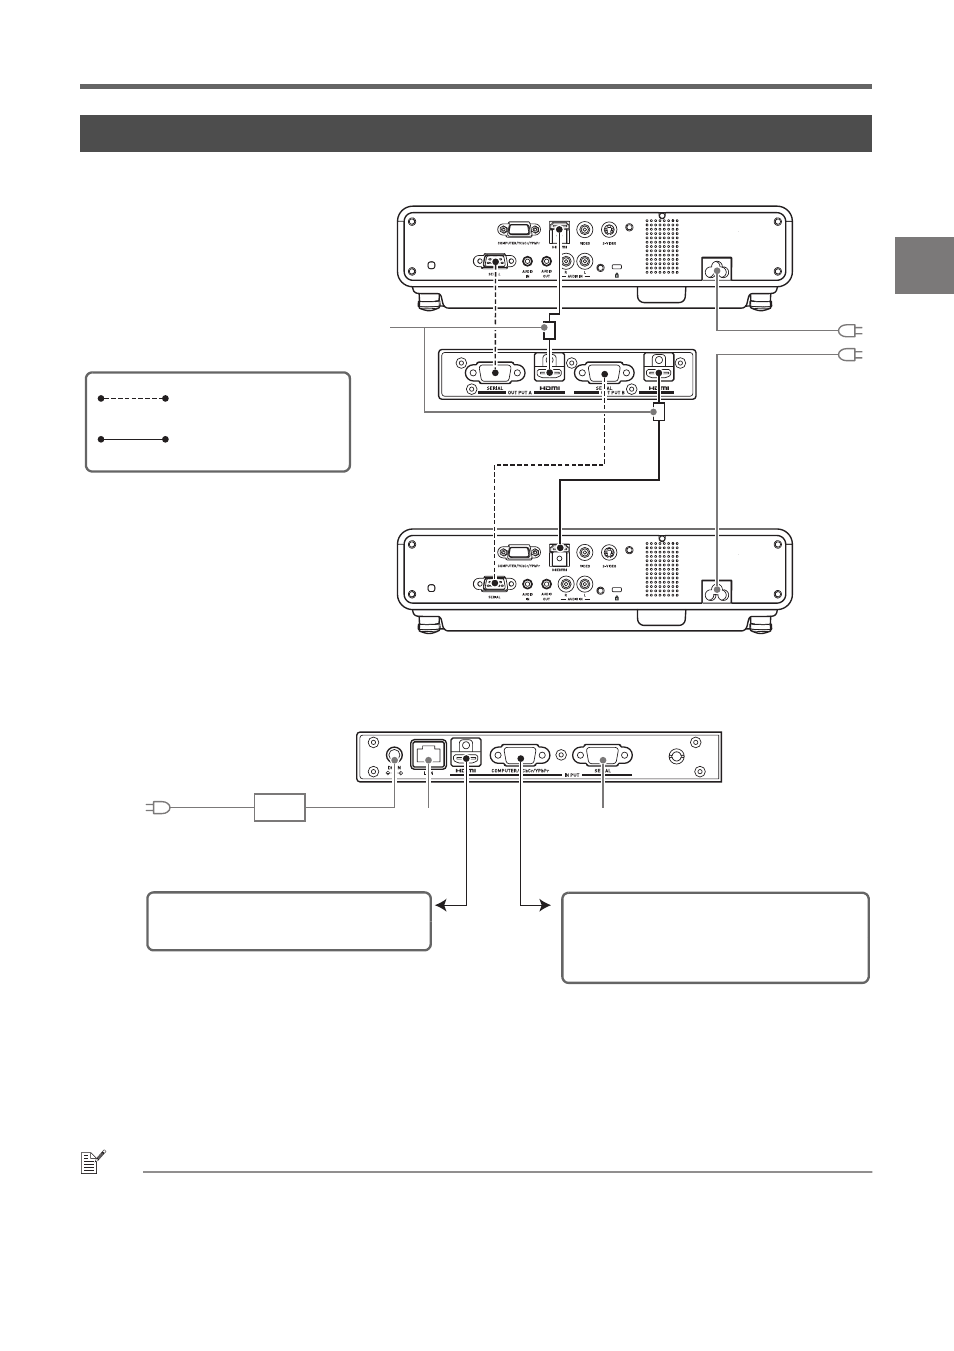
Wire the Control Box and two projectors inside the Cabinet as shown in the illustration below.
When connecting the Control Box to a projector using a supplied HDMI cable, connect the plug of the
cable that is nearest the ferrite core to the HDMI port of the Control Box.
NOTE
z The HDMI cables and RS-232C cables that connect the Control Box to the projectors can be stored in
Storage Box (A) when they are unneeded. The Control Box AC adapter can be stored in Storage Box
(B). See page E-15 of this manual for an illustration that shows the locations of Storage Box (A) and
Storage Box (B).
Wiring
*1 To control the Projector System from an external device over a LAN, use a commercially available
LAN cable to connect this terminal to the LAN terminal of the external device.
*2 To control the Projector System from an external device over an RS-232C connection, use a
commercially available serial cable (cross) to connect this port to the serial port of the external
device.
Projector A
(Side nearest the Control Box)
Use the supplied
power cord to plug
into an outlet.
Control Box side
Use a supplied RS-232C
cable to connect.
Use a supplied HDMI
cable to connect.
Projector B
(Side furthest from the Control Box)
Ferrite core
Connect the supplied AC adapter and
plug it into a power outlet.
Connect to the RGB output terminal (using the
included D-sub mini cable or a commercially
available cable) or the component output
terminal (using a commercially available cable)
of the image source device.
*1
*2
Control Box back
Use a commercially available HDMI cable to
connect to the HDMI output port of an
image source device.