Fig 1 fig 2, Preparing wrench for use 4. operating instructions – Sealey SA4 User Manual
Page 2
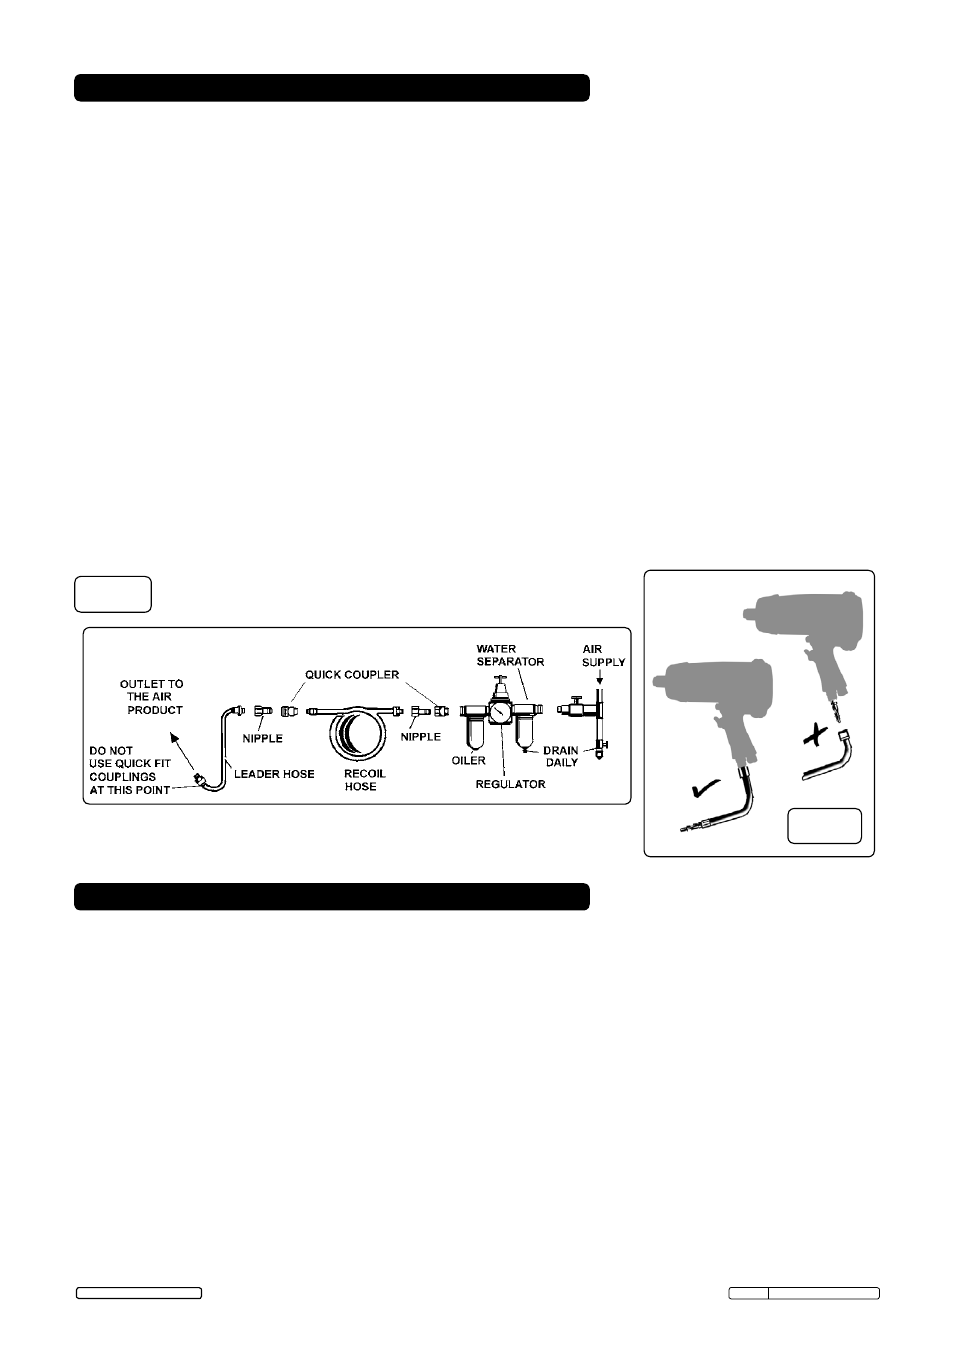
3.1. Air Supply
Recommended hook-up procedure is shown in fig 1.
3.1.1. Ensure wrench air valve (or trigger) is in the "off" position before connecting to the air
supply.
3.1.2. You will require an air pressure of 90psi, and an air flow according to specification.
3.1.3.
WARNING! Ensure the air supply is clean and does not exceed 90 psi while operating the
wrench. Too high an air pressure and unclean air will shorten the product life due to
excessive wear, and may be dangerous causing damage and/or personal injury.
3.1.4. Drain the air tank daily. Water in the air line will damage the wrench.
3.1.5. Clean air inlet filter weekly.
3.1.6. line pressure should be increased to compensate for unusually long air hoses (over 8
metres). The minimum hose diameter should be 1/4” I.D. and fittings must have the same
inside dimensions.
3.1.7. Keep hose away from heat, oil and sharp edges. Check hose for wear, and make certain
that all connections are secure.
3.2. Couplings.
Vibration may cause failure if a quick change coupling is connected directly to the wrench.
To overcome this, connect a leader hose to the wrench. A quick change coupling may then
be used to connect the leader hose to the air line recoil hose. See fig 1 & 2.
3.
PREPARING WRENCH FOR USE
4. OPERATING INSTRUCTIONS
WARNING! Ensure you read, understand and apply safety instructions before use.
4.1. Only use impact sockets which are specifically designed for use with an impact wrench.
4.2. This impact wrench is heavy. Maintain control of the tool at all times during use.
4.3. Connect the wrench to the air hose as in chapter 3.
4.4. When the forward/reverse button protrudes over the trigger as seen in fig.3 the wrench is
running in the forward direction (tightening). To select reverse (loosening) push the button
inwards. The other end of the button will now be protruding from the rear face of the wrench.
To return to forward running push the button inwards at the rear face of the wrench.
4.5. Place the socket over the subject nut and depress the trigger to operate the wrench.
4.6. The flow of air may be regulated by adjusting the flow valve at the base of the handle (See
fig.3)
DO NOT use any additional force upon the wrench in order to remove a nut.
DO NOT allow wrench to free run for an extended period of time as this will shorten its life.
fig 1
fig 2
Original Language Version
SA4.V2 Issue: 5 (SP) - 06/09/13
Jack Sealey limited 2013