Sealey AK2018 User Manual
3 in 1 metal, voltage & stud detector, Instructions for, Model
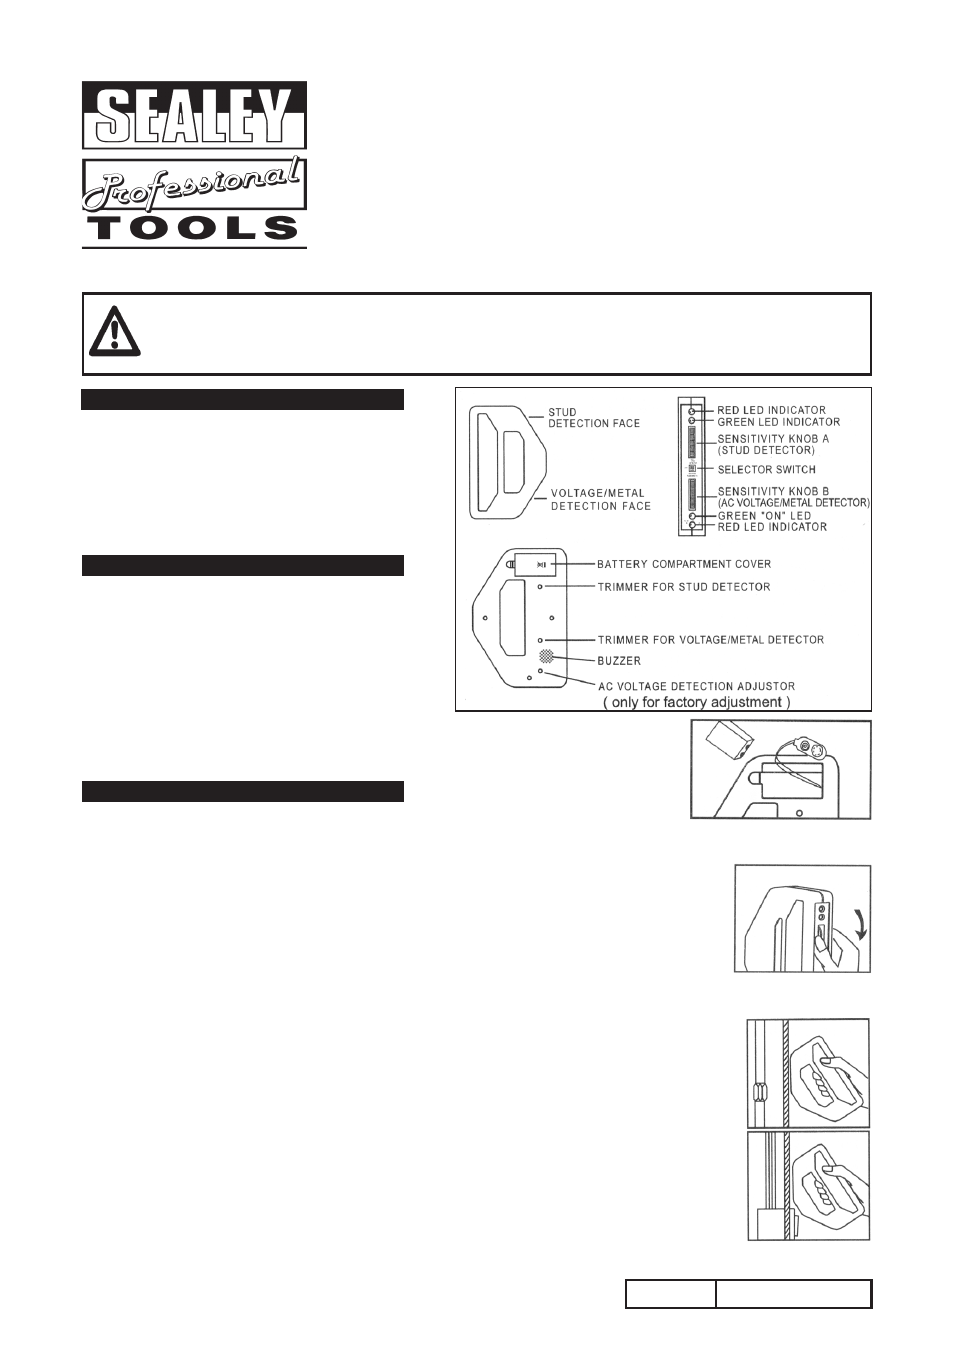
1. DESCRIPTION
InstructIons For:
3 IN 1 mETal, vOlTagE & STuD
DETECTOR
MoDEL:
aK2018.V2
Thank you for purchasing a Sealey product. Manufactured to a high standard this product will, if used according to these
instructions and properly maintained, give you years of trouble free performance.
IMPORTANT: PlEaSE REaD THESE INSTRuCTIONS CaREFullY. NOTE THE SaFE OPERaTIONal
REQuIREmENTS, WaRNINgS aND CauTIONS. uSE THIS PRODuCT CORRECTlY aND WITH CaRE FOR THE
PuRPOSE FOR WHICH IT IS INTENDED. FaIluRE TO DO SO maY CauSE DamagE aND/OR PERSONal
INJuRY aND WIll INvalIDaTE THE WaRRaNTY. PlEaSE KEEP INSTRuCTIONS SaFE FOR FuTuRE uSE.
combined unit for the accurate detection of live or dead
electricity cables, water or gas pipes and wooden studs or
battens. Powered by a 9V battery (not supplied) the
detector will, with red and green LED displays and an
audible signal, show the presence of metal, electricity and
studs or battens.
2. SaFETY
When the unit gives a ‘no voltage’ reading (no
flashing of red LED and beeping of the buzzer
when touching the conductor), check the unit on a
known voltage source BEForE touching the
conductor.
Intended for indoor use only -
DO NOT get the
detector wet.
the unit will not detect electricity in shielded
conductors i.e. those in a metal conduit. In such
cases it will indicate only the presence of metal.
3. OPERaTION
Warning! Ensure that you read, understand and apply the safety instructions
before attempting to use the detector.
Note: remove the battery cover. Install a 9V PP9 battery. refit the battery cover. refer to Fig.2.
3.1
metal/voltage Detection
3.1.1 Hold the detector as shown in Fig.3. and rotate knob B (Voltage/Metal Detector) fully
downwards. Move the selector switch to the Voltage/Metal Detection position, the green
LED will illuminate immediately. Make sure that the unit is far away from any metal or
current carrying conductor.
3.1.2 turn knob B upwards until the indicators come on (red LED illuminated and buzzer
activated). reverse the knob slowly until the indicators just go off . the unit is now ready
for use.
3.1.3 Hold the unit as shown in Fig. 4 and move it sideways (horizontally) across the wall.
the red LED and a continuous buzzer tone will come on when a metal object is in the
vicinity. A current carrying conductor will be shown with a rED blinking LED and a
beeping sound from the buzzer.
3.1.4 If the indicators do not come on, or will not go off, after the unit has been switched on, the
detector requires adjustment. For adjustment details, please refer to section 3.4.
Notes: a) some walls may contain metallised fibre, for fire-proofing, which will spread the area of
voltage pick-up. Placing your free hand on the wall may cancel the effect.
b) rubbing or banging the unit on the wall may generate static electricity and cause
false readings.
c) Because of the extremely small current required to cause a reading on the unit, an
apparent false reading may be seen in some situations e.g. a conductor with poor
insulation touching a damp wall, will show a voltage on the wall. In this situation, the
unit is indicating a potential hazard which should be checked by a qualified electrician.
Fig.2
Fig.3
Fig.4
AK2018.V2
Issue no: 1 - 12/08/08
Fig.1