Sealey ES900F User Manual
Es900f.v2, Safety instructions 2. specification, Assembly
Thank you for purchasing a Sealey product. Manufactured to a high standard this product will, if used according to these instructions
and properly maintained, give you years of trouble free performance.
1. SAFETY INSTRUCTIONS
2. SpECIFICATION
IMPORTANT: pLEASE READ THESE INSTRUCTIONS CAREFULLY. NOTE THE SAFE OpERATIONAL REQUIREMENTS, WARNINGS AND
CAUTIONS. USE THIS pRODUCT CORRECTLY AND WITH CARE FOR THE pURpOSE FOR WHICH IT IS INTENDED. FAILURE TO DO SO MAY
CAUSE DAMAGE OR pERSONAL INJURY, AND WILL INVALIDATE THE WARRANTY. pLEASE KEEp INSTRUCTIONS SAFE FOR FUTURE USE.
INSTRUCTIONS FOR:
FOLDING ENGINE STAND 900kg
Model No
:
ES900F.V2
Max capacity . . . . . . . . . . . . . . . . . . . . . . . 900kg
Width . . . . . . . . . . . . . . . . . . . . . . . . . . . . . 820mm
Length. . . . . . . . . . . . . . . . . . . . . . . . . . . . . 1105mm
Height . . . . . . . . . . . . . . . . . . . . . . . . . . . . . 910mm
WARNING! Ensure all health and safety, local authority, and general workshop practice regulations are strictly adhered to when using this
equipment.
Before using the stand ensure it is in sound condition and good working order.
Replace or repair damaged parts. Use recommended parts only. Non authorised parts may be dangerous and will invalidate the warranty.
Keep the stand clean for best and safest performance.
Locate the stand in an adequate working area for its function, keep area clean and tidy and free from unrelated materials and ensure
there is adequate lighting.
Use on a firm, level surface capable of sustaining the stand and the load.
Remove ill fitting clothing. Remove ties, watches, rings and other loose jewellery. Contain and/or tie back long hair.
Maintain correct balance and footing. Ensure the floor is not slippery and wear non-slip shoes.
Ensure all non-essential persons keep a safe distance whilst the stand is in use.
Lock mounting plate in position before fixing a load and ensure the load is centred and securely mounted on the locking plate.
Ensure the stand and the load are stable.
To move a loaded stand, push it from the load side.
DO NOT move the stand from the handle end and never pull the stand towards
yourself. Also ensure surface over which the stand is to travel is strong enough to take the stand and load and that it is not cracked,
uneven or obstructed.
Keep hands clear of moving parts when folding and unfolding the stand.
Wear appropriate protective clothing.
DO NOT operate unit if damaged.
DO NOT allow untrained persons to operate the stand.
DO NOT exceed the rated capacity of 900kg.
DO NOT use the stand when you are tired or under the influence of alcohol, drugs or intoxicating medication.
DANGER: DO NOT work under an engine mounted on the stand.
DO NOT use the stand for purposes other than for which it is designed.
WARNING! Failure to comply with these instructions may result in damage to the stand, load and/or personal injury.
When not in use store stand in a safe, dry, childproof area.
Original Language Version
ES900F.V2 Issue: 1 - 06/03/12
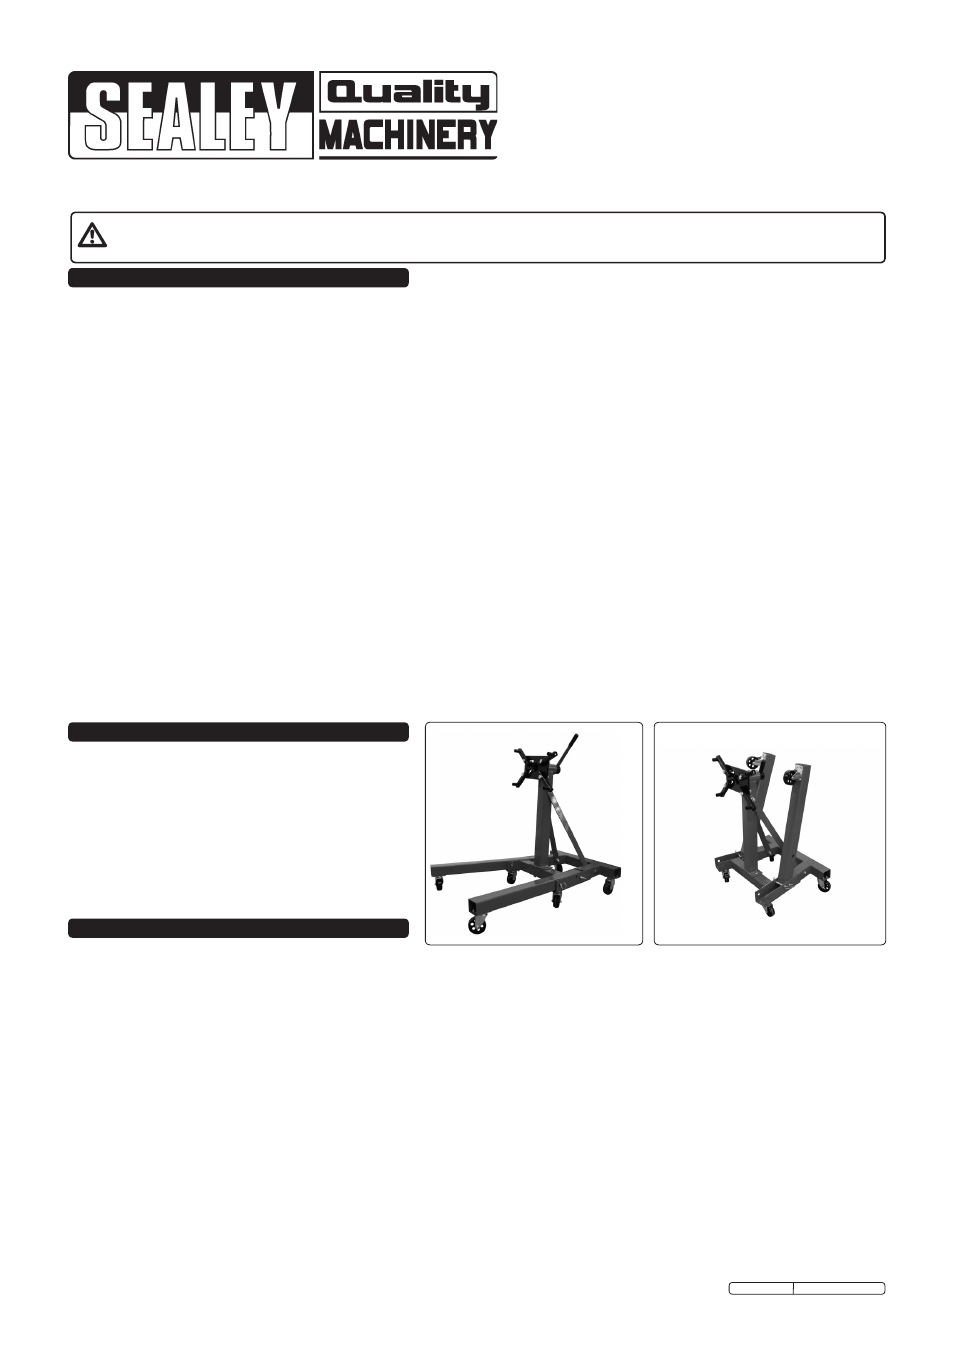
3. ASSEMBLY
Refer to fig.1 overleaf
3.1 Bolt the large castor wheels (9) to the rear-most mountings on the main frame and to the legs using M8x20 bolts (4), M8 washers (3),
M8 lock washers (2) and M8 nuts (1). Bolt the small castor wheels (14) to the forward mountings on the main frame using M8x14 bolts
(10), M8 washers (3), M8 lock washers (2) and M8 nuts (1).
3.2 Assemble the legs to the frame using the Ø16x110 pins (11). Lay each leg into the open channel and insert the first pin into the hole
nearest the rear of the frame. This will be the folding leg pivot. Retain the pin with a ‘R’ clip (15). Lock the leg in the down position by
inserting a second Ø16x110 pin (11) into the hole nearest the open end of the channel and retain with a ‘R’ clip (15).
3.3 Bolt the main upright to the cross member between the open channels using two M14x100mm bolts (8), M14 washers (7), M14 lock
washers (6) and M14 nuts (5). Do not fully tighten the nuts at this stage.
3.4 Take the two support struts and loosely bolt them to the top of the main upright using a M14x100 bolt (8). Insert two M14 bolts (8)
through the angled parts of the main base in the holes adjacent to the rear square section ensuring that the bolt heads are on the outside
of the frame. Slide the bottom of each support strut over the end of each bolt in turn and secure with the nuts and washers provided.
Fully tighten all the nuts and bolts holding the main upright and struts.
3.5 Take the engine mounting plate and insert it through the tube at the top of the main upright. Rotate the plate until one of the holes in
the inner tube is aligned with a hole in the outer tube and insert the locking pin (13).
3.6 Take the handle and insert it into the hole in the part of the turning plate tube protruding through the top of the main upright.
3.7 Attach the adjustable mountings to the turning plate using M14x60 bolts (12), M14 washers (7), M14 lock washers (6) and M14 nuts (5).
3.8 To fold up the legs remove the 'R' clips (15) from the Ø16x110 pins (11) furthest from the rear of the frame and pull out the pins. Fold the
legs up. Always retain the legs in the upright position by re-inserting the pins (11) through the holes in the frame directly in front of the
folded legs. Retain the pins (11) with the 'R' clips (15).