Sealey CT951 User Manual
Model: ct951.v2, Fig. 1 fig. 2, Instructions for petrol engine compression tester
INSTRUCTIONS FOR
PETROL ENGINE COMPRESSION TESTER
MODEL: CT951.V2
Thank you for purchasing a Sealey Product. Manufactured to a high standard this product will, if used according to these instructions and
properly maintained, give you years of trouble free performance.
IMPORTANT:
PLEASE READ THESE INSTRUCTIONS CAREFULLY. NOTE THE SAFE OPERATIONAL
REQUIREMENTS, WARNINGS AND CAUTIONS. USE THIS PRODUCT CORRECTLY AND WITH CARE FOR THE
PURPOSE FOR WHICH IT IS INTENDED. FAILURE TO DO SO MAY CAUSE DAMAGE AND/OR PERSONAL INJURY,
AND WILL INVALIDATE THE WARRANTY. PLEASE KEEP INSTRUCTIONS SAFE FOR FUTURE USE.
NOTE: It is our policy to continually improve products and as such we reserve the right to alter data, specifications and component parts without prior notice.
IMPORTANT: No liability is accepted for incorrect use of this equipment. WARRANTY: Guarantee is 12 months from purchase date. proof of which will be required
for any claim. INFORMATION: Call us for a copy of our latest catalogue on 01284 757525 and leave your full name and address including your postcode.
01284 757500
01284 703534
Sole UK Distributor
Sealey Group,
Bury St. Edmunds, Suffolk.
www.sealey.co.uk
Web
1.
SAFETY INSTRUCTIONS
2.1
Preparation.
2.1.1 Run engine until normal operating temperature is achieved.
2.1.2 Stop engine, loosen spark plugs one turn, with an air hose, blow dirt and debris from the spark plug wells.
2.1.3 Remove all spark plugs.
2.1.4 If fitted with a carburettor set the throttle valve wide open.
!
WARNING! The ignition system MUST be disabled. Failure to disable could result in damage to the ignition
system or ECU.
2.1.5 Unplug the low tension connections to the coil. If you aren't sure how to disable the vehicle ignition system
then consult the manufacturer’s service instructions or a proprietary manual before you start. It is also
good
practice to unplug the fuel injectors or disable the fuel pump, especially on cars fitted with a catalytic convertor.
This prevents unburned fuel getting into the exhaust system during the test.
2.2
Compression Test.
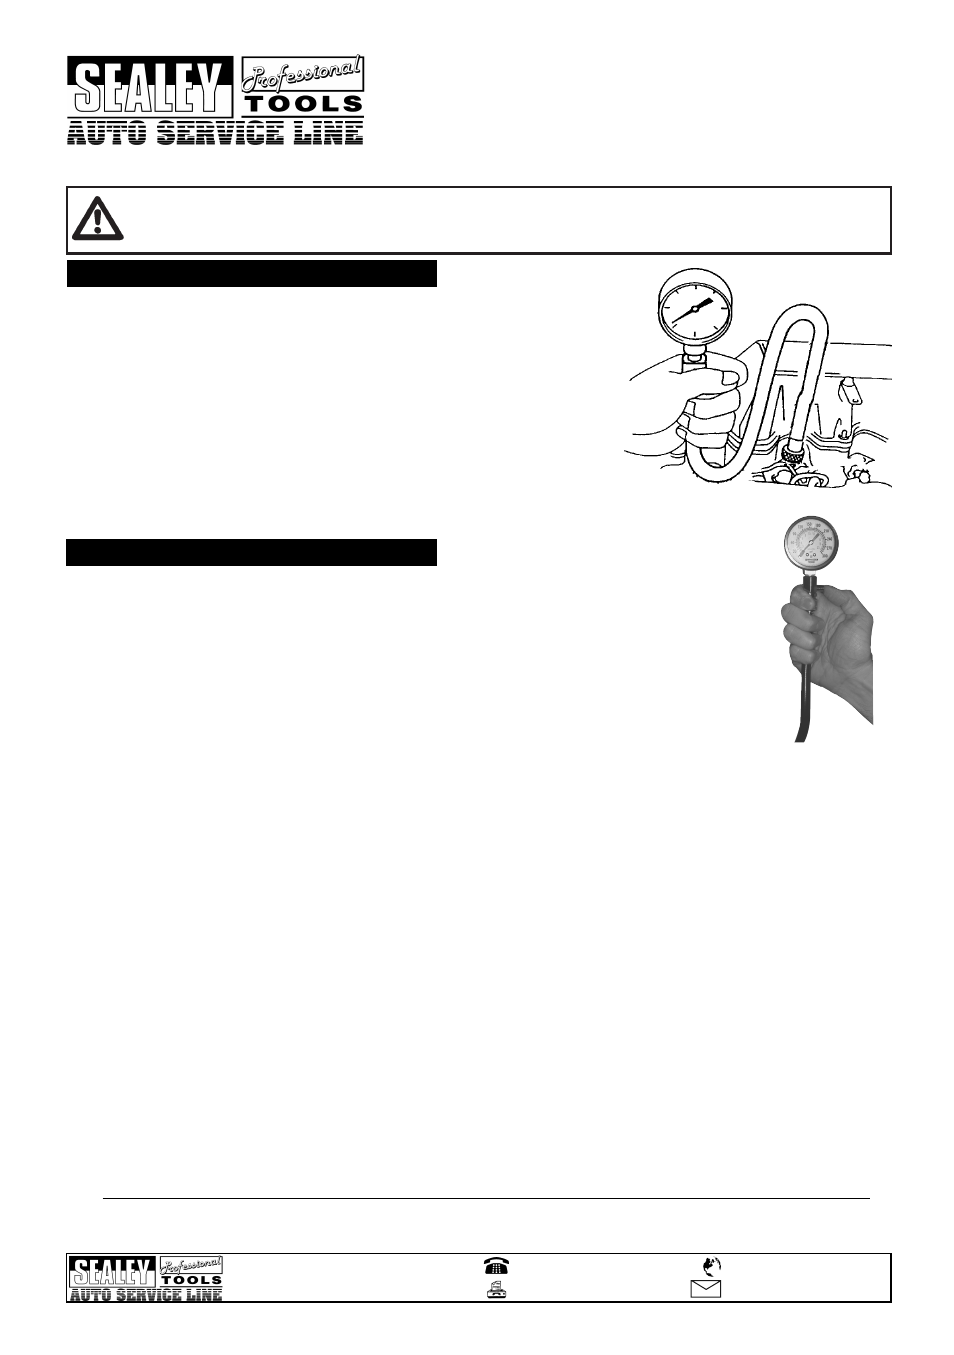
2.2.1 Using the appropriate threaded adaptor, screw the tester into a spark plug hole (fig. 1) (finger-tight - do not use a wrench) or
using the push fitting, hold the compression tester firmly against the spark plug aperture.
2.2.2 Crank the engine until no increase in pressure is noted on the gauge reading; usually 3 or 4 revolutions is sufficient. Take a
note of the pressure reading.
2.2.3 Decompress tester by pressing release valve (fig. 2) remove the compression tester from the spark plug hole and proceed to
the next cylinder. Note pressure reading for each cylinder.
Note! The actual figure in psi is not important. It is important that all cylinders have approximately the same compression
pressures.
Note! On high compression engines (150psi and higher) the pressure should not vary more than 15psi from the highest to
the lowest cylinder reading.
Note! On low compression engines (under 150psi) the pressure should not vary more than 10psi from the highest to
the lowest cylinder reading.
Note! Compression readings are unbalanced when one or two cylinders are considerably higher or lower than the others.
2.3
CAUSES OF UNBALANCE.
2.3.1 Low cylinder compression is caused by leakage from:
a. Head Gasket - explosive sound when running engine.
b. Head Gasket between cylinders - compression will be low in two adjacent cylinders and water may appear in cylinders
or crankcase.
c. Valves that are not seating properly.
d. Piston rings that are worn. Pour a teaspoon of oil into the spark plug hole to seal the rings. Repeat test. If compression
reading increases, the rings are worn; no increase indicates a bad valve.
2.3.2 High cylinder compression is caused by accumulation of carbon in that cylinder. High compression readings in all cylinders is
caused by an even accumulation of carbon in all cylinders. This may cause detonation “pin
king” that is difficult to eliminate.
!
WARNING! Ensure all Health & Safety, local authority and general workshop
practice regulations are strictly adhered to when using tools.
#
DO NOT use tester if damaged.
$
Maintain the tester in good and clean condition for best and safest performance.
$
Wear approved eye protection. A full range of personal safety equipment is available
from your Sealey dealer.
$
Wear suitable clothing to avoid snagging. Do not wear jewellery and tie back
long hair.
$
Account for all tools and equipment being used and do not leave them in, on or
near engine.
$
When not in use, place in protective case and store in a safe, dry, childproof area.
%
IMPORTANT: Always refer to the vehicle manufacturer’s service instructions or
a proprietary manual, to establish the current procedure and data.
These instructions are provided as a guide only.
2.
OPERATION
CT951.V2 - 1 - 081106
fig. 1
fig. 2