Dry vacuum cleaning, Wet vacuum cleaning, Fine dust vacuuming – Sealey PC85 User Manual
Page 3
6. DrY VACUUM ClEANING
WArNING! ensure you read, understand and apply section 1 'safety Instructions'.
reminder:
DO NOt vacuum hazardous substances. use of an incorrect filter will invalidate your warranty.
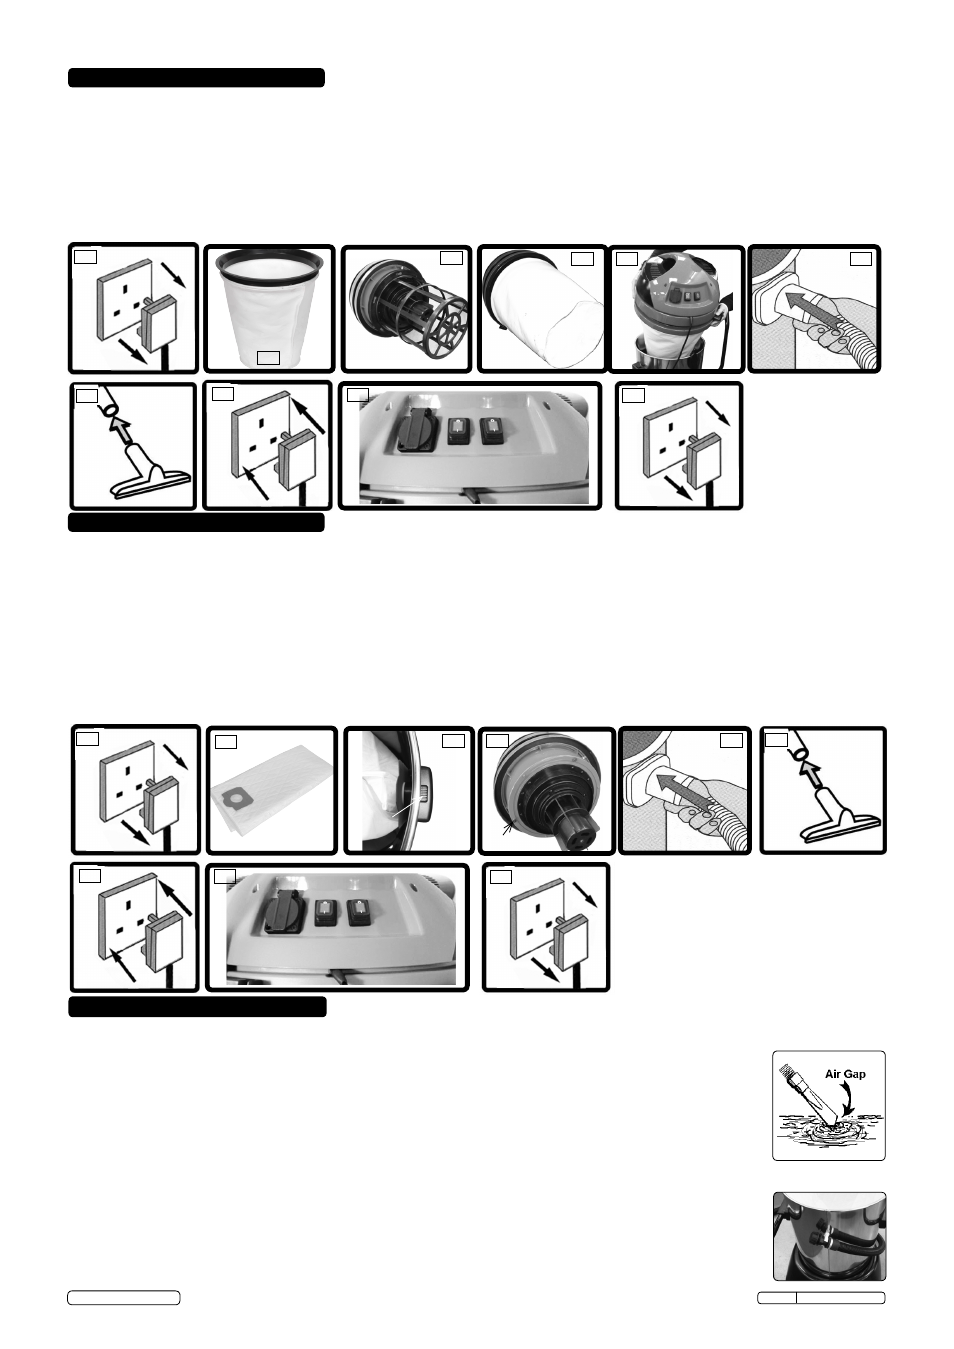
6.1. ensure the machine is unplugged from the power supply.
6.2. For dry vacuuming fit the polyester ring filter item "B" over the filter cage shown in 6.3.
6.4. replace the top section onto the tank together with the filter, and clip in place.
6.5. Insert the larger end of the flexible hose into the front inlet on the tank fully and an "engagement click" will be heard.
6.6. Push the required attachment onto the free end of the hose.
6.7. ensure the switch is 'off' ("o") before plugging into the power supply.
6.8. switch the motor/motors on to vacuum, position "I".
6.9. When vacuuming is completed, push the "o" button/buttons to switch the vacuum off, then unplug from the power supply.
8. WEt VACUUM ClEANING
WArNING! Ensure you read, understand and apply Section 1 ‘Safety Instructions’. Reminder: Remove plug from power supply
before opening unit. DO NOT vacuum solvents, explosives, inflammable and/or hazardous liquids such as petrol, oil, spirits,
paint, thinners, acids etc. Use of an incorrect filter will invalidate your warranty.
8.1. make sure the tank is clean and free from dust and dirt.
8.2. ensure the machine is unplugged from the power supply.
8.3. For wet vacuum cleaning the foam filter ("A") must be used. remove filter cage (7.4), remove any paper filter
fitted. ensure the foam filter is clean and dry. Place the foam filter ("A") over the exposed neck and adjust carefully.
8.4. re-position the head onto the tank, and clip into place.
8.5. Insert the larger end of the flexible hose into the front inlet on the tank fully and an engagement "click" will be heard.
8.6. Fit the required accessories or tubes to the suction hose.
8.7. ensure the switch is 'off' ("o") before plugging into the power supply.
8.8. switch the motor/motors on to vacuum, position "I".
8.9. When vacuuming is completed, push the "o" button/buttons to switch the vacuum off, then unplug from the power
supply.
8.10. After use, empty the tank via the drain hose, and tip any remaining. re-clip the hose and dry the tank with a cloth.
WArNING! the tank is not designed for liquid storage. Always empty liquids fully after use.
Never store the cleaner with liquid in the tank
Pc85 Issue: 1 - 01/12/14
Original Language Version
© Jack sealey limited
6.2
6.3
6.6
6.8
6.1
6.7
6.5
6.9
6.4
7. FINE DUSt VACUUMING
WArNING! ensure you read, understand and apply section 1 'safety Instructions'.
reminder:
DO NOt vacuum hazardous substances. use of an incorrect filter will invalidate your warranty.
7.1. ensure the machine is unplugged from the power supply.
7.2. For fine dust dry vacuuming fit the dust collection bag filter item "c".
7.3. the opening in the bag has a flexible rubber neck which will shroud the internal nozzle, terminating in a recessed annular ring.
7.4. remove the filter cage by slackening the three screws in the keyhole slots and twist cage. replace the top section onto the tank, and
clip in place.
7.5. Insert the larger end of the flexible hose into the front inlet on the tank fully and an "engagement click" will be heard.
7.6. Push the required attachment onto the free end of the hose.
7.7. ensure the switch is 'off' ("o") before plugging into the power supply.
7.8. switch the motor/motors on to vacuum, position "I".
7.9. When vacuuming is completed, push the "o" button/buttons to switch the vacuum off, then unplug from the power supply.
7.2
7.3
7.6
7.8
7.1
7.7
7.5
7.9
7.4
drain hose clip
3-screws
hose
release
button
6.3
Filter cage