Sealey AK433 User Manual
Rechargeable lantern, Ak433.v2, Instructions for
IMPORTANT: PLEASE READ THESE INSTRUCTIONS CAREFULLY. NOTE THE SAFE OPERATIONAL REQUIREMENTS, WARNINGS AND CAUTIONS.
USE THIS PRODUCT CORRECTLY AND WITH CARE FOR THE PURPOSE FOR WHICH IT IS INTENDED. FAILURE TO DO SO MAY CAUSE DAMAGE
AND/OR PERSONAL INJURY AND WILL INVALIDATE THE WARRANTY. PLEASE KEEP INSTRUCTIONS SAFE FOR FUTURE USE.
INSTRUCTIONS FOR:
RECHARGEABLE LANTERN
MODEL No:
AK433.V2
Thank you for purchasing a Sealey Product. Manufactured to a high standard this product will, if used according to these instructions and properly maintained, give you
years of trouble free performance.
1. SAFETY INSTRUCTIONS
1.1. GENERAL SAFETY
Ensure the lantern is charged for a minimum of 15 hours before initial use.
DO NOT charge the battery for more than 20 hours. Explosive gas will be
generated if overcharged.
DO NOT charge the battery if the ambient temperature is greater than
40
°C or less than 5°C.
WARNING! The lens may become hot after prolonged use.
DO NOT cover or block the lens during use.
DO NOT turn the lantern on when it is being charged.
DO NOT shine directly into your, other person’s or animal’s eyes.
DO NOT stand the lantern near any surface or item that may be adversely
affected by the heat emitted from the lens.
DO NOT allow children to use the lantern.
DO NOT handle or move the lantern whilst it is being charged.
DO NOT use the lantern if you suspect that the battery or the lantern
casing is damaged.
Ensure that correctly rated battery and bulb are used for replacements.
When not in use store the lantern in a safe, dry, childproof location.
DO NOT dis-assemble the battery for any reason.
DO NOT leave battery in a discharged state, recharge battery immediately.
If the lantern is not in use, recharge the battery every three months.
Dispose of the old battery in accordance with local authority regulations.
DO NOT dispose of with regular refuse.
1.2. ELECTRICAL SAFETY
USE ONLY THE SUPPLIED CHARGER PLUG FOR CONNECTING THE
LANTERN TO THE MAINS POWER SUPPLY.
USE ONLY THE SUPPLIED ADAPTOR LEAD FOR CONNECTING THE
LANTERN TO A VEHICLE'S 12V ACCESSORY SOCKET.
WARNING! It is the owner’s responsibility to read, understand and comply
with the following electrical instructions:
You must ensure the risk of electric shock is minimised by the installation
of appropriate safety devices. An RCCB (Residual Current Circuit Breaker)
should be incorporated in the main distribution board. We also recommend
that an RCD (Residual Current Device) is used with all electrical products,
particularly portable equipment which is plugged into an electrical supply
not protected by an RCCB.
You must also read and understand the following instructions concerning
electrical safety.
1.2.1.
The Electricity At Work Act 1989 requires all portable electrical
appliances, if used on business premises, to be tested by a qualified
electrician, using a Portable Appliance Tester (PAT), at least once a year.
1.2.2.
The Health & Safety at Work Act 1974 makes owners of electrical
appliances responsible for the safe condition of the appliance and the
safety of the appliance operator.
If in any doubt about electrical safety,
contact a qualified electrician.
1.2.3.
You must ensure that you:
Inspect the charger plug, cable and connector for wear and damage to
ensure items are safe before connecting to the mains power supply.
If worn or damaged
DO NOT use.
Check cables are always protected against short circuit and overload.
Important: Check that the voltage marked on the charger plug is the same
as the power supply to be used.
Uncoil the cable between charger and the lantern.
DO NOT pull the charger plug from the mains socket by the lead.
DO NOT use any other type of charger with this product.
DO NOT place the connector into any area of the lantern except the
correct jack inlet socket.
DO NOT try to take the charger plug apart.
DO NOT use the charger plug to charge or power any other electrical item.
DO NOT get the charger wet, or use in wet, damp conditions (for indoor
use only).
WARNING! NEVER substitute a standard 13 amp 3 pin plug, or any other
type of plug, for the charger plug.
2. INTRODUCTION & SPECIFICATIONS
3. CHARGING
2.1. INTRODUCTION
Lantern with swivel handle feature allowing pistol grip or carry handle
operation. Ø85mm lens with 1W CREE LED bulb produces 3-million
candlepower lasting up to 3hrs on one charge. Secondary side LED tube
light, with low power consumption lasts up to 24hrs on full charge. Suitable
for a wide variety of applications. Supplied with 4V 1Ah sealed battery,
in-car charger and 230V mains charger.
WARNING! Ensure that you read, understand and apply the safety
instructions relating to the battery and charger before use.
IMPORTANT: Turn off lantern while charging. Failure to do so will
damage the charger plug/vehicle plug.
IMPORTANT WARRANTY INFORMATION:
The battery fitted to this lantern is considered to be a consumable item and
its ability to accept charge will reduce over time. We will warranty it against
mechanical and electrical defect for a period of one year - this does not
cover fair wear and tear. If the battery is not properly charged before first
use, or regularly conditioned, its capacity will diminish. Under these
circumstances we will not replace the battery even if it is less than one
year old.
3.1. CHARGER PLUG - AK433.V2.CA
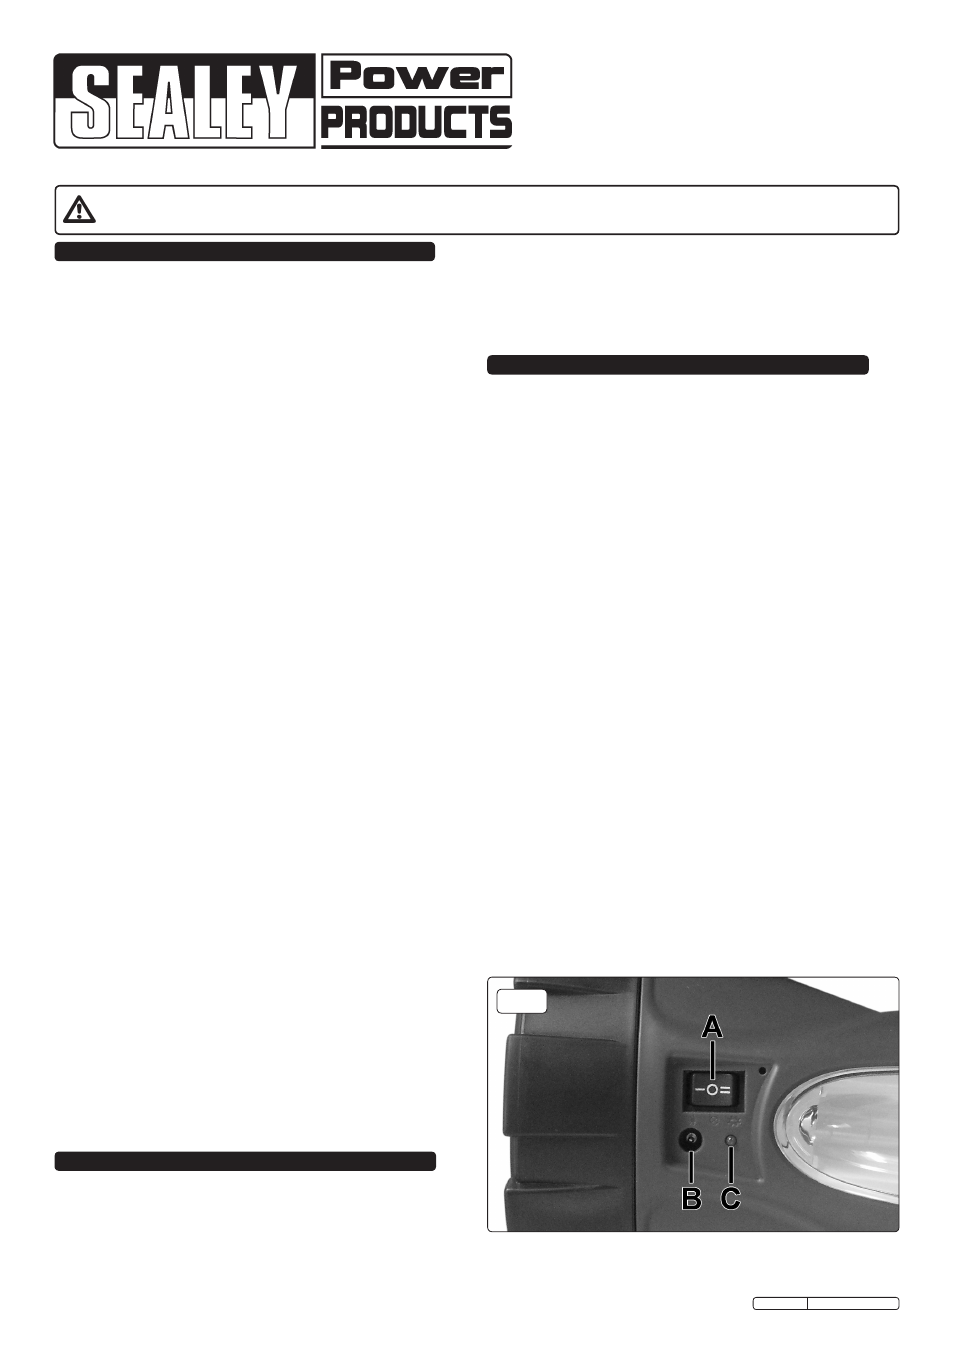
3.1.1. The charging jack plug socket is situated beneath the switch (fig.1B).
Fully insert the jack plug and stand the lantern in a safe location ready to
charge.
3.1.2. Ensure the lantern is turned off and then plug the charger into the mains
supply and switch on. The red LED (fig.1C) will light up to indicate that
charging is in progress.
3.1.3. Allow 15 hours for charging. When fully charged, switch off the
mains supply and unplug the charger. Remove the charger jack plug from
the lantern.
3.1.4. Store the charger in a safe, dry childproof location.
Notes: a) A fully charged battery will last for approximately 3 hours on main
torch and 24 hours on side tube LED.
b) There is no need to fully discharge the battery before recharging.
3.2. VEHICLE ADAPTOR LEAD
3.2.1. The charging jack plug socket is situated beneath the switch (fig.1B).
Fully insert the jack plug and stand the lantern in a safe location ready to
charge.
3.2.2. Ensure the lantern is turned off and then plug the charger into the vehicle's
12V accessory socket. The red LED (fig.1C) will light up to indicate that
charging is in progress.
3.2.3. When fully charged, unplug the adaptor from the vehicle socket and
from the lantern
before turning the lantern on.
3.2.4. Store the adaptor in a safe, dry, childproof location.
NOTE: Charging the lantern from a 12 volt vehicle socket may drain the vehicle
battery.
Original Language Version
AK433.V2 Issue: 1 - 22/02/12
fig.1
2.2. SPECIFICATIONS
Lens. . . . . . . . . . . . 85mm
Cell Type . . . . . . . . 4V - 1Ah Rechargeable
Operating Time . . . 3hrs / 24hrs
Charge Time . . . . . 15hrs