Fig.7, Fig.5 fig.6, Operation 7. cool air fan 8. maintenance – Sealey LP290 User Manual
Page 3
IMPORTANT: To ensure continuous ventilation to the heater area, a ventilation opening must connect to the outside of the premises where the heater is to
operate. The opening must be 100cm
2
for every kW of output, and must be set at an equal distance from the upper and lower parts of the heater
operating area.
6.1.
Switching Heater On.
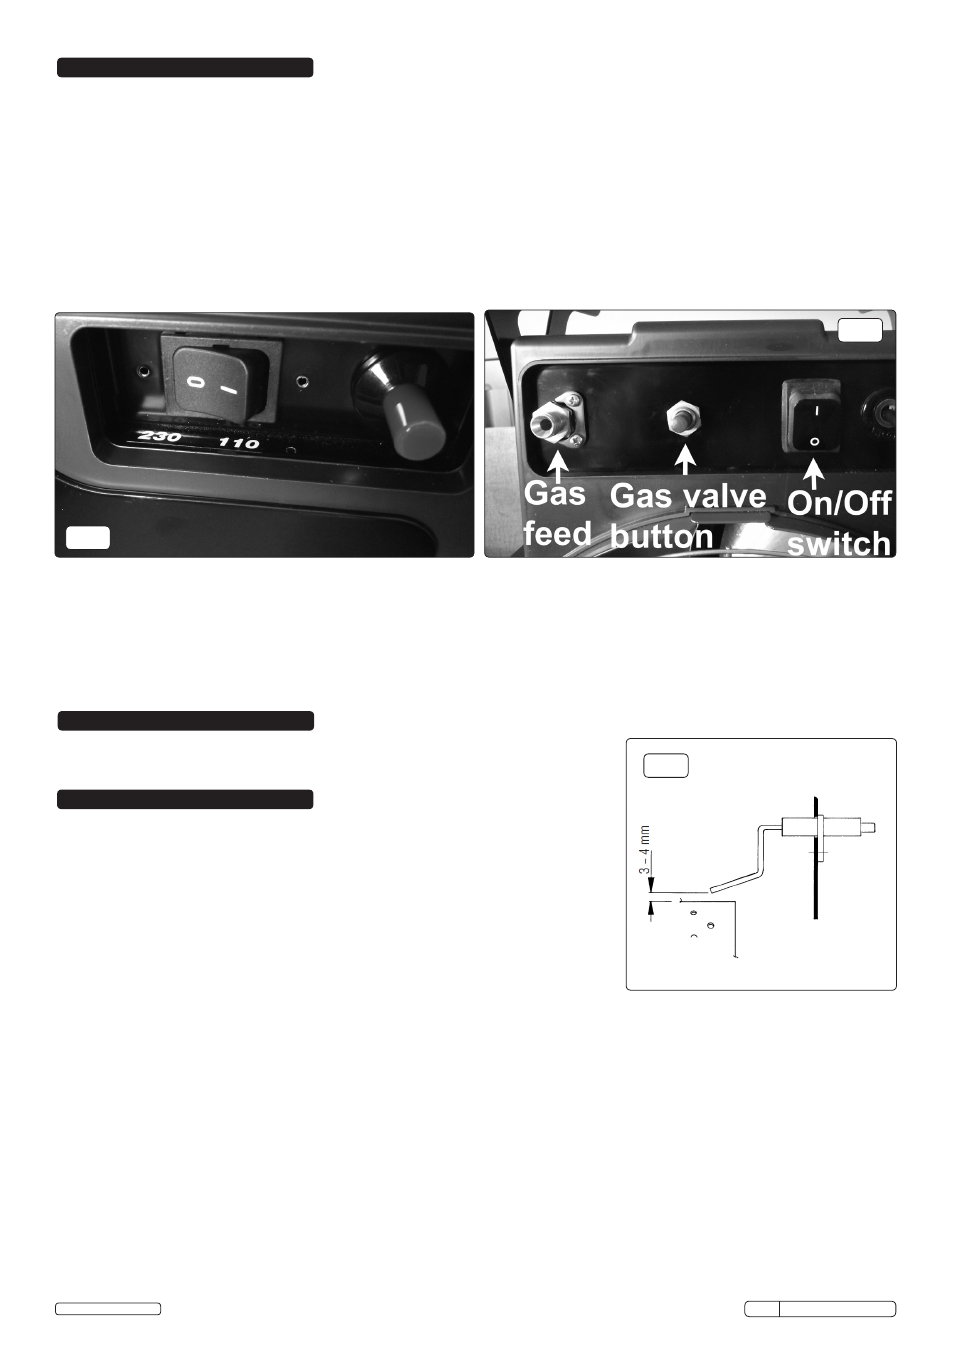
6.1.1. Switch the On/Off switch to the ON (I) position (fig.6) and check that the fan starts running.
6.1.2. Push in the gas valve button and hold it in (fig.6), at the same time, press (repeatedly) on the Piezo Ignition Button (fig.2) until the flame
ignites. When the flame has ignited and the heater has started, keep the gas valve button pushed in for a further 10 seconds, then release it.
6.1.3. If the heater stops when the gas valve button is released, leave the fan on, wait for one minute, before repeating the ignition
sequence.
Hold the gas valve button in for 15-20 seconds this time, before releasing.
6.1.4. The heat output is controlled by adjusting the gas pressure via the regulator (fig.4). Turn the regulator knob anti-clockwise to reduce the
gas pressure and heat, and clockwise to increase the gas pressure and heat.
6.2.
Switching Heater Off.
6.2.1. After use, shut off the gas cylinder tap. Allow the fan to continue running until the flame shuts down, then switch the On/Off switch to the
OFF (O) position and isolate the heater from the electrical supply.
WARNING! If the flame shuts down during operation, before repeating the ignition sequence, make sure that the fan is not jammed, and
the air inlet and outlet are completely free of obstructions. If it is due to overheating, the cause of the problem must be determined and
corrected before repeating the ignition procedure.
The heater may also be used as a cool air fan, as follows:
7.1.
Remove the gas supply hose and plug the heater into the electrical power supply.
7.2.
Switch on the fan. The unit will now blow out cool air only.
WARNING! Before commencing service or maintenance, disconnect the heater from
the electrical and gas supplies. Use authorised parts only. Unauthorised parts may be
dangerous and will invalidate the warranty. Should the heater require service or
maintenance, a suitably qualified engineer should carry this out or contact your local
Sealey service agent.
8.1.
Check the gas supply hose condition and change if necessary.
8.2.
Carefully clean the fan blade and inside the heater unit with compressed air.
Caution: Wear safety goggles to perform this operation.
8.3.
Check the starting electrode gap (fig.7).
8.4.
Check the ignition unit, safety thermostat, and thermocouple condition and ensure that
they are clean.
WARNING! If for any reason, there is a sudden increase in gas flow (a ruptured supply pipe for instance), the Excess Flow Valve will shut
and cut off the gas supply. Close the tap on the gas cylinder and investigate the problem and resolve it. Re-open the tap on the gas cylinder
and reset the Excess Flow Valve by pressing on the push-button for a few seconds. Carry out the ignition sequence to re-light the heater.
fig.7
6. OPERATION
7. COOL AIR FAN
8. MAINTENANCE
fig.5
fig.6
LP290 Issue No: 2(I) - 24/09/14
Original Language Version
© Jack Sealey Limited