Fig.2, Fig.1 fig.3, Assembly – Sealey LP1500 User Manual
Page 2: Introduction & specifications
3. ASSEMBLY
3.1. FITTING LAMP TO THE STAND (fig.1)
WARNING! Isolate heater from mains before any assembling and/or maintenance operations are
carried out.
3.1.1. Place the locating hole in the lamp’s bracket onto the thread situated at the top of the stand.
3.1.2. Secure with plastic wing nut provided.
3.2. ELEMENT REPLACEMENT - LP1500.V2
WARNING! Never touch the element glass directly with fingers, only touch the ceramic ends or use a
soft cloth, otherwise the tube may get damaged.
WARNING! When removing/replacing the element, take great care not to expose the element to
excessive force as this may cause the element to fracture.
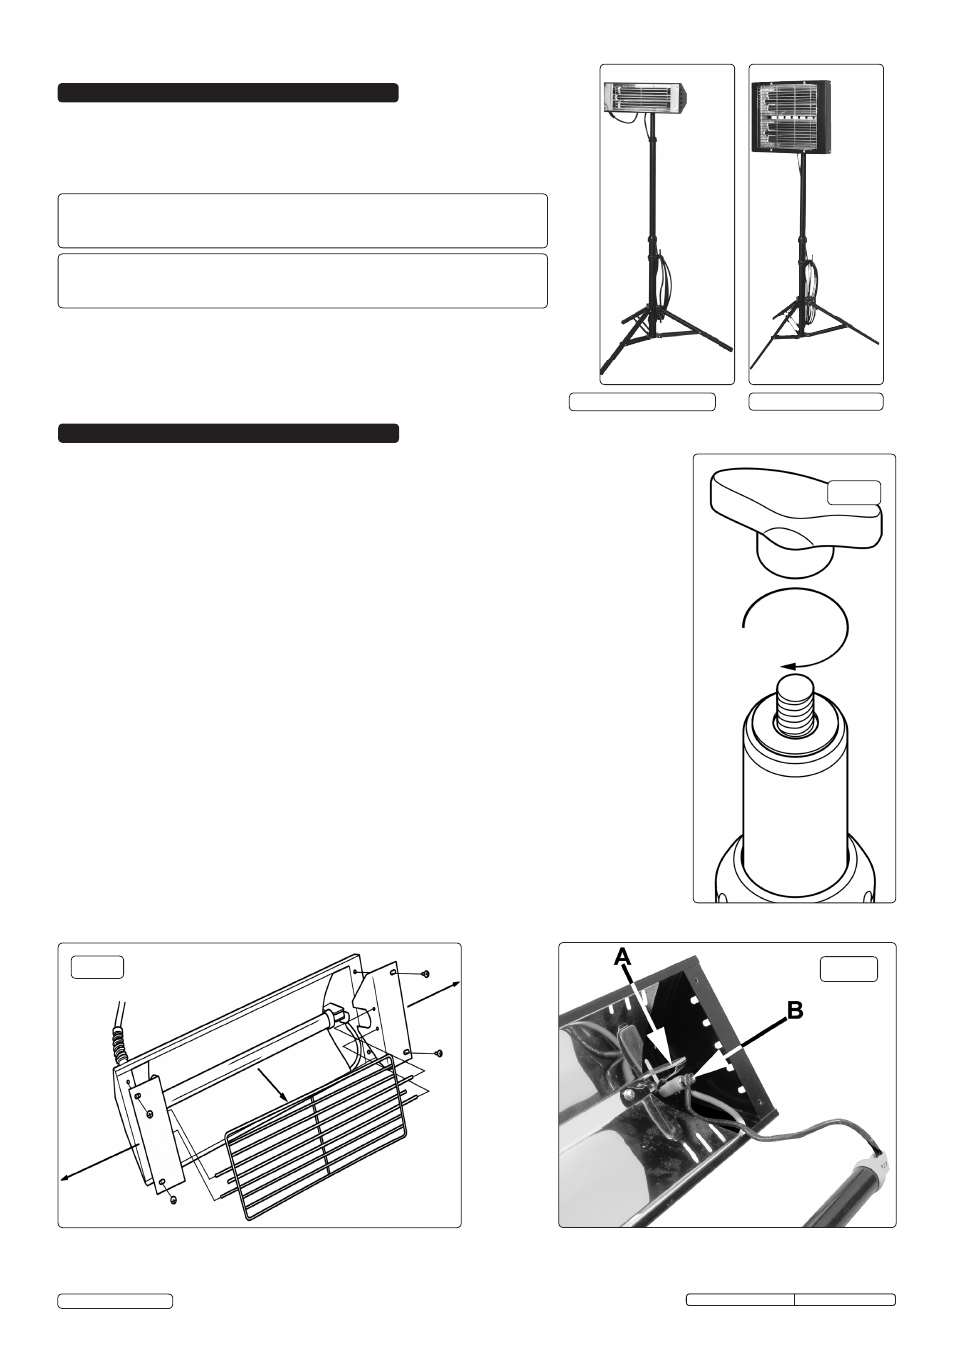
3.2.1. Remove the four screws located at each end of the face of the lamp which hold the end reflectors
and grill in place. (See fig.2)
3.2.2. Slide the element out from it’s clips (See fig.3a) taking care not to stress the attached wires. Loosen
the nut on the top of the pillar at each end of the reflector and slide out the forked connector
(See fig.3b). The element can now be removed.
3.2.3. Lay the new element on a soft cloth in front of the heater body and connect the wires at either end to
the pillars ensuring that the fork connector at the end of each wire is fully inserted between the plain
and serrated washers. Retighten the nuts at the top of each pillar.
3.2.4. Insert the new tube into the clips with the wire connections facing downwards. Ensure that the
excess loops of wire lie in the voids at either end of the casing and not on top of or underneath the
reflector.
3.2.5. Push the end reflectors on to each end of the grill and place the assembly onto the face of the main
body. Line up the holes in the end reflectors with the holes in the main body and insert the screws
finger tight. Check that there are no wires trapped or showing then tighten the screws.
2. INTRODUCTION & SPECIFICATIONS
Electric, tripod mounted, heaters with infrared quartz lamps. Reach maximum heat
output within seconds of being turned on. Supplied with power cable and 3-pin plug.
A totally dry heat with no condensation, no gas, no fumes, so no smell. Ideal for
workshops, bars, forecourts or gardens and terraces
if weather protected.
Model No. . . . . . . . . . . . . . . . LP1500.V2
Maximum Power: . . . . . . . . . . . . 1500W
Minimum Power:. . . . . . . . . . . . . . . . . . -
Supply: . . . . . . . . . . . . . . . . . 230V – 13A
Height: . . . . . . . . . . . . . . . . . . 0.6-1.6mtr
fig.2
Model No. . . . . . . . . . . . . . . . . . LP3000
Maximum Power: . . . . . . . . . . . . 3000W
Minimum Power: . . . . . . . . . . . . 1500W
Supply: . . . . . . . . . . . . . . . . 230V – 13A
Height: . . . . . . . . . . . . . . . . . . 0.8-1.7mtr
LP1500.V2
LP3000
fig.1
fig.3
Original Language Version
LP1500.V2, LP3000 Issue: 3(L) - 10/06/14
© Jack Sealey Limited
Original Language Version
LP1500.V2, LP3000 Issue: 3(L) - 10/06/14