Set-up, Operation – Sealey PW2200 User Manual
Page 3
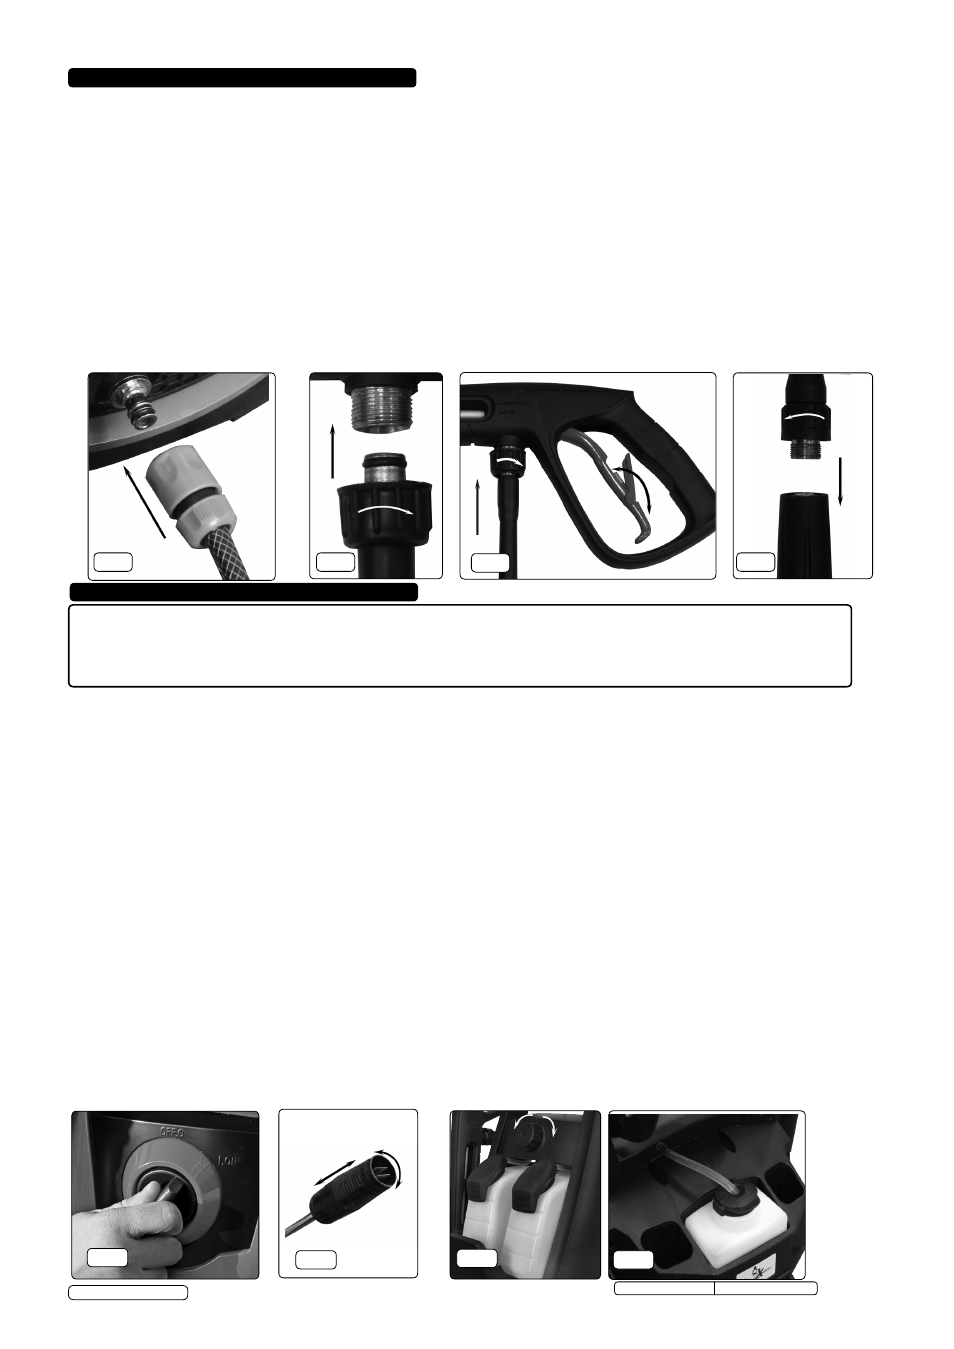
4. SET-UP
4.1. Connecting the water supply.
Use a reinforced hose pipe with an internal diameter of 1/2” and connect to the mains water supply. Before attaching the hose to the
pressure washer flush the hose through with some clean water to remove any foreign matter from within the hose.
Connect
female quick conection hose fitting to inlet on the front of the machine (fig.1)
4.2. Connecting the high pressure hose.(PW2200 only)
Insert the high pressure hose into the hose fitting at the lower rear of the machine and screw the collar onto the threaded outer (fig.2)
ensuring the connector is tight. The PW2500 is pre-connected via the inside of the hose storage reel.
4.2.1. Attach the other end of the high pressure hose to the gun (fig.3). To attach the hose, push the male hose connector into the underside
of the gun and screw the collar onto the gun fitting. Ensure that the connection is tight to prevent leakage.
4.3. Assembling the lance and nozzle.
Push the nozzle into the gun as shown in fig.4 and screw the threaded male lance connector into the gun, again ensuring that the
connection is tight.
WARNING! Ensure the nozzle is locked into position, failure to ensure this could result in the nozzle being ejected under high
pressure when operating the gun.
4.4.
Connecting to mains electrical supply.
WARNING! Ensure the On/Off switch is in the 'Off' position.
Using an RCD plugged into a 13A mains socket,
DO NOT turn the power on. DO NOT touch the plug with wet hands.
5. OPERATION
WARNING! Ensure you read, understand and apply Section 1 safety instructions.
WARNING! Dry running can damage the unit seriously.
WARNING! Use washer on a flat, levelled surface, in an upright position.
Failure to do so will invalidate your warranty. Never lay the washer down during use.
WARNING! DO NOT leave washer switched on for more than 15 minutes without operating trigger.
Important! The washer motor will stop as soon as the gun trigger is released and will restart when the trigger is
squeezed. Always allow at least 5 seconds between releasing the trigger and restarting.
5.1.
Primary checks.
Check that the inlet filter is clean; pump delivery and pressure will be reduced if blocked. Never use the machine without a
filter (which is fitted inside the inlet connector). Ensure that the water supply, high pressure hose and gun are correctly
connected, and that air can circulate around the washer freely.
5.2.
Operation of safety catch.
To prevent inadvertent operation of the unit the safety catch should always be engaged when the gun is not in use. Open
the safety catch as in fig.3 to lock the trigger against the guard.
5.3.
Bleeding The Gun
It is very important to bleed the gun before using the pressure washer. Squeeze the trigger
BEFORE turning the electrical
supply on. This allows any air trapped inside the pressure washer and gun to be removed before using the unit. Continue
holding the trigger for approximately one minute to allow any excess air out of the unit. Water will flow through the gun at
low pressure during this procedure.
5.4.
Operating the machine.
5.4.1. Hold the spray gun firmly to counteract the recoil caused by the high pressure of the water. Before switching on ensure that
the lance is not directed at people, objects or animals prior to being directed at the object to be cleaned.
5.4.2. It is recommended that the trigger is depressed before switching on the unit before every use. This reduces the back
pressure and amperage draw which prevents fuses blowing.
5.4.3. Switch the machine on by turning the switch to the 'On' position (fig.5). Release the handle safety catch (fig.3). Point the
lance at the object to be cleaned and depress the trigger fully. When the trigger is released the motor will switch off
automatically.
5.5.
Adjusting the spray pattern.
5.5.1. The fan nozzle can be adjusted from pencil point to fan jet by rotating the body of the nozzle as indicated in fig.6
Caution! The pencil point setting is very aggressive. It is recommended that for most cleaning applications, a 20° spray
angle is used to avoid damage to the surface being sprayed.
© Jack Sealey Ltd
fig.4
fig.2
fig.1
fig.3
fig.6
fig.5
fig.6
fig.7
fig.8
Original Language Version
PW2200,PW2500 Issue: 3 (I) - 14/10/13