Fig 1 – Sealey AK451DX User Manual
Page 2
5. OpERATION
WARNING! Ensure that you read, understand and apply the safety instructions in Section 1.
5.1
DRAINING VEhICLE
5.1.1 Position drainer under vehicle, turn clamp (8) approximately 1/4 turn anticlockwise and raise oil pan (13) beneath
drain plug.
DANGER! DO NOT release clamp (8) when there is pressure in the reservoir as pipe (11) and oil pan (13)
will be propelled upward with force. This could result in damage and/or serious injury.
5.1.2 open ball valve (12) and then remove vehicle drain plug.
5.1.3 When draining is complete lower oil pan (13) before moving drainer.
5.2
EMpTYING DRAINER
5.2.1 Ensure all ball valves are closed and clamp (8) is tight. Connect air supply at a pressure of 0.7bar to air inlet valve (4).
5.2.2 open air inlet valve (24) and allow reservoir to pressurise until safety valve (5) vents. Close air inlet valve (24) and
disconnect air supply.
5.2.3 Place end of drain tube in the waste oil container and then open ball valve (3).
5.2.4 When all waste oil is displaced from reservoir any remaining air pressure will be lost. Always confirm that reservoir
pressure is zero before closing valve (3).
Never leave drainer with pressure in the reservoir.
IMpORTANT! Dispose of waste oil in accordance with local authority regulations.
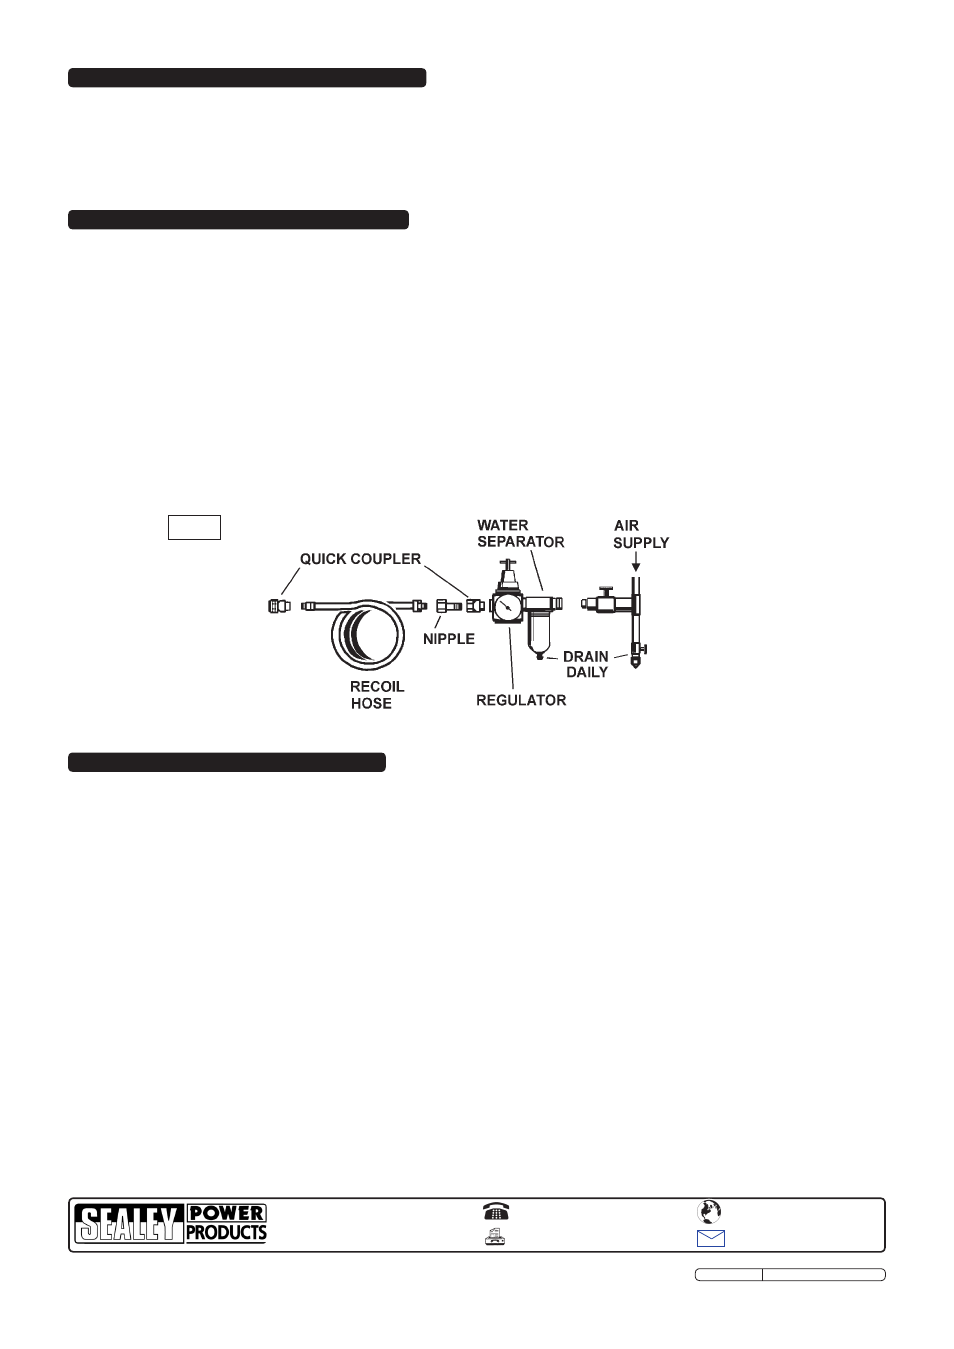
fig 1
4.1
AIR SUppLY
Recommended hook-up procedure is shown in fig 1.
4.1.1 Ensure drainer air valve (or trigger) is in "off" position before connecting to the air supply.
4.1.2 You will require an air pressure of 0.7bar.
4.1.3
WARNING! Ensure the air supply is clean and does not exceed 0.7bar. too high an air pressure and unclean air will
shorten the product life due to excessive wear, and may be dangerous causing damage and/or personal injury.
4.1.4 Drain the air tank daily. Water in the air line will damage the tool.
4.1.5 Clean air inlet filter weekly.
4.1.6 line pressure should be increased to compensate for unusually long air hoses (over 8 metres). the minimum hose
diameter should be 1/4” i.D. and fittings must have the same inside dimensions.
4.1.7 Keep hose away from heat, oil and sharp edges. Check hose for wear, and make certain that all connections are
secure.
3. ASSEMbLY
4. AIR SUppLY
3.1
Assembly
3.1.1 Close all valves on the drainer.
3.1.2 Screw drain pan (13) into ball valve (12) using securing bolt (16).
3.1.3 loosen the handle retaining bolts (16) at the back of the reservoir, insert the handle (14) and tighten the bolts (16).
Note: Numbers in brackets refer to item numbers on the parts Diagram
01284 757500
01284 703534
Sole Uk Distributor
Sealey Group,
Bury St. Edmunds, Suffolk.
www.sealey.co.uk
Web
NOTE:
It is our policy to continually improve products and as such we reserve the right to alter data, specifications and component parts without prior notice.
IMpORTANT: no liability is accepted for incorrect use of this product.
WARRANTY: Guarantee is 12 months from purchase date, proof of which will be required for any claim.
INFORMATION: For a copy of our catalogue and latest promotions call us on 01284 757525 and leave your full name, address and postcode.
AK451DX issue no. 2 - 16/03/09