Sealey AP6350 User Manual
Page 2
AP6350 - 1 - 220207
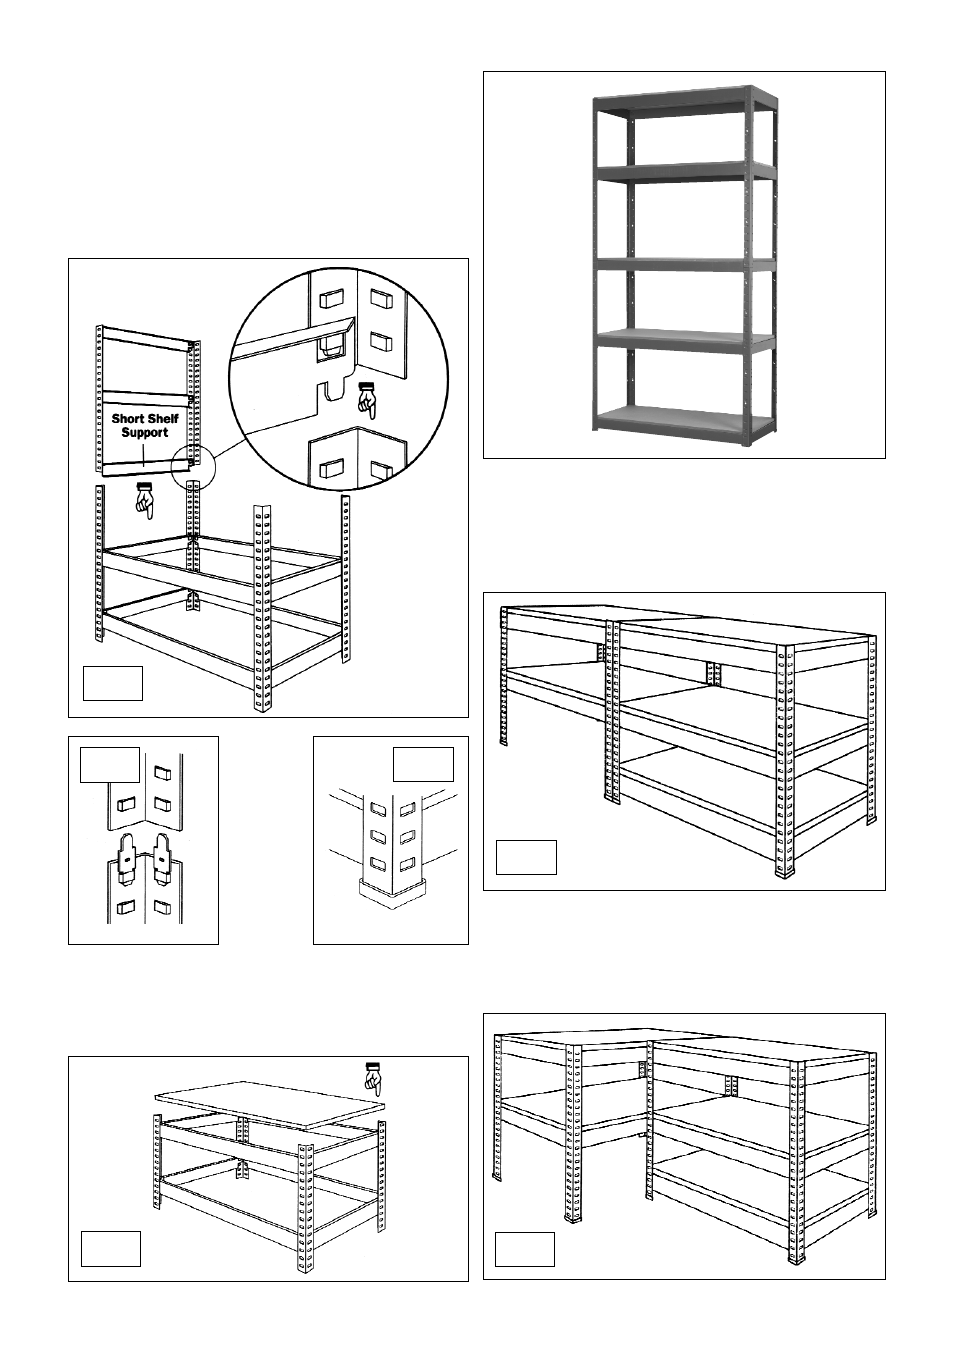
4.4 Decide the shelf positions for the upper section of the shelves
and assemble two more end frames, each using 2 leg angle
sections and 3 short shelf supports ensuring that the shelf
supports are at the same height on both frames. The upper part
of the shelves can be joined to the lower part of the shelves
using the lower shelf supports as shown in Fig.3. If the lower
shelf is not positioned at the centre of the frame use the special
joining pieces supplied as shown in Fig.4.
4.5 When both upper end frames are in place join them together with
the remaining 6 long shelf supports ensuring that they are at the
same height as the short shelf supports.
4.6 See Fig.5. When the frame is complete attach the plastic floor
protectors to the bottoms of the angle sections. Get a second
person to steady the frame while this is done.
4.7 See Fig.6. Move the frame into position in the chosen storage
area. Place the 5 MDF shelves onto the shelf supports.
4.8 See Fig.7. To assemble as a bench/low level shelving unit make
up two separate frames following steps 4.1 to 4.3 but with
different shelving positions. Make up one frame with 3 shelves
and one frame with two shelves as shown below. Ensure that the
middle and top shelves on both frames are at the same height.
Fix the frames together with the four nuts and bolts supplied.
Place the 5 shelves into position in the frames.
4.9 See Fig.8. To assemble as a corner unit make up two separate
frames following steps 4.1 to 4.3 but with different shelving
positions. Make up one frame with 3 shelves and one frame with
two shelves as shown below. Ensure that the middle and top
shelves on both frames are at the same height. Fix the frames
together with the four nuts and bolts supplied. Place the 5
shelves into position in the frames.
Fig.3
Fig.6
Fig.4
Fig.5
Fig.7
Fig.8