Environmental protection. fig.4, Fig.5, Operation – Sealey SCFS04 User Manual
Page 2
NOTE: It is our policy to continually improve products and as such we reserve the right to alter data, specifications and component parts without prior notice.
IMPoRtaNt: No liability is accepted for incorrect use of this product.
WaRRaNty: Guarantee is 12 months from purchase date, proof of which will be required for any claim.
INfoRMatIoN: For a copy of our latest catalogue and promotions call us on 01284 757525 and leave your full name and address, including postcode.
01284 757500
01284 703534
sole UK Distributor, sealey Group,
Kempson Way, Suffolk Business Park
,
Bury St. Edmunds, Suffolk,
IP32 7AR
www.sealey.co.uk
W e b
Under the Waste Batteries and Accumulators Regulations 2009, Jack Sealey Ltd are required to inform potential purchasers of products
containing batteries (as defined within these regulations), that they are registered with Valpak’s registered compliance scheme.
Jack Sealey Ltd’s Batteries Producer Registration Number (BPRN) is BPRN00705. See 5.5.1 for replacement.
5.1 Initial opening. (supplied override key required or external battery module)
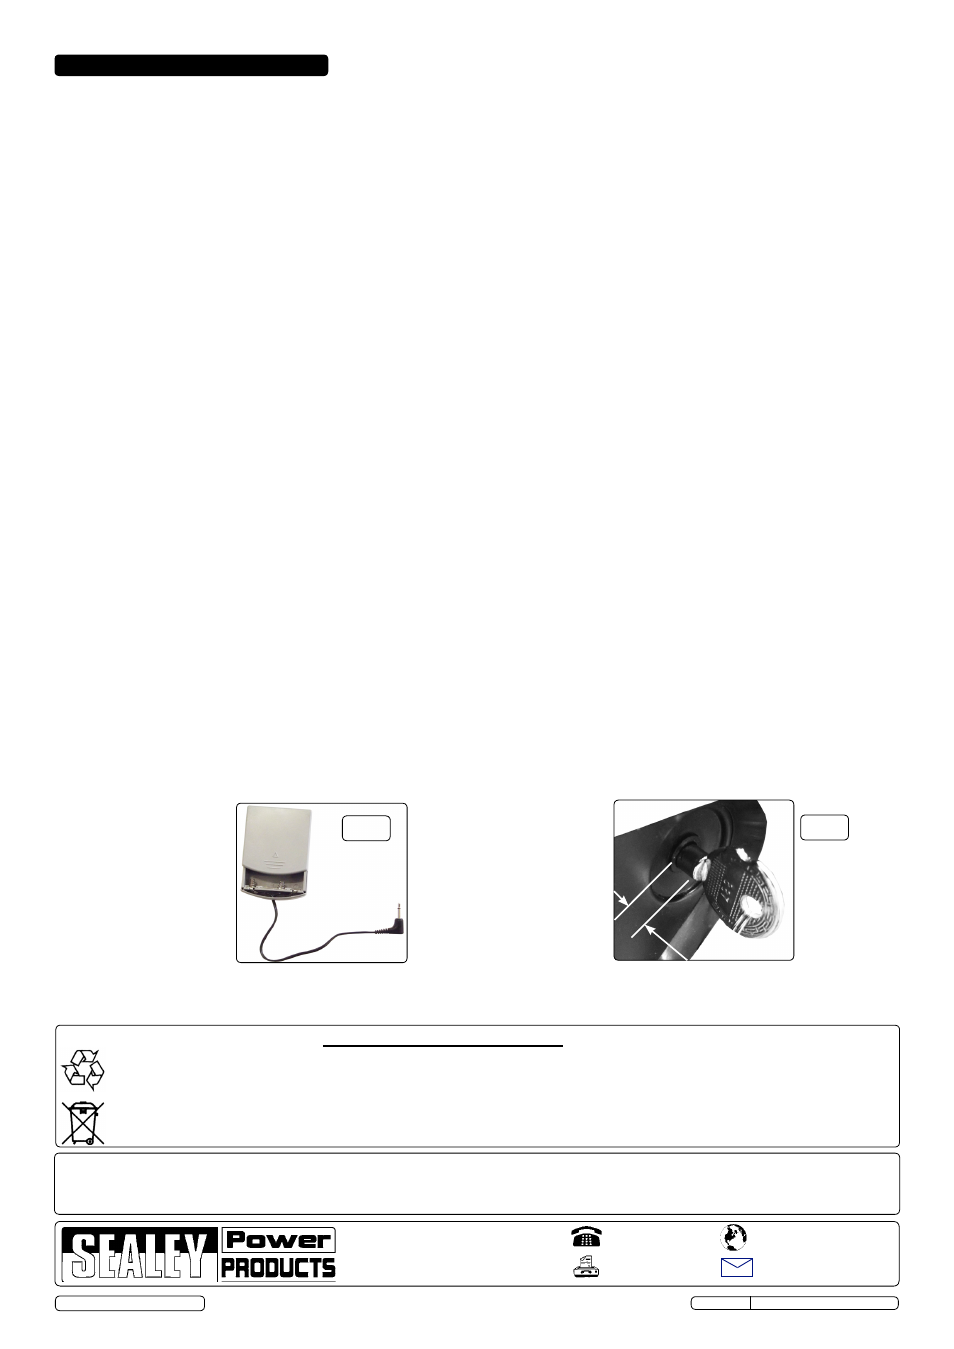
5.1.1 Locate the two supplied keys or the battery module (fig.4).
5.1.2 The override lock is situated in the handle recess of the main control panel. Prise out the plug using a small screwdriver and retain the plug.
5.1.3 Insert the override key, not full depth, leaving approximately 6mm of key shank out of the keyhole (fig.5). With the left hand on the door lever,
pressure the lever in an anti clockwise direction. At the same time twist the key clockwise and anti clockwise (jiggle) until the handle lever
sweeps freely anti clockwise releasing the four door dead locks, the door will now be unlocked.
5.1.4 Snap the plug back into place afterwards.
Do Not keep the override key or battery module (fig.4) in the safe.
5.1.5 Alternatively refer to 5.7.2 a), then key in the factory preset password combination as in 5.3.2.
5.2 Battery compartments
5.2.1 Remove the safe battery cover from the rear of the safe door (fig.2) by depressing tab and lifting. Observing polarity insert 4 new “AA”
batteries. Replace the cover by locating and snapping back in the tab. The safe is now “primed” for combination programming.
5.2.2 Inside the packaging is a separate battery housing module (fig.4) with a wired in jack plug. Depress and slide off the cover as indicated.
Observing polarity insert 4 new “AA” batteries into the module. This module will enable opening of the safe should the internally housed
batteries fail.
5.3 factory preset passcode combination
5.3.1 With the safe door closed, press the green button “#” to start and the LCD will display 8 dashes “--------”.
5.3.2 Input “123456” and press the green button “#” to confirm. The LCD screen will display the characters “OPEN”; rotate the lever handle
anticlockwise within 5 seconds to open the safe.
5.3.3 If the factory combination or your personal combination is forgotten at any time refer to
5.1 Initial opening.
5.4 entering a new combination.
the combination consists of 1 group of 6 digits, these numbers should be safely recorded before being entered into the safe’s
electronics. In our example “111111” has been chosen.
5.4.1 The program requires a group of personal identification numbers. With the door open, press the green “#” button to start and the LCD will
display 8 dashes “--------”. Now input the factory original password “123456” and press the green button “#” to confirm. The characters
“OPEN” will be displayed on the LCD screen. Within 5 seconds, press the yellow button “*” and the LCD screen will display 8 dashes “--------”.
5.4.2 Input your personal group of 6 digits, “111111” for example and press the green button “#” to confirm. The LCD screen will display 8 dashes
“--------”, then repeat the previously input 6 digits “111111” in our example, and press the green button “#” to confirm. The characters
“Into” will be displayed in the LCD screen indicating the success of your setting.
5.4.3 At any time, with the safe door open, pressing the red button on the inside of the door near the hinges (fig.2) will restore the factory original
password combination “123456”. This will also be indicated by an audible beep.
5.5 Using your own password combination to open the door.
5.5.1 With the door closed, press the green button “#” to start and the LCD will display 8 dashes “--------”.
5.5.2 Input your personal password group of 6 numbers and press the green button “#” to confirm. The LCD screen will display the characters
“OPEN”; rotate the lever handle anti-clockwise within 5 seconds to open the safe.
5.6 Closing and locking the door.
5.6.1 Close the door, rotate the handle clockwise and the door will lock automatically.
5.7 low internal batteries.
5.7.1 To test for low batteries, press the green button “#” and if the LCD screen displays the characters “LO-BAT”. Remove all the batteries
immediately and replace with new equivalent (fig.3).
5.7.2 If the keypad does not work because the batteries in the safe are exhausted, two options exist to open the safe.
a) A separate battery compartment module exists (fig.4) and can be plugged into the safe jack plug socket (fig.3).
b) A manual override key exists and is explained in
5.1 Initial opening.
5.8. lost keys
5.8.1 Please note, for security reasons, we are not able to offer replacement keys. Please keep the keys in a secure place.
5. oPeRatIoN
Original Language Version
© Jack Sealey Ltd 2013
SCFS04 ISSUE - 2 (I) - 20/08/13
Recycle unwanted materials instead of disposing of them as waste. All tools, accessories and packaging should be sorted, taken to a
recycle centre and disposed of in a manner which is compatible with the environment.
environmental Protection.
fig.4
Battery module
(4 x “AA” batteries
not supplied)
fig.5
6mm approx. key shank
projection at engagement
with locking mechanism