Sealey SB1200 User Manual
Page 2
4.4.
ATTACH LID USING FIXED SCREWS AS A GUIDE. DO NOT
OVERTIGHTEN
4.5.
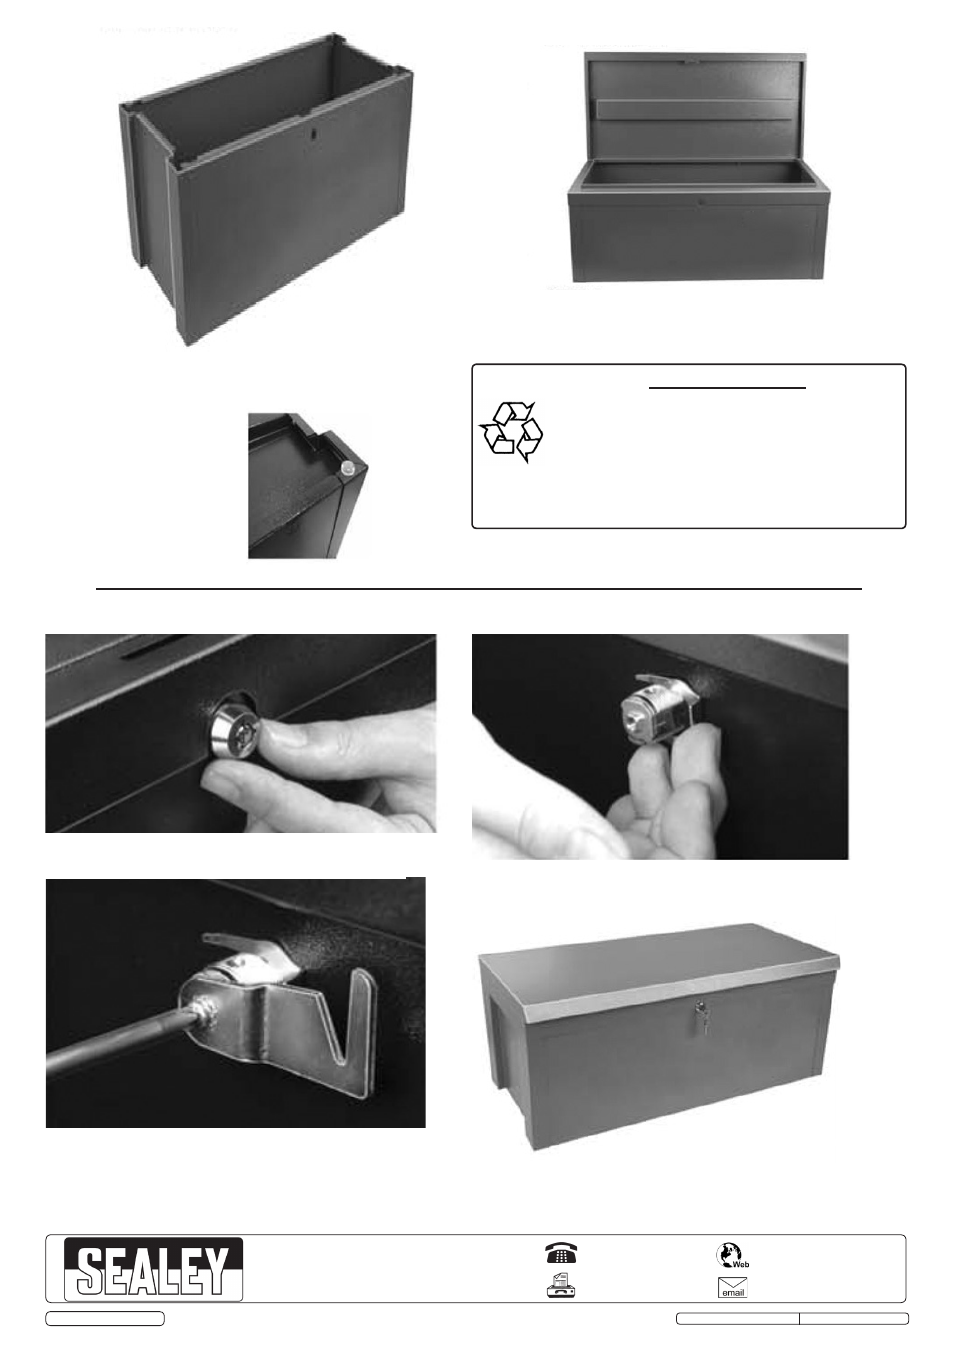
ONCE BOX IS
ASSEMBLED INSERT
PVC PLUGS INTO
EACH OF THE CORNER
HOLES
STEP 2
INSERT LOCK INTO HOLE PROVIDED
STEP 3
ATTACH RETENTION CLIP TO REAR OF LOCK
STEP 4
SCREW LATCH ONTO LOCK BARREL
4.6. LOCK ASSEMBLY. STEP 1
DISASSEMBLE LOCK (UNSCREW)
4.3.
ATTACH BOTH SIDES USING FIXED SCREWS AS A GUIDE. DO
NOT OVERTIGHTEN
NOTE: It is our policy to continually improve products and as such we reserve the right to alter data, specifications and component parts without prior notice.
IMPORTANT: No liability is accepted for incorrect use of this product.
WARRANTY: Guarantee is 12 months from purchase date, proof of which will be required for any claim.
01284 757500
01284 703534
Sole UK Distributor, Sealey Group,
Kempson Way, Suffolk Business Park
,
Bury St. Edmunds, Suffolk,
IP32 7AR
www.sealey.co.uk
Environmental Protection
Recycle unwanted materials instead of disposing of
them as waste. All tools, accessories and packaging
should be sorted, taken to a recycling centre and
disposed of in a manner which is compatible with the
environment.
When the product becomes completely unserviceable
and requires disposal, dispose of the product according
to local regulations.
SB565, SB765 & SB1200 Issue: 2 (L) - 16/02/15
Original Language Version
© Jack Sealey Limited