Fig.3 fig.4 fig.5, Fig.6 – Sealey AP920M User Manual
Page 2
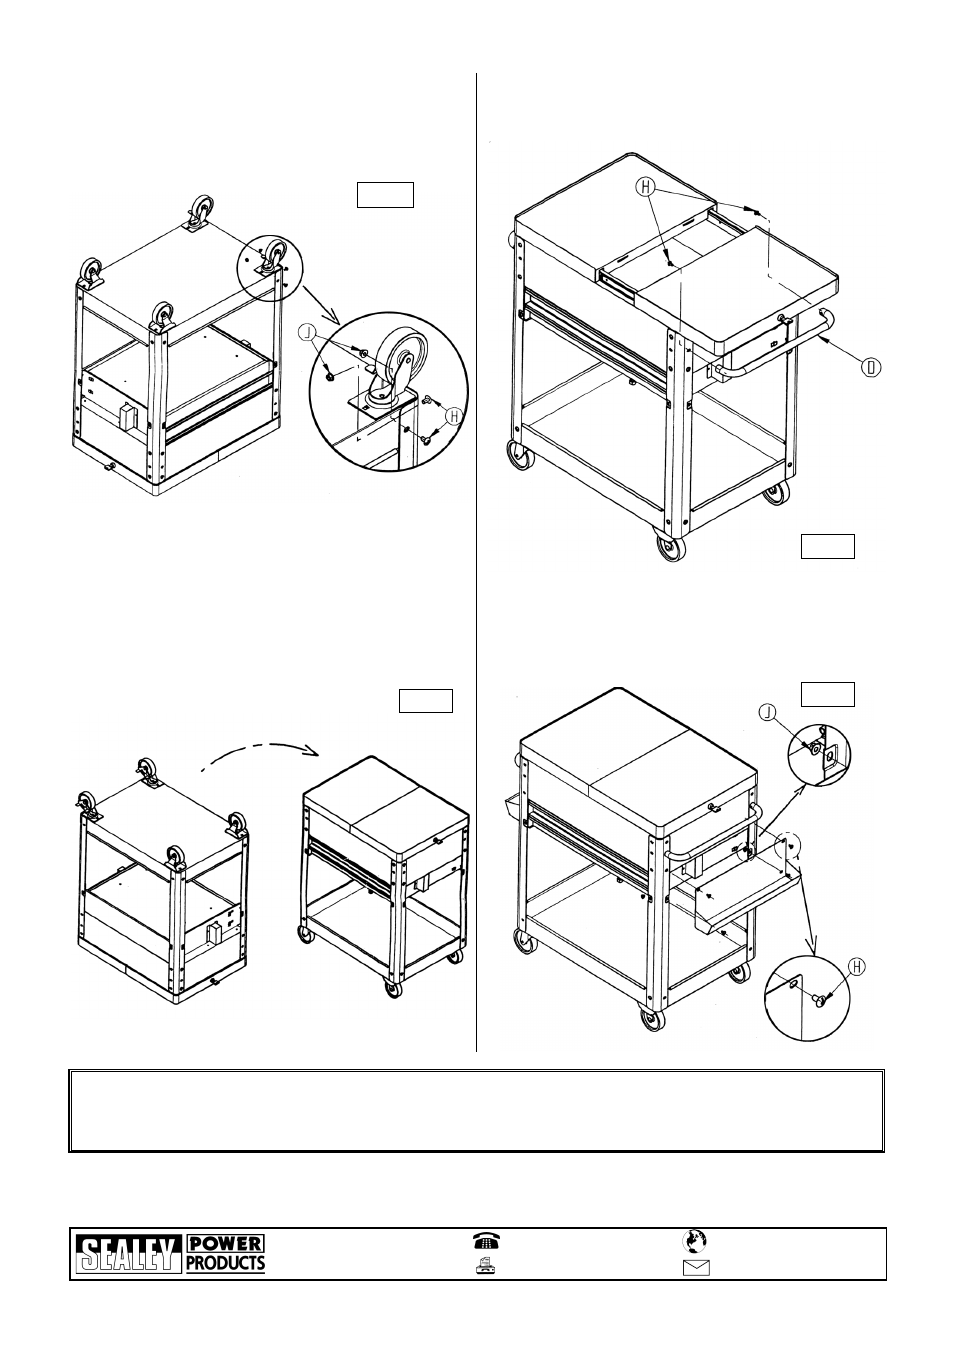
4.4
Next attach the base of the trolley to the legs. Do this by following
the diagram below (Fig. 3) using the screws (H) and small nuts (J).
4.7 To attach the two sid bins hold them up against the trolley just
below the handles as shown in Fig. 6 and screw into place,
then take two screws (H) and small nuts (J) and secure the
bottom of the bins to the legs of the trolley.
4.5
After completing 4.4, turn the trolley onto its wheels, from its upside
down position.
Note! this is a heavy product and you will require assistance.
AP920M - 1 - 250407
Fig.3
Fig.4
Fig.5
01284 757500
01284 703534
Sole UK Distributor
Sealey Group,
Bury St. Edmunds, Suffolk.
www.sealey.co.uk
Web
NOTE:
It is our policy to continually improve products and as such we reserve the right to alter data, specifications and component parts without prior notice.
IMPORTANT: No liability is accepted for incorrect use of this product.
WARRANTY: Guarantee is 12 months from purchase date, proof of which will be required for any claim.
INFORMATION: For a copy of our catalogue and latest promotions call us on 01284 757525 and leave your full name, address and postcode.
4.6 The handles (D) are held on by screws (H) which are fitted from
inside the main storage compartment.
Note! It would be advantageous to have assistance to hold the
handles in place while fixing.
Fig.6
Parts support is available for this product. To obtain a parts listing and/or diagram,
please log on to www.sealey.co.uk, email [email protected] or phone 01284 757500.