Fig.6 fig.7, Fig.5 – Sealey AP02WC User Manual
Page 3
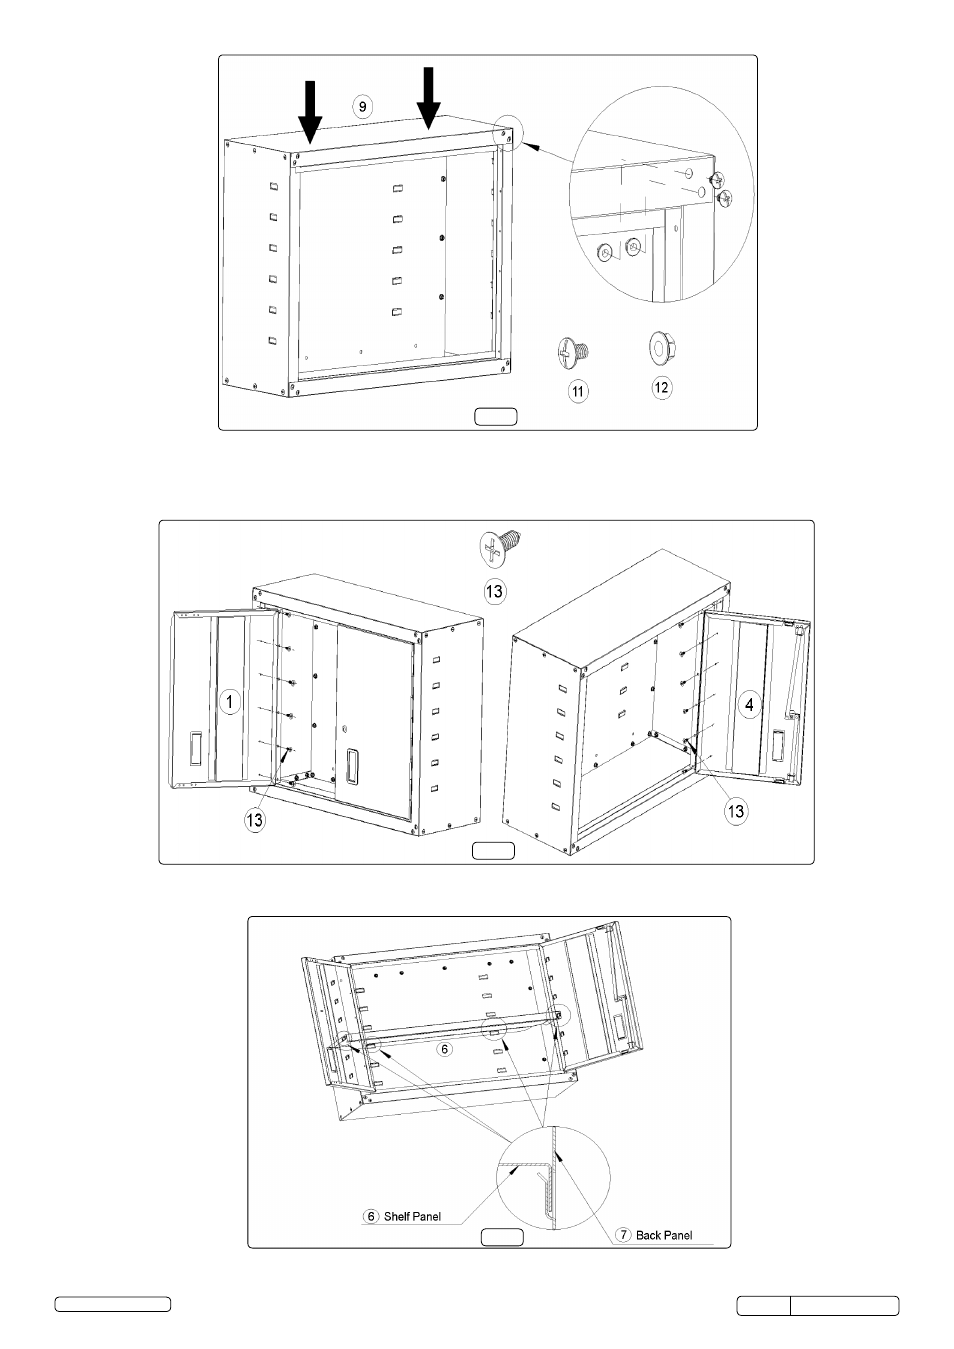
Fig.6
Fig.7
3.3.4 Top Panel Assembly (Fig.5)
Attach the top panel to the sides and back, align the holes and secure with screws (11) and nuts (12).
DO NOT fully tighten.
3.3.5 Squaring the Cabinet
Upright the cabinet and place on a level surface. Check the cabinet for squareness, adjust the cabinet as required and fully tighten all the
fixings.
3.3.6 Door Assembly (Fig.6)
Select the left hand door (1) and align the hinge with the holes on the side panel and secure with screws (13). Repeat for the right hand
door (4). Fully tighten both doors to side panel, ensuring both doors will open and close and the lock operates smoothly.
Fig.5
3.3.7 Installing Shelf (Fig.7)
Open the doors and place the shelf panel (6) into the cabinet. Select the desired height and secure the shelf by lowering into the tabs in
the back and side panels. The tabs may require opening up slightly with a flat bladed screwdriver.
AP02WC Issue: 2(L) - 15/07/14
Original Language Version
© Jack Sealey Limited