Assembly 4. maintenance fig.2 fig.3 – Sealey APSPB User Manual
Page 2
01284 757500
01284 703534
Sole UK Distributor
Sealey Group,
Bury St. Edmunds, Suffolk.
www.sealey.co.uk
Web
NOTE: It is our policy to continually improve products and as such we reserve the right to alter data, specifications and component parts without prior notice.
IMPORTANT: No liability is accepted for incorrect use of this product.
WARRANTY: Guarantee is 12 months from purchase date, proof of which will be required for any claim.
INFORMATION: For a copy of our catalogue and latest promotions call us on 01284 757525 and leave your full name, address and postcode.
4.1
Periodically the surface should be cleaned with a mild detergent and water solution.
4.2
Grease and oil can be removed with most standard cleaning fluids. For safety, use a nonflammable cleaning fluid.
3.1
Fitting the peg board directly to a wall (Fig.1).
3.1.1 Position the panel on the wall surface, use a spirit level to align and mark the position for each of the four mounting holes.
3.1.2 Using a size 8 drill bit, drill the holes and then insert the four nylon rawl plugs (A), if a wood stud is located,
DO NOT use rawl plugs, the
panel can be screwed directly into the wood.
3.1.3 Attach the peg board to the wall using screws (C) and washers (B),
DO NOT over tighten.
3.1.4 Insert hooks (D) into the peg board.
3.2
Fitting to the optional Mounting Frame (APMF).
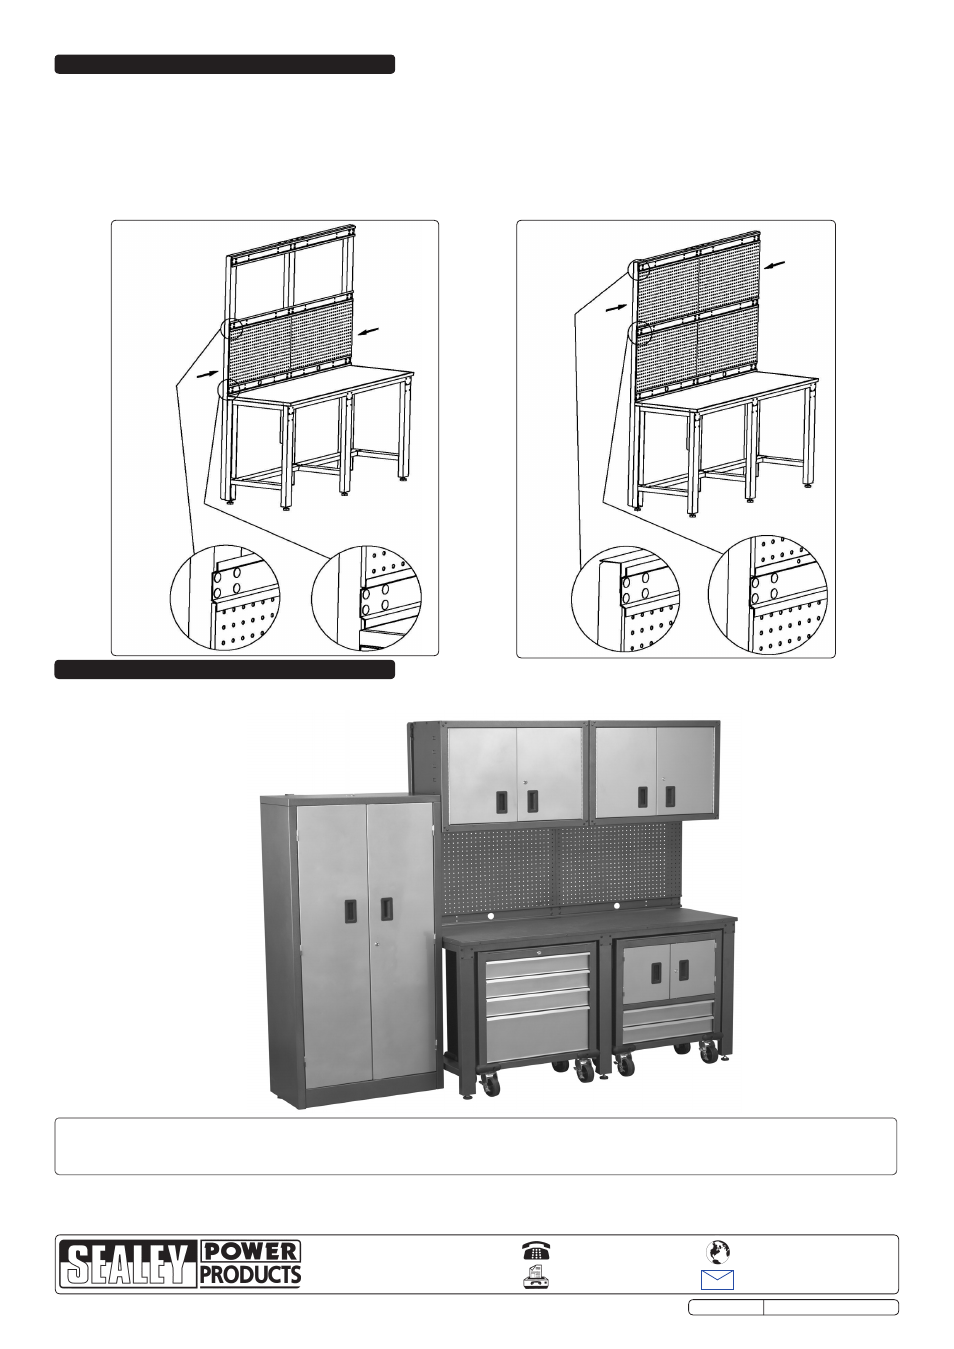
3.2.1 Slide the peg board between the rails of the mounting frame as shown in Fig.2 and or Fig.3 depending on the configuration required.
3. ASSEMBLY
4. MAINTENANCE
Fig.2
Fig.3
Peg Board shown here in conjunction with other options available.
Contact your Sealey Dealer for more details.
Parts support is available for this product.
To obtain a parts list and diagram please log on to www.sealey.co.uk, email [email protected] or phone 01284 757500
APSPB.V2 Issue No: 1 - 30/07/09