Sealey PB397 User Manual
Wheel clamp, Pb397.v2, Fig.1 fig.3 fig.2
p
WARNING! Due to the variety in design of vehicles, it is the user’s full responsibility to ensure no damage occurs whilst using this clamp.
Correct attachment of clamp to a vehicle is therefore critical and is beyond control of the supplier.
p
WARNING! The user must secure the clamp properly.
7
DO NOT use the wheel clamp if any parts are missing or damaged as this may cause failure and/or personal injury.
r
WARNING! Avoid any protrusions beyond the side of the car as these may present a risk of injury to passers-by.
7
DO NOT use the clamp for any purpose other than for which it is designed.
3
Ensure that the clamp is removed before using the vehicle or trailer.
3
Do make sure all nuts bolts and the locking bar are secure and tight before leaving the vehicle or trailer unattended.
01284 757500
01284 703534
Sole UK Distributor
Sealey Group,
Bury St. Edmunds, Suffolk.
www.sealey.co.uk
Web
NOTE: It is our policy to continually improve products and as such we reserve the right to alter data, specifications and component parts without prior notice.
IMPORTANT: No liability is accepted for incorrect use of product.
WARRANTY: Guarantee is 12 months from purchase date, proof of which will be required for any claim.
INFORMATION: For a copy of our latest catalogue and promotions call us on 01284 757525 and leave your full name and address, including
postcode.
1. SAFETY INSTRUCTIONS
Thank you for purchasing a Sealey Product. Manufactured to a high standard this product will, if used according to these instructions and properly
maintained, give you years of trouble free performance.
IMPORTANT: PLEASE READ THESE INSTRUCTIONS CAREFULLY. NOTE THE SAFE OPERATIONAL REQUIREMENTS, WARNINGS AND CAUTIONS.
USE THIS PRODUCT CORRECTLY AND WITH CARE FOR THE PURPOSE FOR WHICH IT IS INTENDED. FAILURE TO DO SO MAY CAUSE DAMAGE
AND/OR PERSONAL INJURY AND WILL INVALIDATE THE WARRANTY. PLEASE KEEP INSTRUCTIONS SAFE FOR FUTURE USE.
INSTRUCTIONS FOR:
WHEEL CLAMP
MODEL NO:
PB397.V2
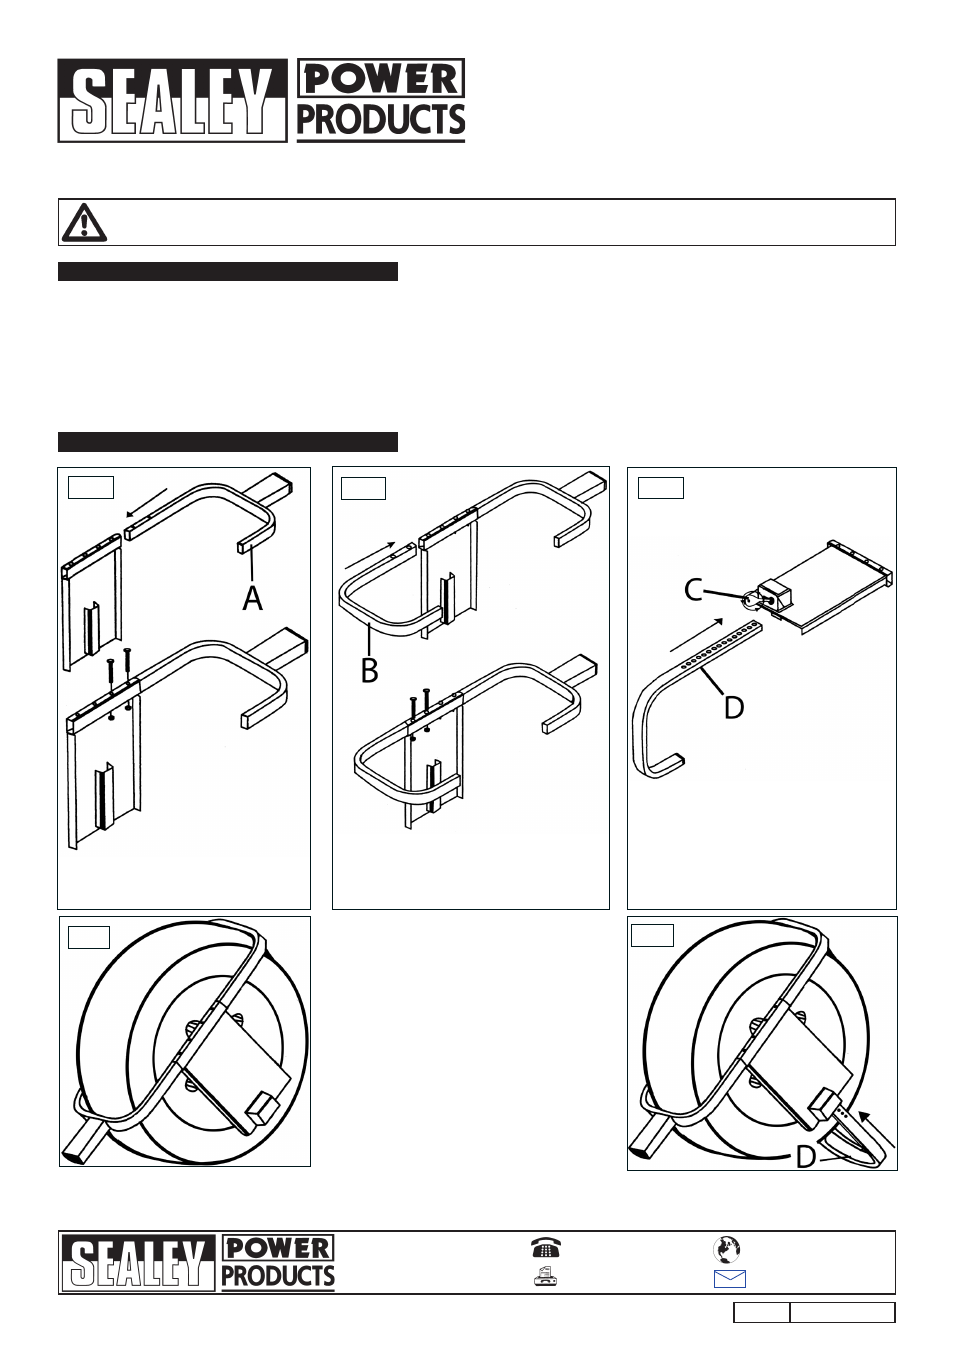
2.1 Insert clamp section “A” (fig.1) into the
main plate and secure with supplied nuts
and bolts.
2.2 Insert clamp section “B” (fig.2) into the main
plate and secure with supplied nuts and bolts.
2. ASSEMBLY
fig.1
fig.3
fig.2
2.3 Turn the key in the lock “C” fully
anti-clockwise, to enable the insertion of the
locking bar “D” (fig.3).
fig.4
2.4 Take the wheel clamp and place it over the
wheel, with the locking plate facing outwards, as
in fig.4.
NOTE! Take care not to damage vehicle
bodywork or wheels
2.5 Attach the locking bar (fig.5D) to the locking
plate, hold the key fully anti-clockwise and push
it in until contact is made with the tyre, this will
ensure a tight fit.
2.6 To remove, reverse procedure 2.4 to 2.5.
fig.5
PB397.V2
Issue No: 1- 14/04/08